
KC HiLiTES Behind the Grille Lightbar on 5th Gen 4Runer – 20” C-Series (Full Review and Overview – 1 Year Later)
Lighting is such a great upgrade to do on a 5th Gen 4Runner. Having adequate lighting at night time is crucial for safety. You can also travel at higher speeds with proper lighting as you will have better visibility of the road ahead.
Light bars are a great way to increase lighting on your 4Runner. There are numerous options for light bar installs on your 5th Gen 4Runner, but there are very few companies that offer a complete kit.
There are even fewer companies that offer a behind the grille light bar kit with every single component you need to install it. KC Hilites is one of the very few companies that offer such a kit, and they offer an amazing kit at a great price.
The 20” C-Series LED Behind the Grille Mount System (#342) includes everything you need to install some additional lighting on your 4Runner, including wiring harness, switch, mounting brackets, and relay.
KC Hilites 20” light bar
- 20” 120W C-Series Light Bar: Check Today’s Price
- Air On Board Switch: Check Prices
- 10,800 Lumens
- Combo Beam Pattern (12° Spot & 30° Spread)
- 837 Meter Beam Distance
- 6000K color
- 10 Amp Draw
- IP67 Rating
As you can see, this kit has quite a bit to offer in additional lighting – at a great price too. The price varies depending on where you purchase it at and if there are any deals going on at the time of purchase, but you can get this kit for around $300.
I would like to do an install article on this light bar kit; however, I already have the kit installed and will have to do more of a review instead.
So, let’s go ahead and get started!
Why I Chose This Light Bar

As I previously mentioned, there are endless options for light bars and where to mount them. There are very few kits that provide everything you need with no drilling required though.
I didn’t want to drill any holes and I wanted a kit that was designed specifically for the 4Runner. This kit from KC includes everything I needed to install the light bar and all related items such as the wiring harness, mounting brackets, switch and relay.
This was a big selling point to me because KC specifically designed the components in this kit for a 5th Gen 4Runner.
Sleek and Subtle Appearance with Performance
I have always liked a personalized vehicle, but I don’t like things that stand out too much – I prefer a sleek appearance. This said, I didn’t really want to mount an “eyebrow” light bar right above my windshield. I also didn’t want to do any drilling, which most “eyebrow” light bar kits require.
Even though a light bar installed right above your windshield may have a slightly better light output (because there is no grille in front of the light bar), there is the potential for increased wind noise and a minimal decrease in fuel economy.
This kit mounts behind the 4Runner’s grille and requires no drilling. It utilizes factory bolt locations and is a very simple and straightforward installation. I really like the behind the grille look, as it is somewhat discreet, but you can still see it.
It doesn’t make any noticeable impact on wind noise or fuel economy either.
Price Point, The KC Warranty and Made in America
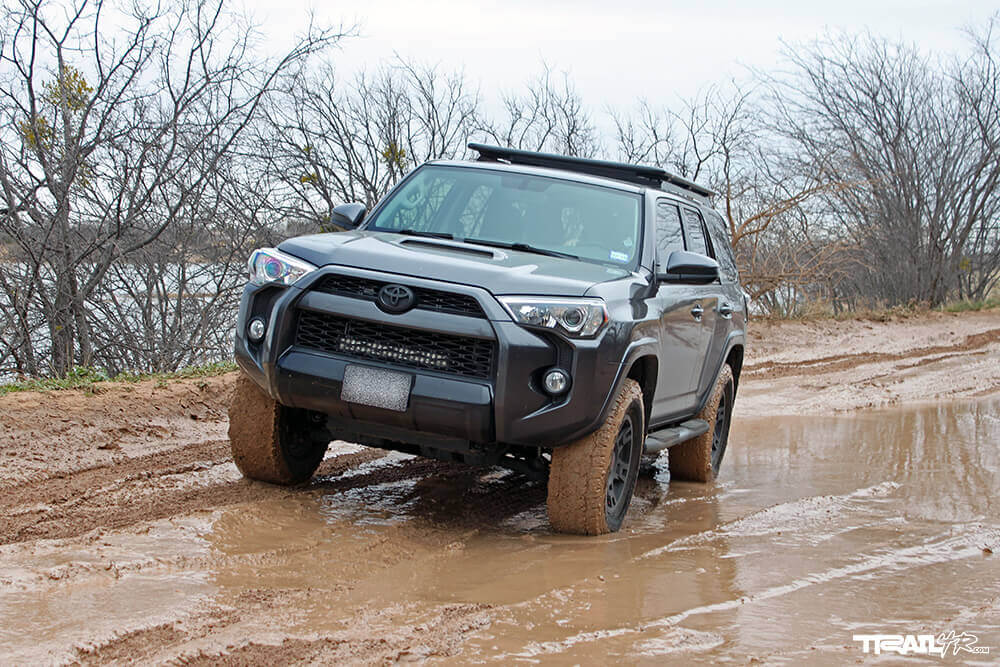
The price point was another big selling point. I wanted something that would make its mark under the $400 range. With other companies such as Rigid Industries and Baja Designs (both of who I really like their products), you wouldn’t be able to get a light bar and everything you needed to install a light bar for under $400.
No doubt Rigid and Baja Designs make some great products; however, I just wasn’t willing to spend more than $400. Even the KC FLEX behind the grille lightbar kit is around $600+.
This KC C-Series light bar kit cost me about $220 due to a holiday sale, but typically this kit is around $300. This really is incredible, and I think most people who are considering a light bar would think this is a fair and reasonable price – especially when KC offers a 23-year warranty!
I will say that some of the other 20” light bars on the market might have more lumens; however, they have a much larger price too. This said I think this KC light bar kit for my 2017 Toyota 4Runner TRD Off-Road was the best option for me, and potentially you as well.
One last note to mention. Although I don’t always buy US products exclusively, I do like to support products made in America. KC is owned and operated in America so that is always a plus!
Installation and Fit
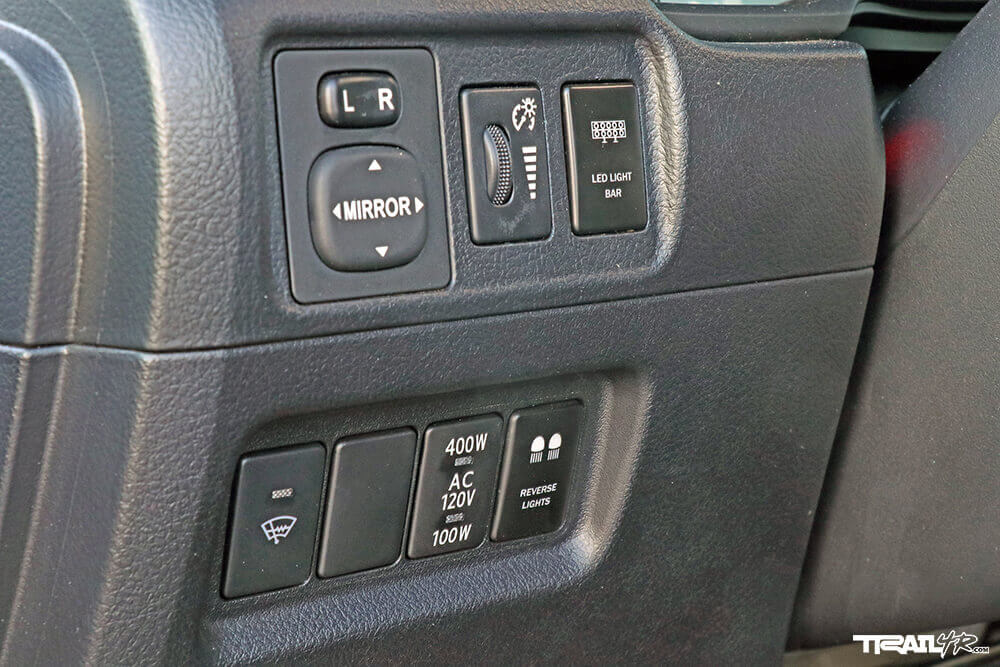
As I mentioned, this kit had already been installed prior to me writing this article, so this will be quick. I primarily want to offer readers an overview of the light bar and what my opinion is on the performance.
Easy Process
I thought the installation process was quite easy and straightforward. The instructions are simple but to the point. One of my favorite features is the light bar mounting brackets that KC Hilites provides.
These brackets allow you to mount the light bar behind the grille with no drilling at all. Once again, this was a huge selling point for me. I will discuss the performance of the light from behind the grille later.
Mounting Brackets
Mounting the brackets, light bar and relay was all very simple and easy. One thing I will mention is to securely tighten the mounting brackets to the frame. However, when mounting the light bar, only loosely snug the bolts that hold on the light bar. The reason is so that you can aim your light bar after you finish the installation process.
Running the Wire and Harness
The most difficult part by far was running the wiring into the cabin of my 4Runner and mounting the switch. There are a lot of different ways to do this, but I believe I came up with a solid option.
KC pretty much states to mount the switch in a good location inside the cabin of the 4Runner. My one complaint is that KC should have made the switch fit into one of the blank switches that the 4Runner has, after all, this is a vehicle specific kit so it should have a vehicle specific switch.
Unfortunately, they did not and only include a universal KC switch. However, I was able to use a switch by Air On Board to give a very factory look.
The first step I did was routing the wiring through the firewall of the 4Runner. I did this by utilizing an existing hole through the firewall and installing a rubber grommet for sealing purposes. This was all pretty easy and straightforward. As I mentioned, I do not have pictures for a step by step install, so please just consider this as advice if you will, with a review of the light bar system.
Where to Mount the Switch?
After I routed the wiring through the firewall I had to deal with the switch. Basically, I removed one of the blank switch locations to the left of the steering wheel on the dash.
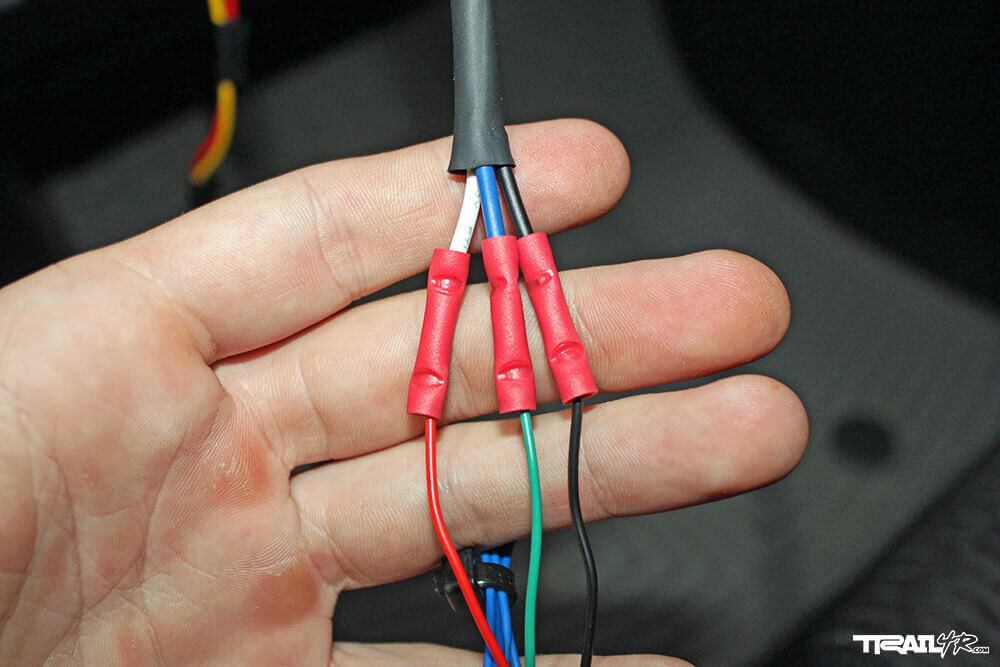
I ran the wiring through this blank switch hole location and then attached it to my Air On Board switch. The wiring is important here. There are four (4) wires on the Air On Board switch and three from the KC Hilites wiring.
You will need to cut off each of the connectors on the KC wiring and then look at the directions from both Air On Board as well as KC Hilites to find the correct wires to match up to.
Unfortunately, not all of the wires have the same color coding. It is pretty straightforward if you follow KC’s and Air On Board’s wiring diagram.

Here is a picture and table of the way the wiring should be connected for the KC light bar and Air On Board switch.
Wiring Label KC Hilites Wire Color Air On Board Wire Color
Quality
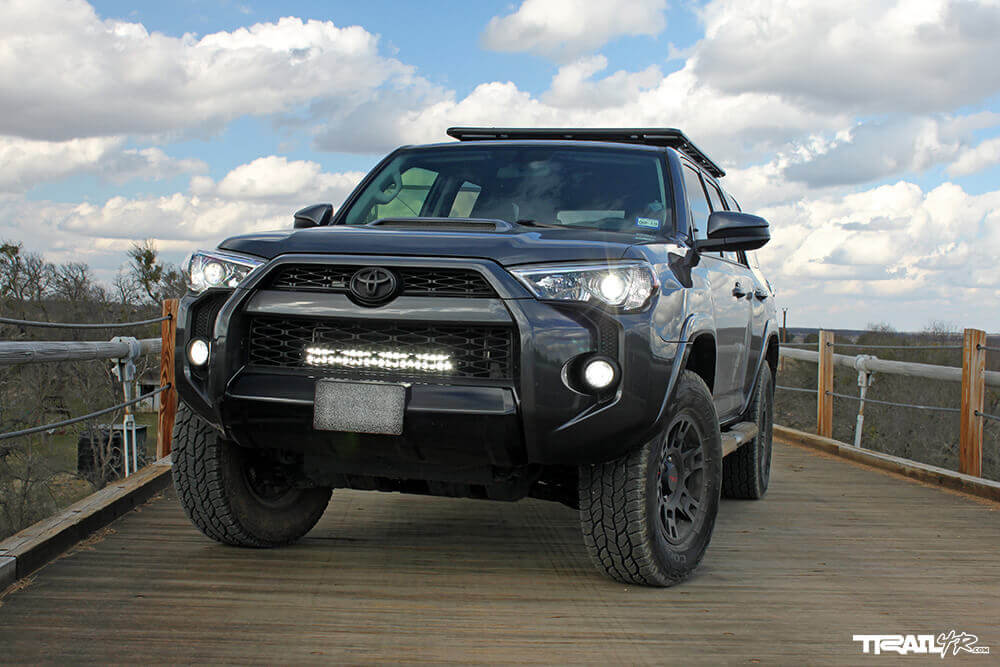
Overall, I was very pleased with the quality of this kit from KC.
I have had the light bar installed for over a year now and it has worked flawlessly in all sorts of conditions – mud, snow, ice, rain, and dust. The light bar and switch have had no issues whatsoever.
I was slightly worried about installing this light bar behind the grille and rocks hitting it, but I haven’t had any issues yet. I have been in a lot of the elements too, primarily rain, ice and dust.
This light bar hasn’t had any issues at all.
Performance
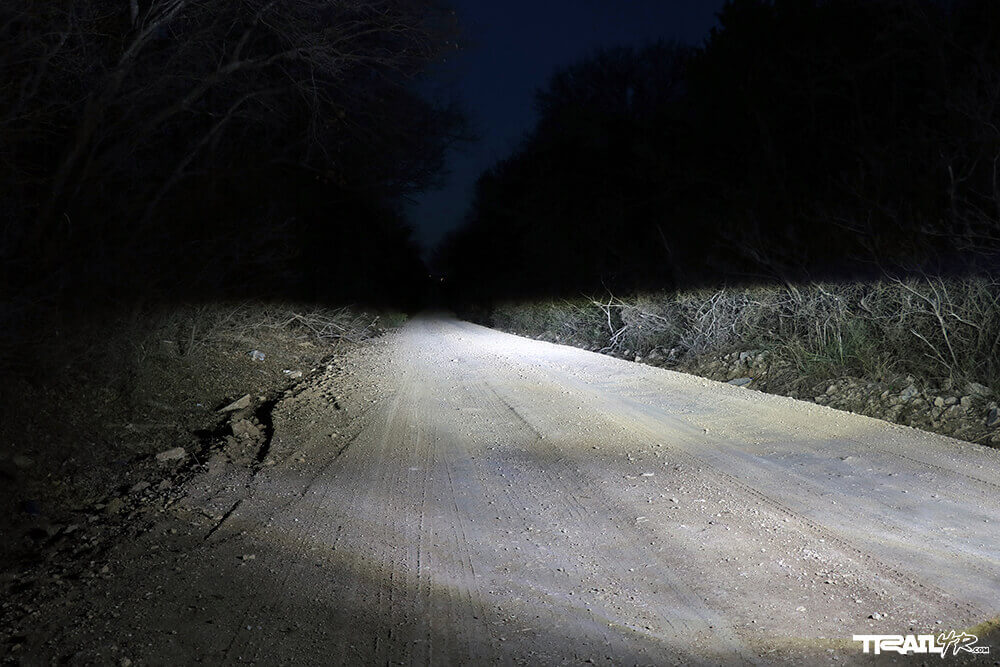
Diode Dynamics SL1 Low Beam Led Headlights
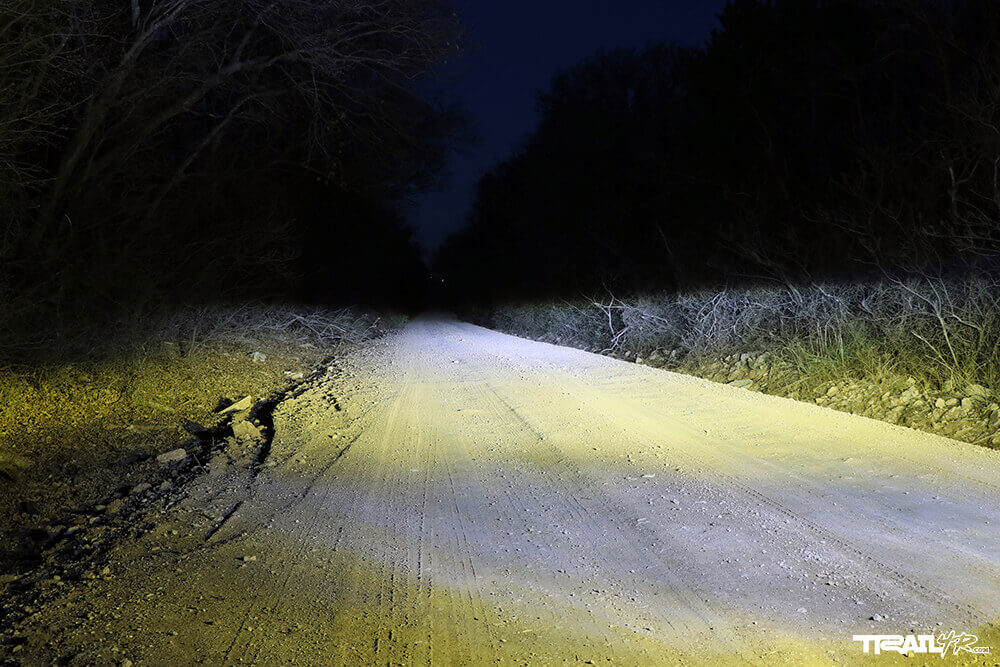
Diode Dynamics SL1 Low Beam LED Headlights and Yellow SLF LED Fog Lights
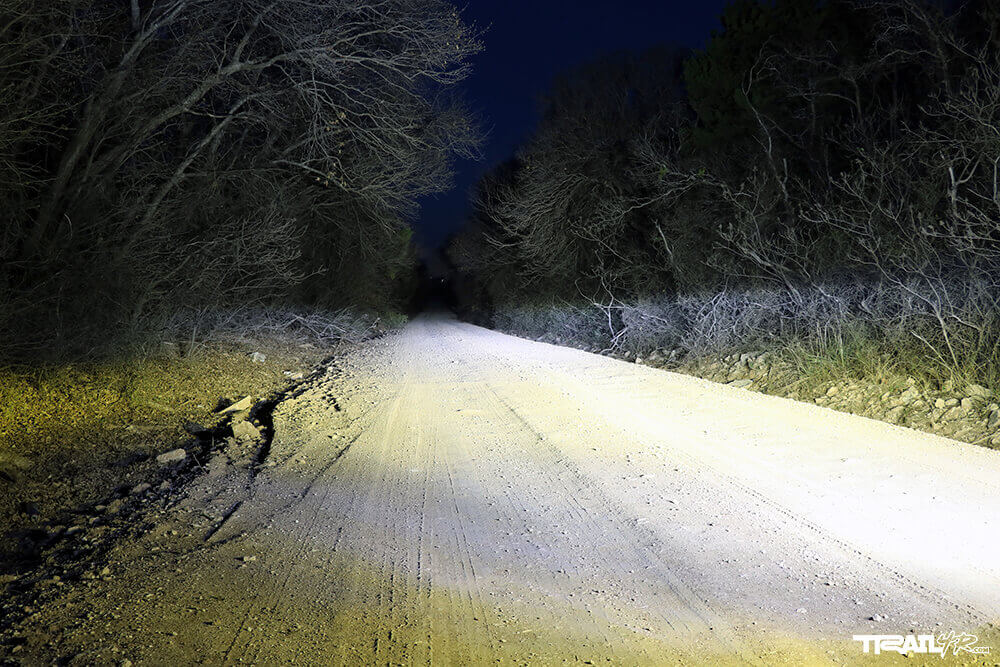
Diode Dynamics SL1 Low Beam LED Headlights, Yellow SLF LED Fog Lights and KC Hilites C-Series 20-inch Light Bar
Overview on Performance
The main reason I got this light bar was for additional lighting, and I assume that is what anyone else who purchases this kit would be doing as well. The additional lighting it provides is good, but not unbelievable. I don’t believe mounting the light behind the grille takes away too much lighting output; however, I do think it diffuses light a bit.
Headlights or a Lightbar?
In my honest and unbiased opinion, I’d recommend upgrading your low beams and fog lights prior to installing this light bar. Although this light bar adds quite a bit of additional light, I believe you will get more bang for your buck upgrading your low beams and fog lights with a quality LED bulb, such as Diode Dynamics, Xenon Depot, etc. Not to mention this light bar isn’t street legal, so you can only use this light bar when cars aren’t around or when you are off-road.
Great for Trails
I have found that this light bar kit really works great on trails. It isn’t the best if you want to see down the road really far, as there are other options more suited for this, but for additional lighting on the trails, this light works great.
This is a kit for someone who wants additional lighting up close and in the mid-range. It is basically middle ground lighting – meaning it is not targeted to be a spot light or a flood light, but a little bit of everything – kind of a driving light. It adds a significant amount of lighting and is very valuable at night time.
I do not have any complaints with the performance of this kit except that I wish they offered a switch that fit in a 4Runner’s blank switch location for easy installation. This would make the kit that much better.
KC Amber Acrylic Cover
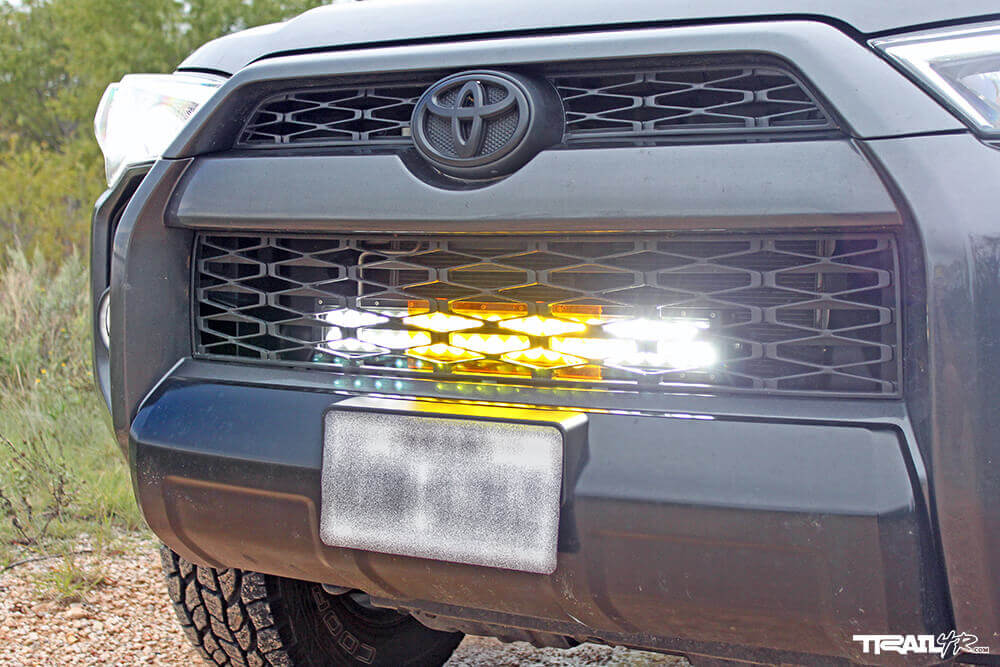
If you are interested in amber off-road lighting, KC makes an acrylic light bar cover that essentially turns the light output to amber.
They come in 10-inch sections, so if you want to make this light bar full amber you would need to purchase two of these covers. The covers will cut some of the output since light has to travel through the acrylic; however, the cover is very inexpensive and gives you the option of running amber lighting.
I have one of these covers installed in the middle of my light bar and it works really well. I plan on purchasing a second cover down the road. There is one big pro and con to mention though. The cover works great at producing an amber light output and protects your light bar, however, since light has to travel through the cover you will not get as much output as an amber lightbar that doesn’t utilize a cover.
It isn’t that much of a reduction in light output, but it is something to be aware of. The nice thing about these covers is they are inexpensive and can be installed and removed quite easily.
Conclusion

This light bar kit from KC provides additional lighting and increased aesthetic looks in my opinion. When you combine this with the price point offered from KC, it is hard not to give this light bar a shot.
It is very sleek and out of the way since it is behind the grille, and it requires no drilling and includes everything you need to install. If you are wanting some additional lighting and a way to upgrade your 4Runner at an affordable price, I would most definitely consider giving the 20” C-Series LED Behind the Grille Mount System (#342) a shot.

Any good resources for popping the dash to install the switch you can point me to?
When you ran the wires through the firewall did you utilize an existing hole (by main wire harness) or pop a new one? You mentioned installing a new grommet, can you advise a good option?
Great review. I found a cheaper one on CBI for $222… can you help confirm if this is the same one? Wasn’t sure about mounting brackets, but looks to be over $100 cheaper???
Jess, I think that light bar is the universal one…it doesn’t have the 4Runner specific brackets. I hope this helps you out!
Thanks! 1 more question… where do you mount brackets? I have a C4 lo pro bumper & have removed aluminum crash bar… I am wondering if brackets would still work? Thanks again!
Jess, sorry for taking so long to respond. The light bar brackets do attach to the aluminum bar you are referencing. This said, I am not sure this kit would be a direct fit. I hope this helps!