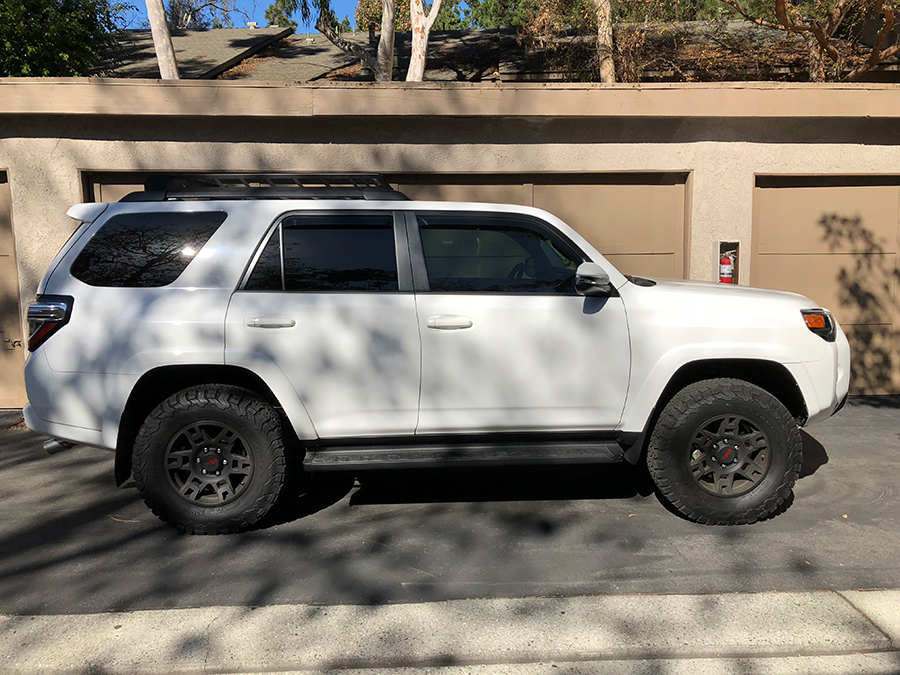
5th Gen 4Runner NFab Roof Rack Install & Overview
If you are looking for a superior lightweight aluminum roof rack, check out the N-Fab rack. This rack is a semi-affordable option out there for an aggressive, multi-purpose rack. The N-Fab roof rack has front and rear mounting locations for LED light bars that can accommodate up to 36″ LED bars. This rack comes in a standard textured matte black color powder coat finish. N-Fab has a 5-year finish and lifetime craftsmanship warranty.
There are quite a few options out there for roof racks, but this one is perfect if you are looking for something simple, aggressive, fully capable of holding everything you need, and incredibly diverse. While this roof rack features the basic needs of every roof rack, you can mount just about any configuration you can think of to this rack. The N-Fab has mounting holes in multiple locations which makes it perfect for you to figure out your rack configuration.
We will be lacking in the Roof Top Tent (RTT) department, but if an RTT is something you don’t plan on using, then you are set. That really might be the only downside of this rack.
On the upside, there is no drilling or cutting required. The N-Fab rack is a complete bolt-on system ready to go to work in under 30 minutes. You do NOT need factory roof rails to mount this rack, like some other basket-style racks. If you are looking at the Curt Rack, the Yakima Rack, or other similar basket racks, you will more than likely need to use factory crossbars. Most of our 4Runner’s do not come with factory crossbars, so this is a plus.
Find It Online:
- N-Fab Roof Rack for 5th Gen: Check Price
Blackout Roof Rails:
- Carbon Fiber Vinyl for rails: Check Price
- Matte Black Vinyl for rails: Check Price
- Plasti-Dip for roof rails: Check Price
This installation assumes you know how to remove your stock roof rack. If you do not know how to remove your factory roof on your 4Runner, check out this install before starting the steps below.
Table Of Contents
1. Crossbar Blackout

Stock Roof Rack Rails Carbon Fiber Mod: First off, I want to show what I did to my stock roof rack pieces.
I used carbon fiber vinyl that I purchased from Amazon. This is the easiest piece of my car that I have applied vinyl to, so far. You have to roll the bar over the vinyl and slowly smooth out the edges. Apply heat to make the vinyl stick to the bar and use a Bondo card or a set of automotive plastic pry tools, across the bar while heating to make sure the vinyl sticks well.
2. Attach Brackets to Crossbars
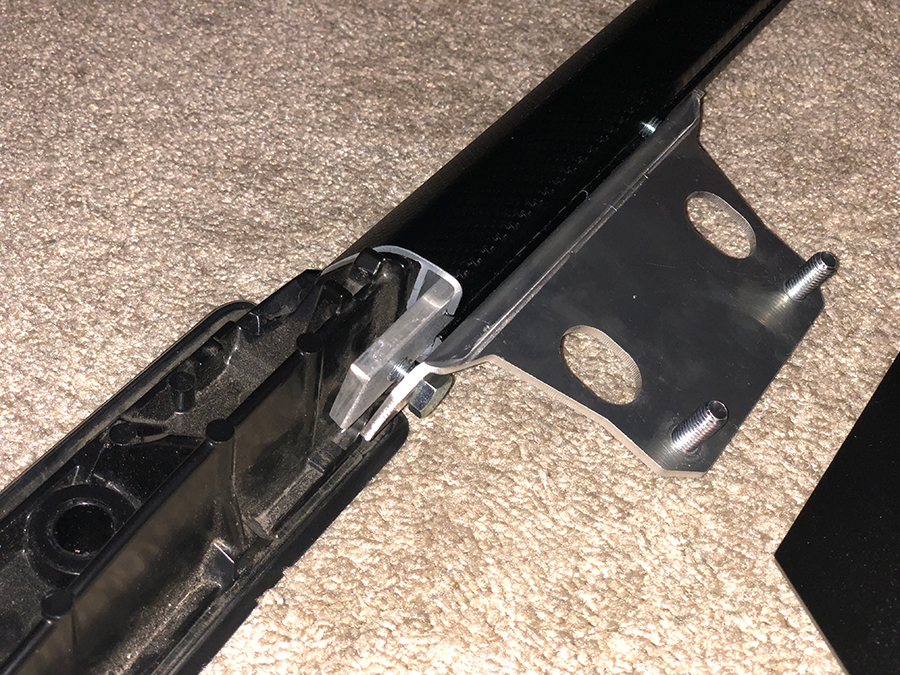
The metal brackets (2 on each side) fit through the rear section of your 4Runner factory roof rails. You may install them onto the car now if you like, but leave the metal brackets with the screw side up loosely as you will fit the roof rack on the vehicle later. I believe the instructions recommend that the rear metal piece sit 28mm from the rear end of the stock 4Runner roof rails. As you place the NFab rack on top of the car, you may manipulate the front metal piece to fit where the appropriate holes are on the actual NFab rack.
3. Unpacking Rack from Box
The NFab rack comes in a slim box, which means the rack comes in several pieces. The install takes approximately 1-2 hours and the install on the NFab 4Runner roof rack shouldn’t take more than 30 minutes. First, let’s take a look at the package and unpacking.
4. Organize Rack Parts
The rack comes with instructions, easy to follow. The most important part is to correctly align the rack at this point because if you do not align it appropriately, the rack will not sit easily on top of the vehicle. The first step is to find the bar labeled 1 (of 6) and screw that down tightly to the sidebars first.
5. Locate First Crossbars
You can see here, the bars are labeled, though I do not think it matters if you used them out of order. By the way, there are two screws to each side of the bar (24 total), which takes up most of the time for installing the rack. Then, you can screw in all the other bars, but do not tighten the other bars just yet (bars 2-6). Leave them loosely on the rack for now
6. Mounting Crossbars
Next, place the rear end of the rack and align it to the ends of the right and left posts. Tighten that end down to the rack. There are three screws on each side. After tightening the first bar, and the rear piece of the rack, now you can place the front of the rack and tighten that down. There are also three screws on each side.
7. Finalizing the Rack Assembly
I tightened the middle screw down first, then worked on the top and bottom. After this step, you may tighten the 5 other bars down now. Your rack should be straight and tight. I recommend using Loctite on all of the screws.
Moving on to mounting the rack.
8. Safely Placing your Rack on Top
Now, to place the rack on your roof. I used bubble wrap and placed it on the stock rack and stock rack end covers to prevent the rack from scratching. I also used a foam square, but you may also use a shoebox or any other box to place the rack on your car to prevent scratching.
This allowed me to install the rack by myself. When installing any rack, it is usually a good idea to have another person there for you. But, in the case that you do not have any help, there are ways you can get creative with any install. Just use your best judgment and always be safe.
9. Mounting Rack to Crossbar Hardware
You will have to climb on your 4Runners steps or hop on a ladder to see where you will position the rack onto the metal brackets previously installed to the factory roof rails.
After properly positioning the rack and metal brackets, I recommend tightening the metal brackets without the rack on the vehicle, meaning take the rack off the 4Runner and then tighten your brackets to the factory roof rails.
The rack applies weight to the metal pieces and though it may not make a difference tightening them down, it may prevent you from damaging/denting the stock rack’s sidebars. Then reapply the rack and tighten down.
That is it – you are finished
10. Roof Rack Measurements
There are several measurements on this rack as it is almost octagonal in shape. The following pictures will show what I am talking about. From front to back, the rack measures 41.5 inches, and from left to right 37.75 inches. Now, the rack shortens if you include the curved edges.
From the shorter aspect of the octagonal shape, the length from front to rear is 40.5 inches, and the width is just a few millimeters longer than 35.75 inches. I could imagine, with a good mini saw, you could get rid of these curves and create a solid 41.5-inch x 37.75-inch basket rack.
Final Thoughts

Besides the affordability of this rack versus its competitors, I chose this rack because of the basket design for those long road trips with my family. After our first 8 hour drive to Lake Tahoe from So. Cal, in our ’16 4 Runner, I knew I had to figure out a solution for packing.
I had to drive back and forth without the ability to see what was behind my vehicle through my rearview mirror because the rear cargo area was so packed with gear. That really bothered me. I also felt that the acoustics of three children screaming was amplified when there are more belongings packed inside of the vehicle.
Though I’m sure that the other roof racks serve the same purpose and probably have larger sq footage space to use, I don’t need it all, nor do I imagine packing that many things on top of my car for a long trip. I plan to purchase a small roof rack container or box to strap down on top.


I’m looking at one of these, and you mentioned you can’t attach an RTT to it. Is that a clearance issue or a load capacity issue? Could you add brackets to give you enough height to bolt one on?
Basket racks are not designed for RTTs. You want to look at the full-length roof rack options listed on this post: https://trail4runner.com/2017/12/04/5th-gen-4runner-roof-racks/
How did you tighten the bottom bolt on the front cover ? Having rail 1 in place makes this very difficult but also the angle the bolt is at will not allow for the nut to go onto the screw …. all the pics I’ve seen show the bolt top side and nut underneath . Did you reverse that for the last bottom hole on the front cover ? Or did I just get one that the angles were made to sharp on the metal bends ?
Anyone know if you can buy replacement crossbars?
please let me know if this worked with your sunroof
It doesnt
What do you mean? This doesn’t obstruct the moonroof in any way. I have a 18TRDpremium and I open my moonroof just fine
I’m planning on getting this rack, anyone know the total height of the truck with the roof rack installed? I just want to know if I can clear the height restrictions on underground parking
I have a 21 trd offroad and it sits right at 7ft with a full tank of gas and factory sized tires
Hi Brenan- I just received this today. The installation instruction is missing. Would you mind emailing it to me? Thank you for your very informative blog!!! Gass A
I don’t have that on hand, and their website does not have links either.
How tall over the original rack does it sit? I want to make sure it will still fit in garage to work on.
From what I remember it was under 7″ from the roof to the top of the rack.
Does anyone have experience using a rooftop awning with this rack? Thanks.
Rack came in today… Will let you know how it goes, but thanks for the detailed report.
This rack does not fit 2010-2013 4runner trail editions! It came in and I slapped to together but the roof rack rail mounts were and inch off and I could not install. So I sent pics into Nfab and they came back and said it won’t fit without me making modifications, sorry. Not sure I want to spend a few hours drilling holes in the rack and four mounting brackets. I may just grab an ARB that can hold more weight! Bummer because this is a sick looking rack!
Well this rack does not fit 2010-2013 4runner trail editions! It came in and I slapped to together but the roof rack rail mounts were and inch off and I could not install. So I sent pics into Nfab and they came back and said it won’t fit without me making modifications, sorry. Not sure I want to spend a few hours drilling holes in the rack and four mounting brackets. I may just grab an ARB that can hold more weight! Bummer because this is a sick looking rack!
Nice! It was an easy install, just make sure you get the alignment correct by tightening down the first bar, then the two end pieces.
What a timely review! I just ordered this rack yesterday. I love the looks of this rack.