If you’ve been looking for a faster way to inflate and deflate your tires, Power Tank’s Monster Valves are worth considering.
Monster Valves are oversized secondary valve stems that install directly into your wheel, allowing for super-fast inflation and deflation. The oversize stem allows for quicker inflation, while the massive holes in the valve stem allow for quicker deflation. The valves let you air down a 40″ tire from about 30 PSI to 15 PSI in around 10 seconds. The speed of these Monster Valves is on another level.
They offer a few options depending on your preferred setup, both drill and/or non-drill valve stems.
Drill and tap option: The first Monster Valve required drilling and tapping your wheel, which is still a great option, depending on your setup, and can be done with your tire mounted on your wheel.
Bolt-on option: Power Tank now offers a couple of bolt-on versions that eliminate drilling/tapping; this must be done with the tire off the wheel, or at minimum, the bead separated from the wheel.
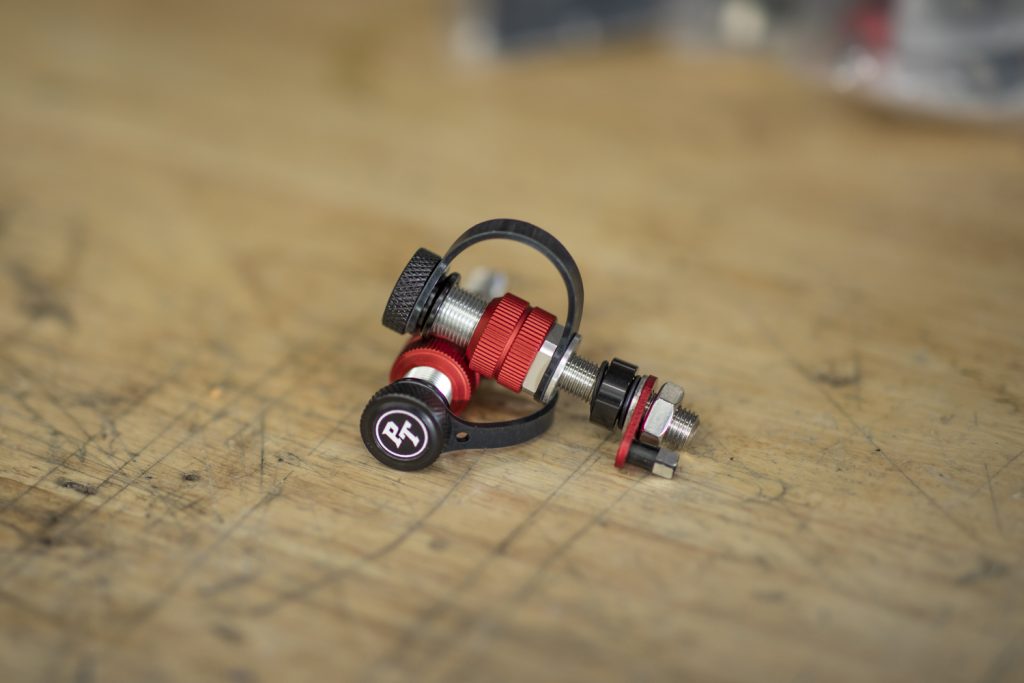
Each kit comes with 4 or 5 monster valves, a monster chuck (90° or 30° depending on the version), an install tool, a valve core removal tool, single-use Loctite, a grease packet for long-term O-ring maintenance, rubber valve stem caps, and a case.
There are three valves to choose from:
- Monster Valve™ Tap3 (drill & tap): Check Price
- Monster Valve™ Flat2 (bolt-on straight stem): Check Price
- Monster Valve™ Primary (bolt-on 30° stem): Check Price
Note: You will need the Monster Chuck to inflate via the Monster Valve.
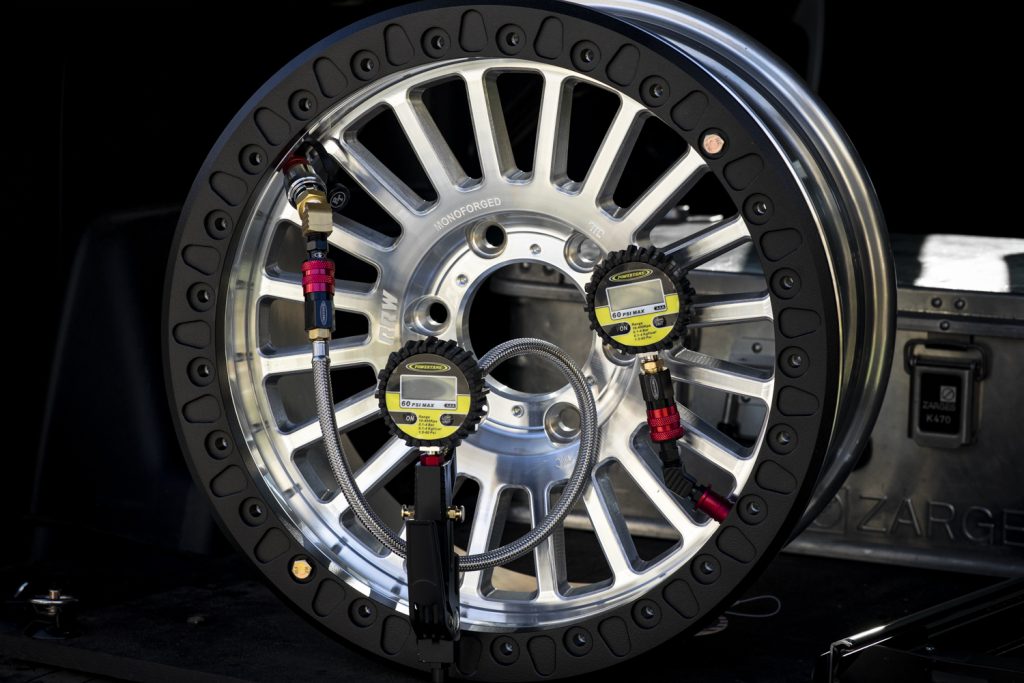
Note: To measure PSI while deflating, consider a secondary Schrader Valve and PSI Gauge: Check Price
Table Of Contents
Overview: Monster Valve Options
We have a couple of wheel changes coming up soon, a set of beadlocks on our 6th Gen 4Runner and 5th Gen 4Runner. So I thought this was a perfect time to get the Monster Valves installed on both.
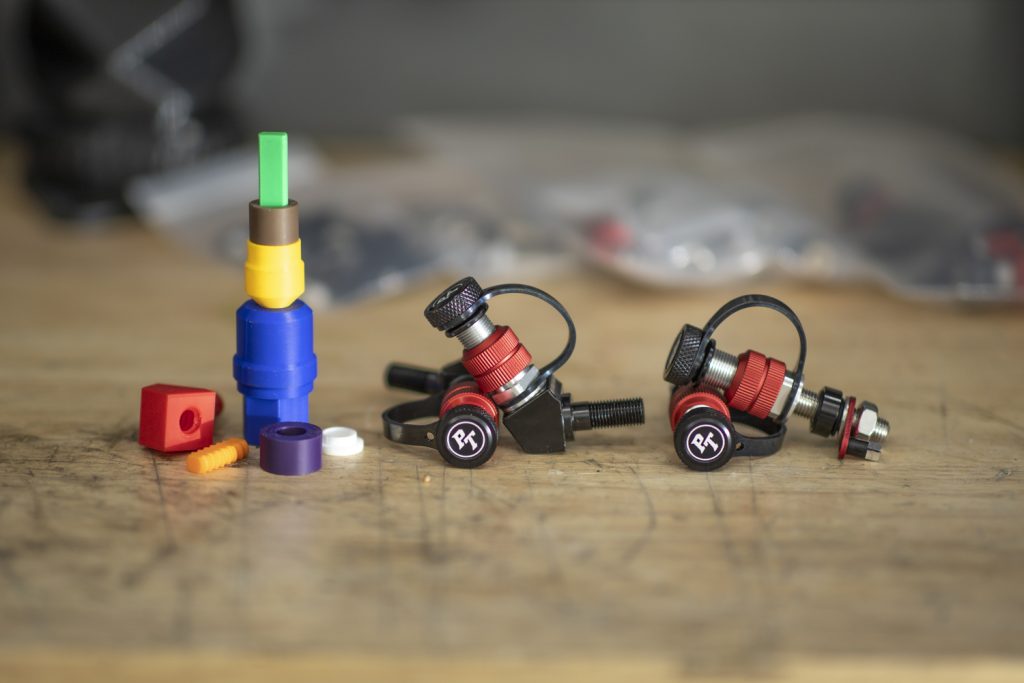
Here is a look at the Power Tank Fit Kit, Monster Valve™ Flat2 (bolt-on straight stem), and Monster Valve™ Primary (bolt-on 30° stem).
The Fit Kit
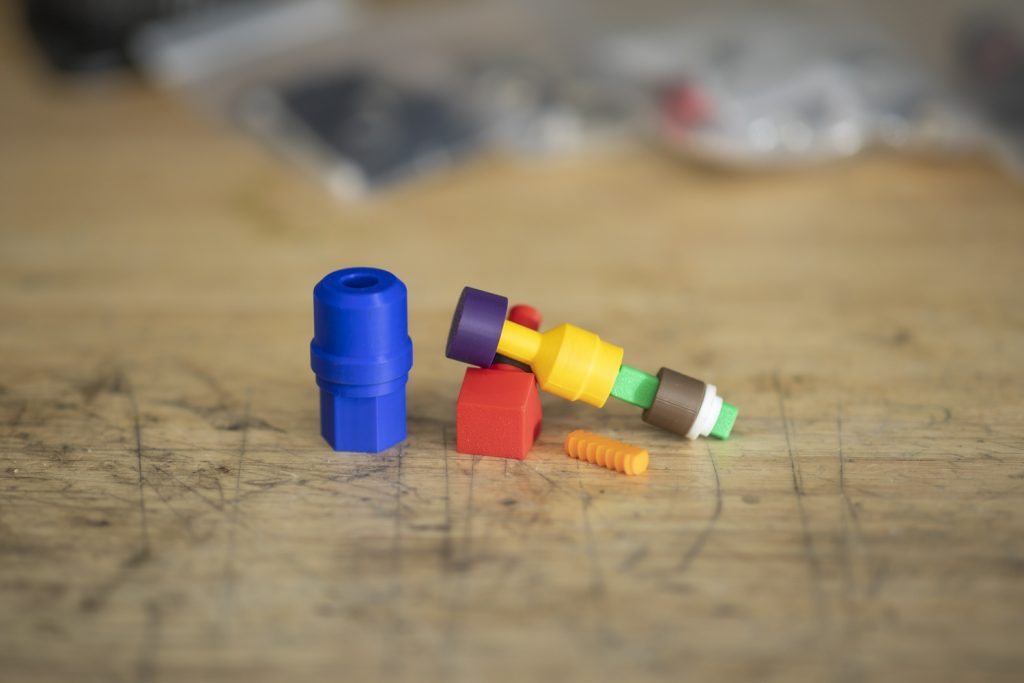
Power Tank offers a fitment kit designed to help you confirm compatibility before committing to a full set of valves. This is a full 3D printed replica of the exact parts found on both the Monster Valve™ Flat2 (bolt-on straight stem) and Monster Valve™ Primary (bolt-on 30° stem), in addition to the Monster Chuck, so that you can test for gauge clearance as well.
The kit includes multiple spacers and hardware to fully dial in your exact setup.
Once you’ve confirmed the fit and decide to move forward, Power Tank will apply the cost of the fitment kit directly toward your Monster Valve purchase, so you’re not losing money on the test.
30-Degree Angle Monster Valve
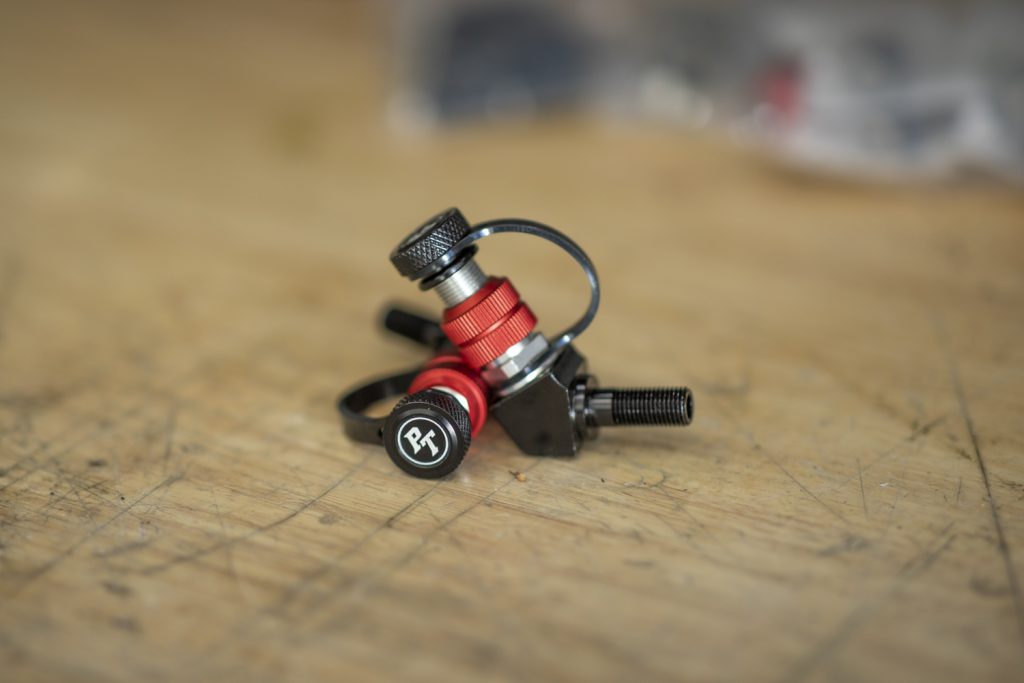
The 30-degree angle Monster Valve is ideal for certain wheel designs where a straight valve stem would be obstructed or difficult to access. The angled design gives you better clearance and easier chuck engagement, depending on your wheel and tire setup. If your wheel geometry makes a straight valve tricky to reach, the 30-degree is likely your best bet.
Straight Monster Valve
The straight Monster Valve is the more traditional profile and works great on a wide range of wheel types. If your wheel has enough clearance around the valve stem area and the monster chuck can seat properly without interference, the straight valve is a clean and simple option.
Step 1. Mock Up The Fit Kit
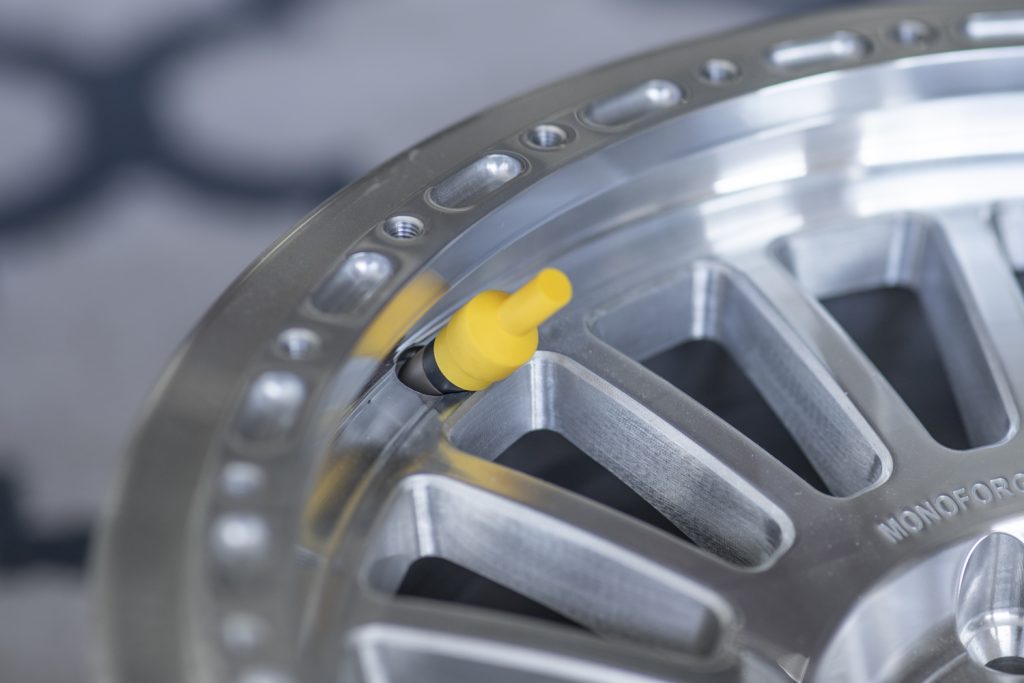
Start by mocking up the fitment kit on your wheel.
You can see on the RRW RG6-H above that the valve opening is sunken into the lip quite a bit, so using the angled 30° stem here would not work. The straight stem works well for this application and requires both spacers to clear the aluminum in order to thread and unthread the valve stem.
Once you confirm the spacers are flush and seated properly with the seal in place, check thread engagement inside the wheel.
Step 2. Check Thread Engagement
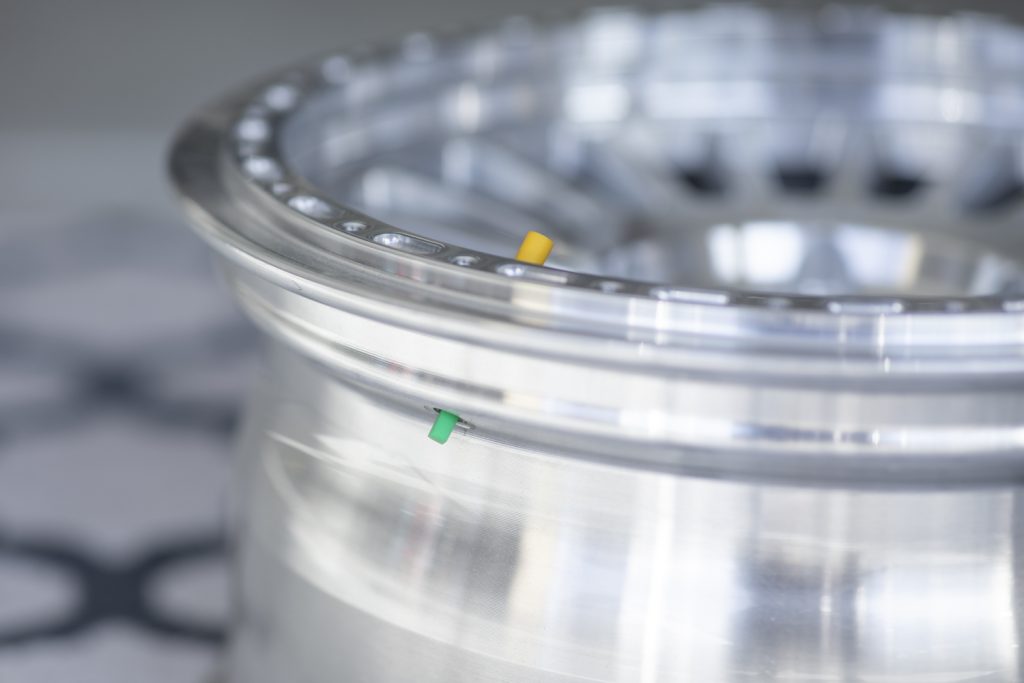
Flip to the backside of the wheel and verify that you have enough thread engagement for the nut to properly thread onto the valve stem. You need enough thread showing through the back of the wheel so the nut can tighten down and securely clamp the Monster Valve in place.
We were pushing it on setup here. Using the longer stem (green) provided in the 3D print fit kit, we were able to mock up just enough thread engagement for a nut to thread on.
Step 3. Confirm Monster Chuck Clearance
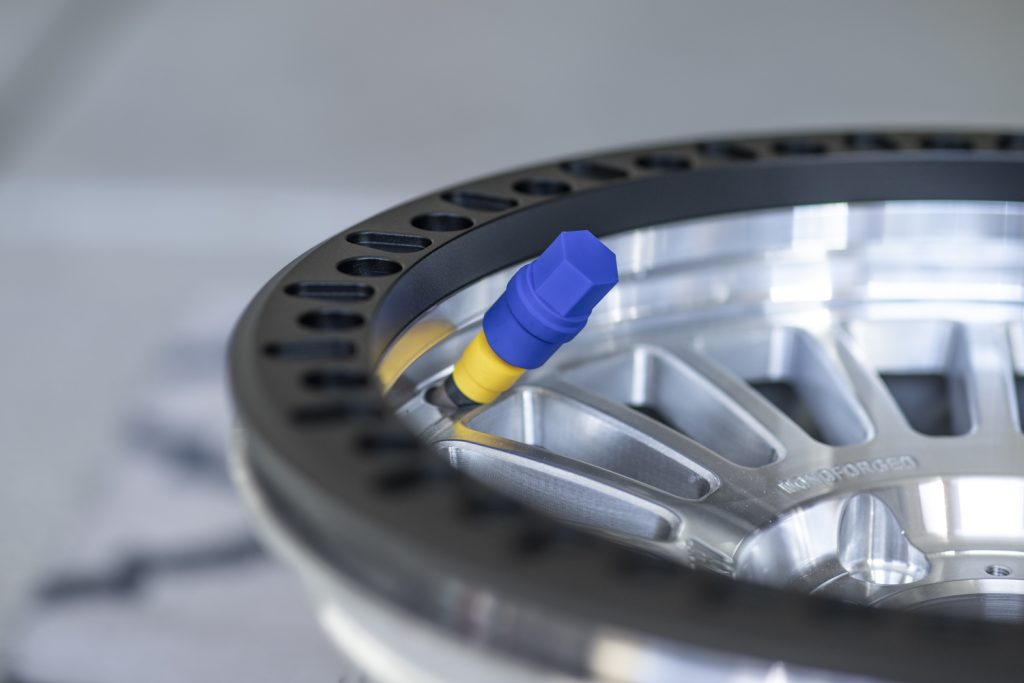
Before finalizing your valve stem choice, confirm that the Monster Chuck can fit around the Monster Valve and clear your beadlock ring or wheel ring.
We had plenty of room around our beadlock ring; however, some brands’ beadlock rings hang over the face of the wheel up to 1/2″ or more. It’s really important to check this portion of your setup.
Step 4. Monster Valve Assembly Diagram
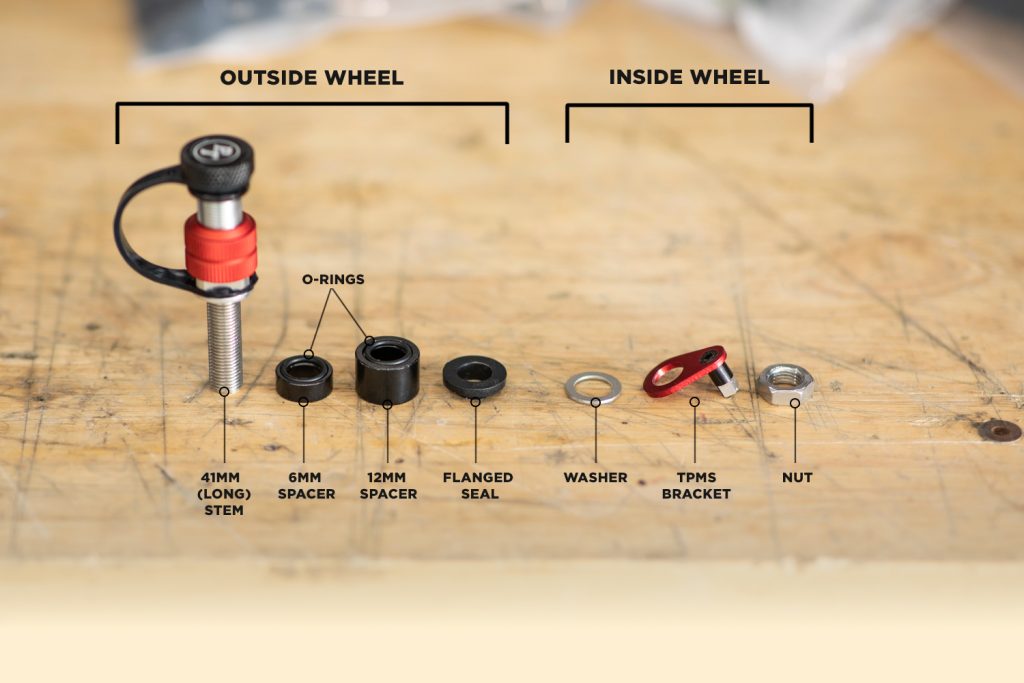
Before starting your installation, make sure you have all the fittings in order.
On the stem side (outside of wheel):
- Monster Valve
- The stem itself (short, medium, or long)
- Spacers (6mm or 12mm – you can stack them) + O-rings
- Flanged seal
On the TMPS side (inside of wheel):
- Washer
- TPMS sensor
- Nut
- Don’t forget blue Loctite
Once everything is organized and in the right order, slide the stem into place from the outside, thread on the hardware from the backside, and torque everything down to spec.
Step 5. Position Valve
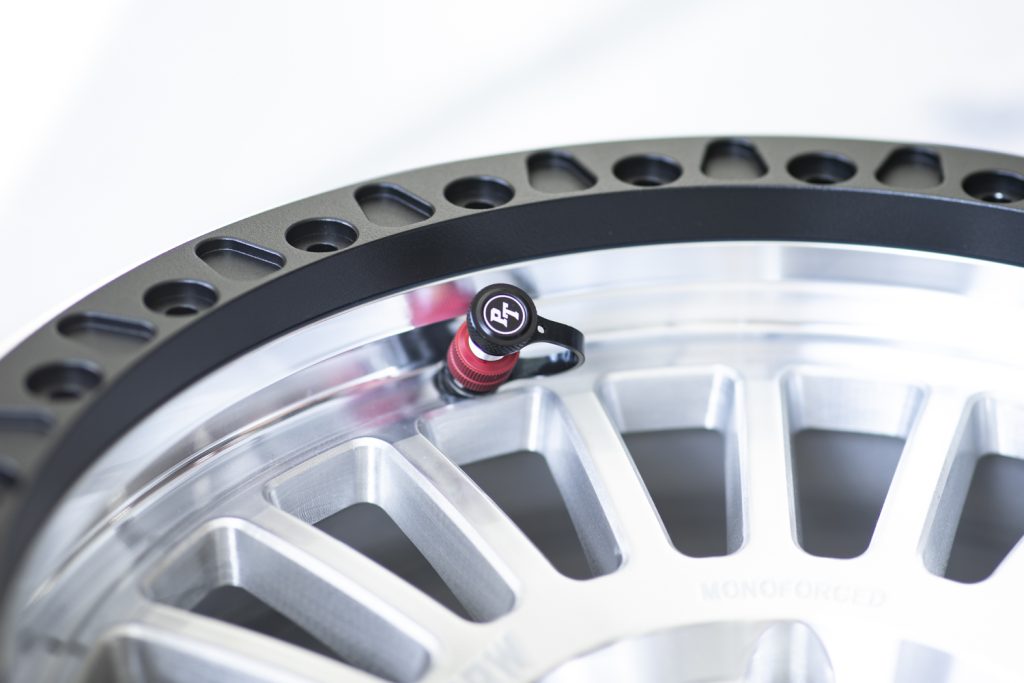
Position the Monster Valve into the valve stem hole from the outside of the wheel.
Make sure the O-rings and flanged seal are seated correctly before pushing them fully into place. Take your time here to ensure everything is aligned properly before moving to the backside.
Step 6. Back Off Collar To Access 9/16 Nut
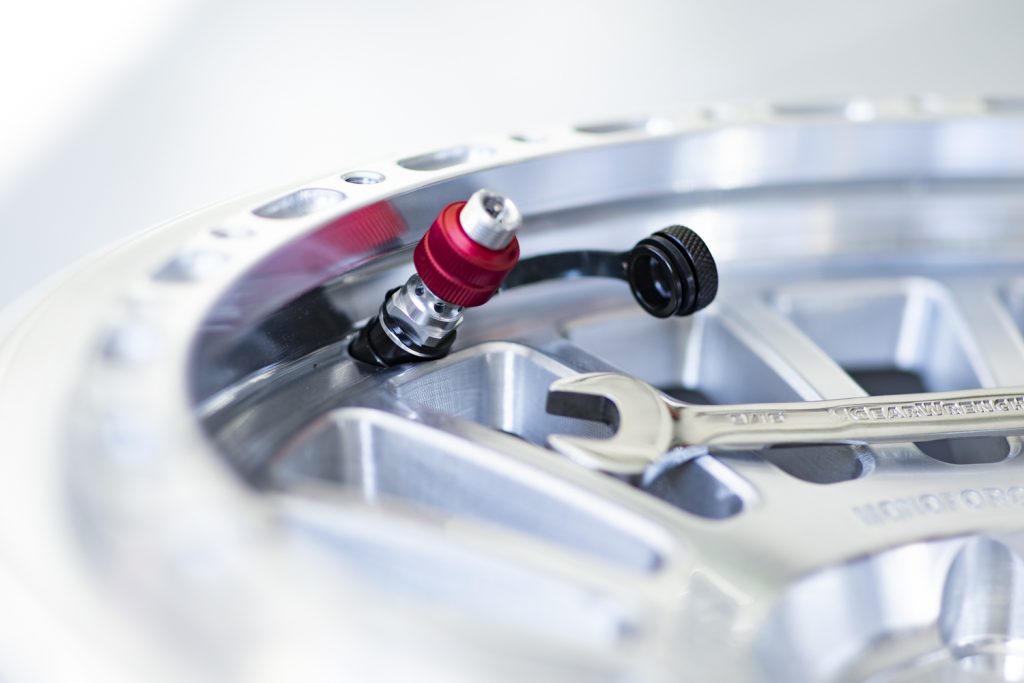
Once the valve is positioned, you’ll need to back off the collar to gain access to the 9/16 nut on the valve stem.
This gives you the clearance needed to get your wrench on the nut and properly tighten everything down from the backside.
Step 7. Tighten Down Nut On Backside Of Wheel
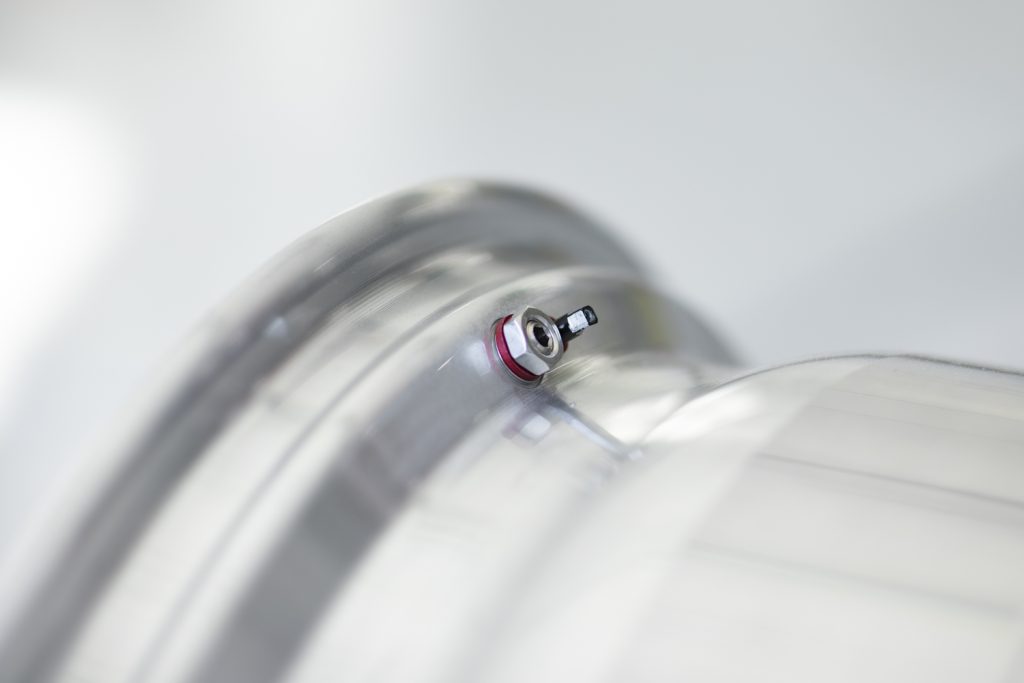
Head to the inside of the wheel and use a 9/16 wrench (14mm) or socket to tighten down the nut onto the valve stem.
Snug it down firmly to clamp the Monster Valve securely against the wheel. Don’t overtighten; you want a solid, leak-free seal without damaging the O-ring or hardware.
Step 8. Drilling For Schrader Valve

This part is optional, but recommended for a complete system that makes it easy to read PSI as you use your new valves.
Start by placing a piece of tape along the lip of the wheel to give yourself a clean reference point exactly opposite your monster valve. Find and mark the center of the lip where the Schrader valve will sit.
Use a center punch and hammer to create a precise starting point for the drill bit. This keeps the bit from walking.
Drill the hole based on the Schrader valve size you are running. In our case, we used a 1/8″ NPT Schrader valve, which requires an 11/32″ drill bit. Keep the drill straight and take your time.
Step 9. Tap For Schrader Valve
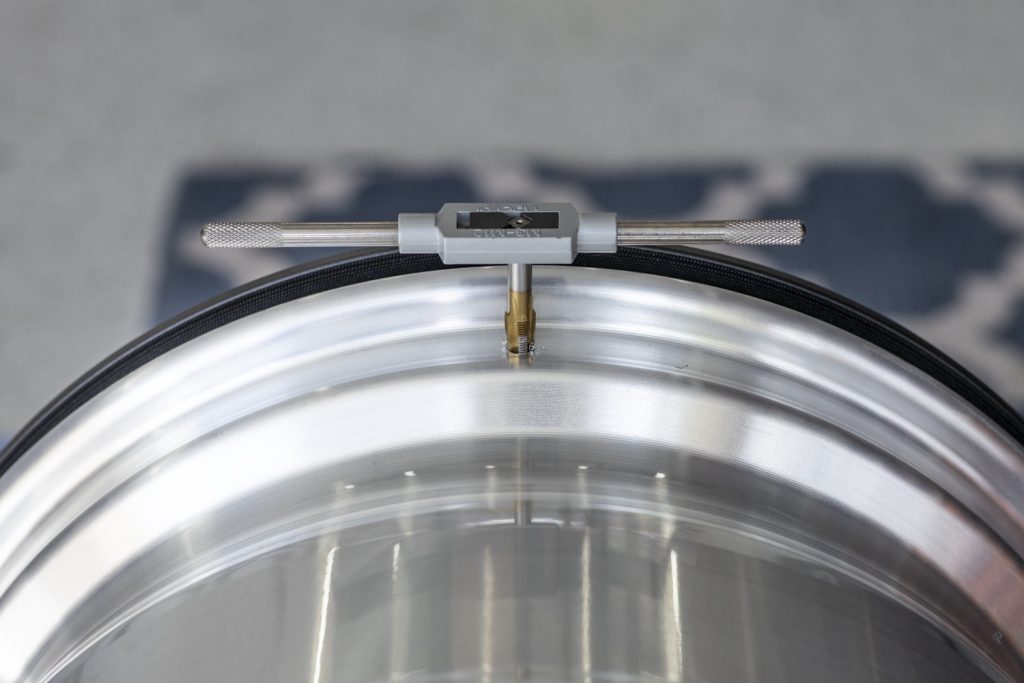
Ideally, you want to tap from the same side the Schrader valve will be installed, working into the threads, not from the backside out.
We were not able to access the inside of the wheel initially on our first wheel, so the first pass was done from the outside toward the inner lip. It worked, but it is not the preferred method.
After that, we switched to tap sockets, which made the process much easier and more controlled.
Another option that worked well was using an 11mm ratcheting wrench with a 1/4 adapter, which allowed us to tap from the inside. The 11mm wrench fits perfectly around the impact socket adapter 3/8 end, and the tap slots perfectly into the 1/4 end.
Step 10. Megaloc Thread Sealant
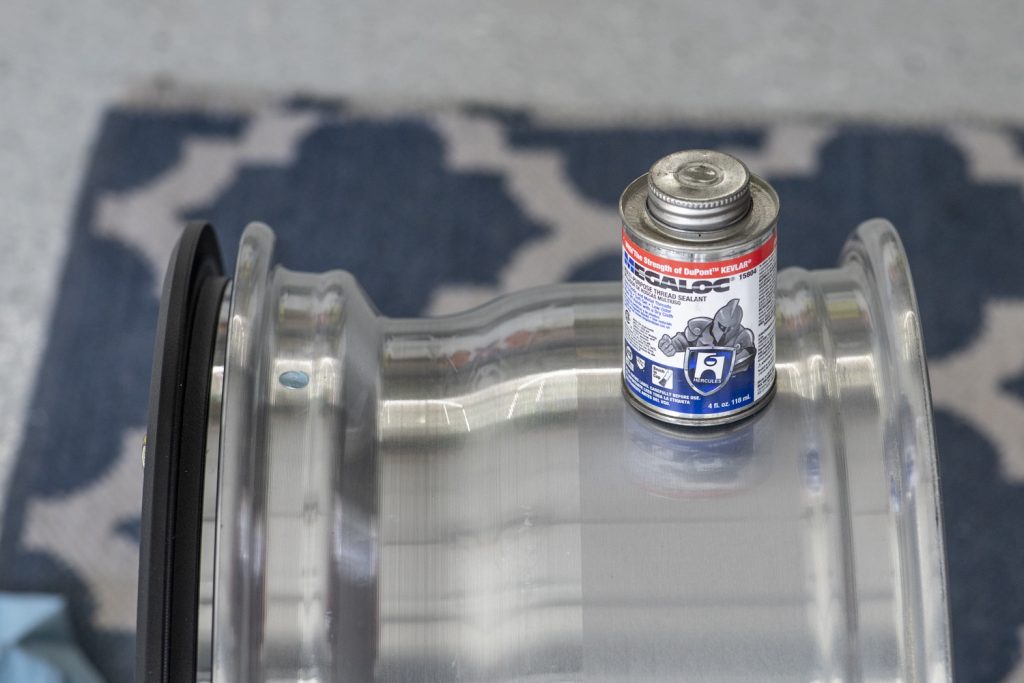
Apply a small amount of MegaLoc sealant to the threads before installation. This adds an extra layer of sealing protection, which was recommended by a buddy who has installed Monster Valves a few times.
Step 11. Tape Thread Sealant
Wrap thread seal tape around the 1/8 NPT Schrader valve, then thread it into the tapped hole.
Tighten it down evenly and make sure it seats clean against the wheel. Do not over-tighten; just snug enough to seal properly.
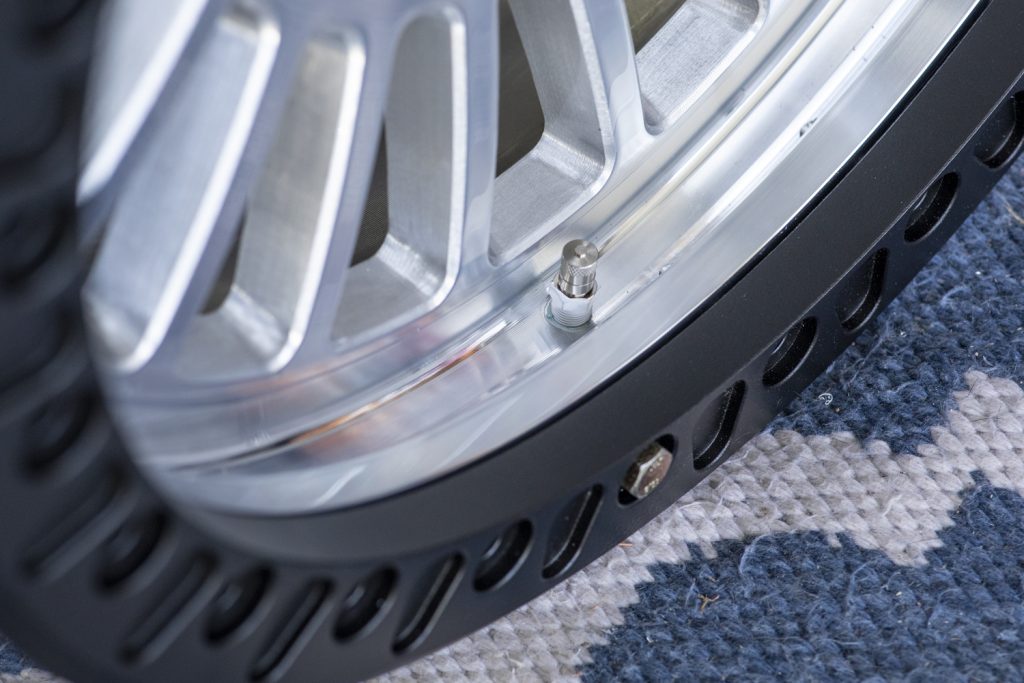
Final: Power Tank Monster Valves + Schrader Valve
This is by far one of the most versatile wheel setups I’ve ever run!
The massive Monster Valve stem will allow me to inflate and deflate tires incredibly fast. Whether I am using a Power Tank CO2 tank or a 12V compressor, the speed increase while going up will be a massive difference compared to the traditional Schrader valves I’ve been using in the past.
That said, the secondary Schrader valve is nice to have for reading pressure while deflating tires, and can be used for normal tire maintenance needs as well.
To top it off, the RRW RG6-H Beadlocks don’t look too shabby either.
Pretty hyped on this setup. I really can’t wait for this wheeling season. Wait until you guys see the build these are going on. Things are about to get rowdy.