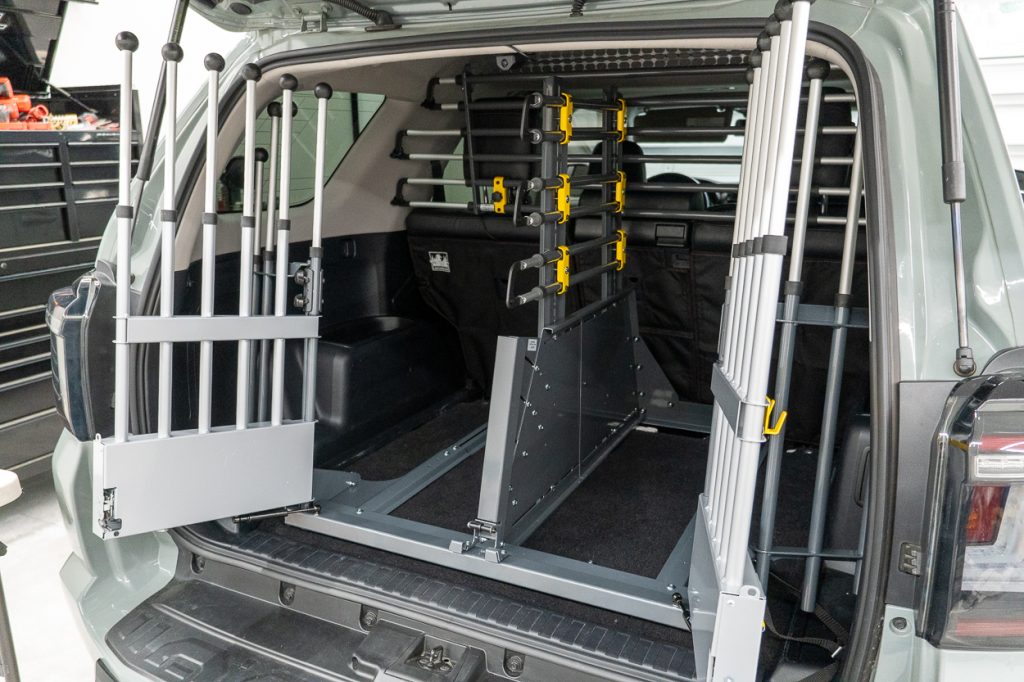
The 4Runner platform is built for adventure, and many who embrace that lifestyle are avid animal lovers. I personally use my 5th Gen to haul my two German Shepherds, which actively compete in dog sports.
While there are lots of options on the market for containing or restraining our furry four-legged friends, few truly prioritize safety. The MIM Safe VarioGate and its associated products are at the pinnacle of safety and craftsmanship for pet safety and travel products. In the world of aftermarket vehicle modification, it’s rare to find genuinely crash-tested products. MIM Safe sets itself apart by being the only kennel system manufacturer to do exactly that. Integrated crush zones and specialty materials help ensure your K9 companion is safe if the unthinkable were to occur.
All of this is critical in keeping your trail buddy safe and secure. As a bonus, the system functions as an excellent gear cage for those hauling substantial equipment on their adventures.
Find It Online:
- MIM Safe
- VarioGate Double: Check Price
- VarioGate Divider: Check Price
- VarioBarrier: Check Price
Table Of Contents
Product Overview
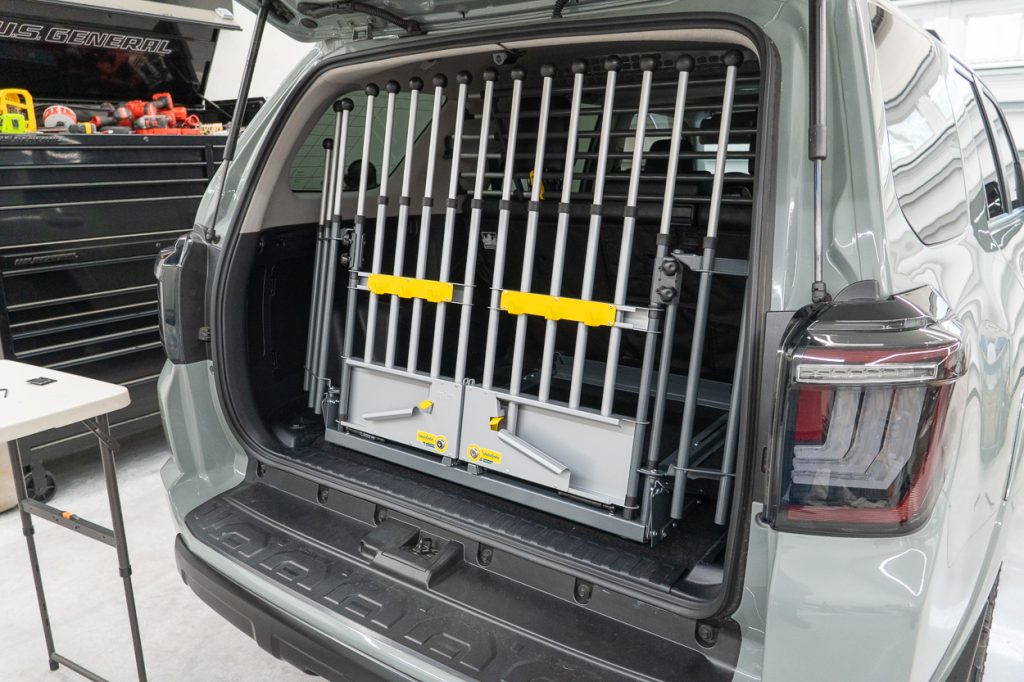
The MIM Safe VarioGate Double is a universal-fit kennel system that can be configured to fit most vehicles with an accessible rear cargo area. It is easily expandable in height, width, and depth, and as shown, is perfectly adapted to the 5th Gen 4Runner platform.
High-Quality Construction
The system is constructed from high-quality, splinter-proof, energy-absorbing materials that have undergone crash testing to verify they are the safest for protecting your pets. The steels are galvanized and coated with a heavy-duty polyurethane finish that stands up to the rigors of real-world use, including mud, water, and everything else our dogs seem magnetically attracted to.
Thoughtful Design
The doors feature high-quality dual-position latches, similar to automotive door latches, for added safety. Gas struts assist with opening and holding the doors, making loading dogs significantly easier. Instead of fighting the door, you can focus on handling your dog safely.
Each door also includes keyed locks, and the kit comes with multiple keys so you can keep spares readily available. These locks come in especially useful at training, events, or outings where the rear hatch may be open for ventilation, but you still need the dogs secure. Riveted to the door structure is a six-hook panel that provides a convenient place to hang a leash, collar, or anything else you might need a hand in holding while you load up your pet.
The design is incredibly thought out. All adjustable hinge points and expandable bars are rubber-isolated to prevent any rattles. After running this system in my 4Runner for a while now, I can personally attest that it is completely silent on and off the road.
Crash Tested
Using the same engineering principles that the automotive industry applies to vehicle safety, every MIM Safe product is built around real crash dynamics. This protects not only your dog but also you and your occupants from the forces of unsecured cargo in the event of an accident. When paired with the VarioBarrier, the VarioGate system transforms the cargo area into a properly contained safety zone, which significantly reduces the risk of injury to the dog and vehicle occupants in the unfortunate event of a collision.
Ventilation
MIM Safe VarioGate provides unmatched ventilation. Fully enclosed dog crates and other competitors’ offerings create stagnant air pockets within their containment solutions. The lack of dedicated HVAC vents in vehicle cargo areas can become dangerous fast. This alone is a major consideration in choosing MIM Safe products over other offerings in the pet safety industry.
Versatile Fitment
What truly separates the VarioGate system from all other offerings on the market is the incredible adaptability in height, width, depth, and angle. This allows it to fit into most any vehicle with a rear cargo area and provide the dog with the most room and comfort while still maintaining crucial separation from the passenger compartment.
Attention To Detail
Rounded hardware, energy-managing structures, rattle-free isolation pads, and the construction is designed to last a lifetime. It is rare to see a product that is truly designed to last the test of time these days. The harsh environments that many 4Runner owners drive and explore with their vehicles and 4-legged companions are not easy on poorly crafted materials.
Installation
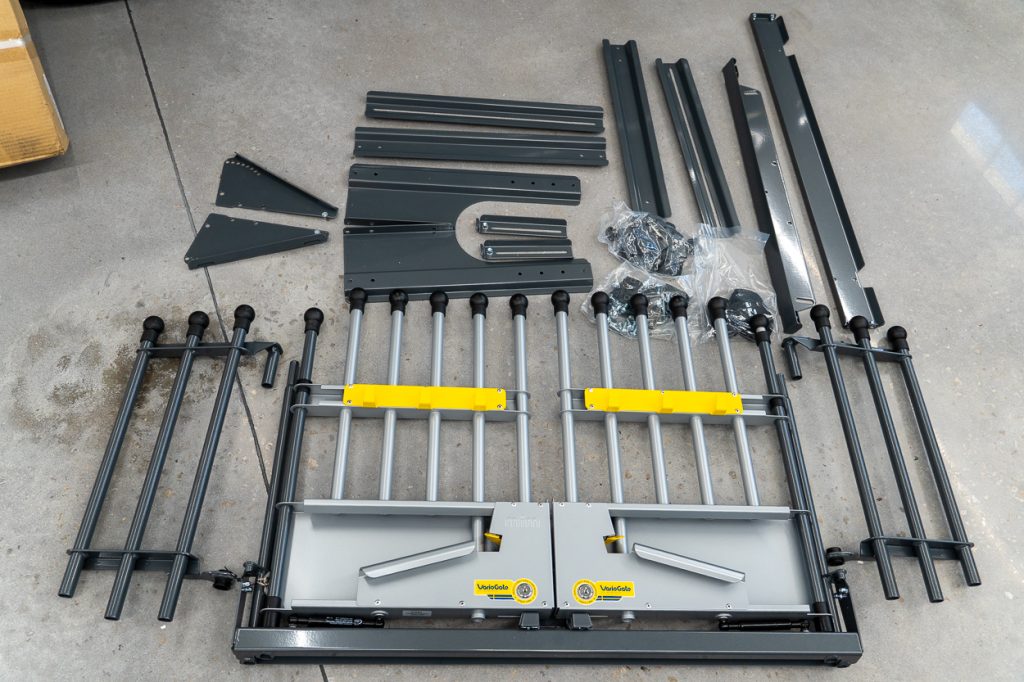
Tools & Materials
- All tools and materials required for assembly are included in the kit.
- An impact wrench or power ratchet is optional, but it helps speed up assembly.
Before you begin, unbox all components and lay them out. You’ll notice that many are side-specific components, and organizing everything first will help you to understand how the system goes together quickly.
Thankfully, MIM Safe ships pre-built door assemblies, significantly reducing assembly time.
Step 1. Lay Out Parts Needed
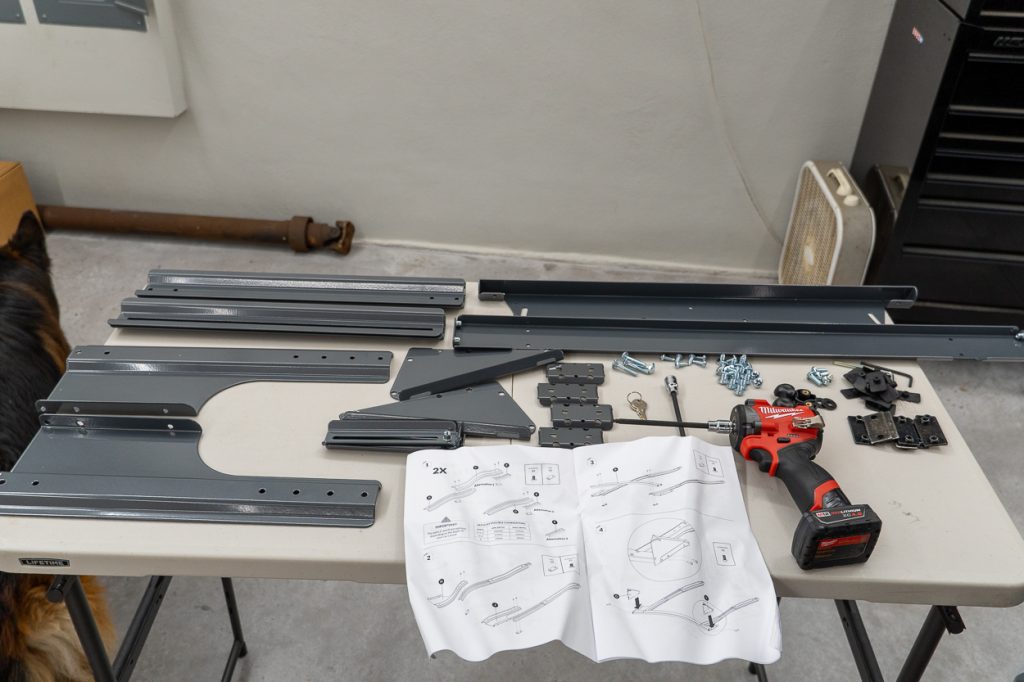
I highly recommend assembling the system on a folding table near the rear of the vehicle, since components will be moved in and out of the cargo area during assembly.
Because this system is a “universal-fit”, some components are optional and will not be used for the 4Runner. There are also multiple adjustment points for setting the angles of brackets and the floor supports. Fortunately, the instruction manual is very well done and easy to follow.
You may notice I used a Milwaukee impact on the bench. While not necessary, it does accelerate the assembly process.
Step 2. Assemble Floor Supports
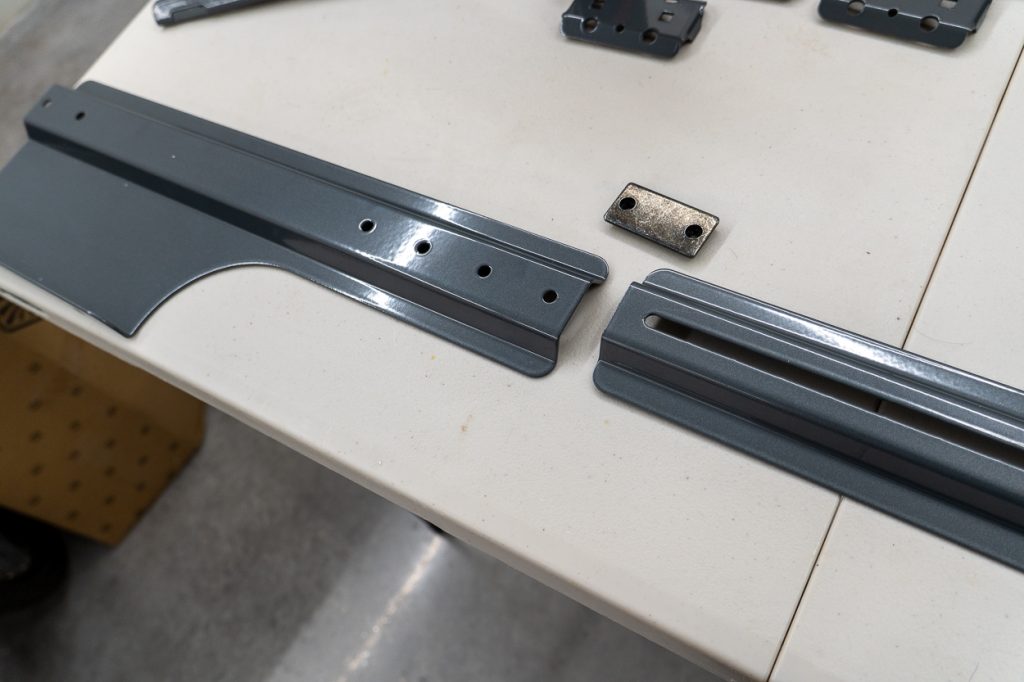
Begin assembly with the floor support system. The legs include multiple mounting holes and a slotted rail, allowing perfect adjustment to fit the cargo area in your 4Runner.
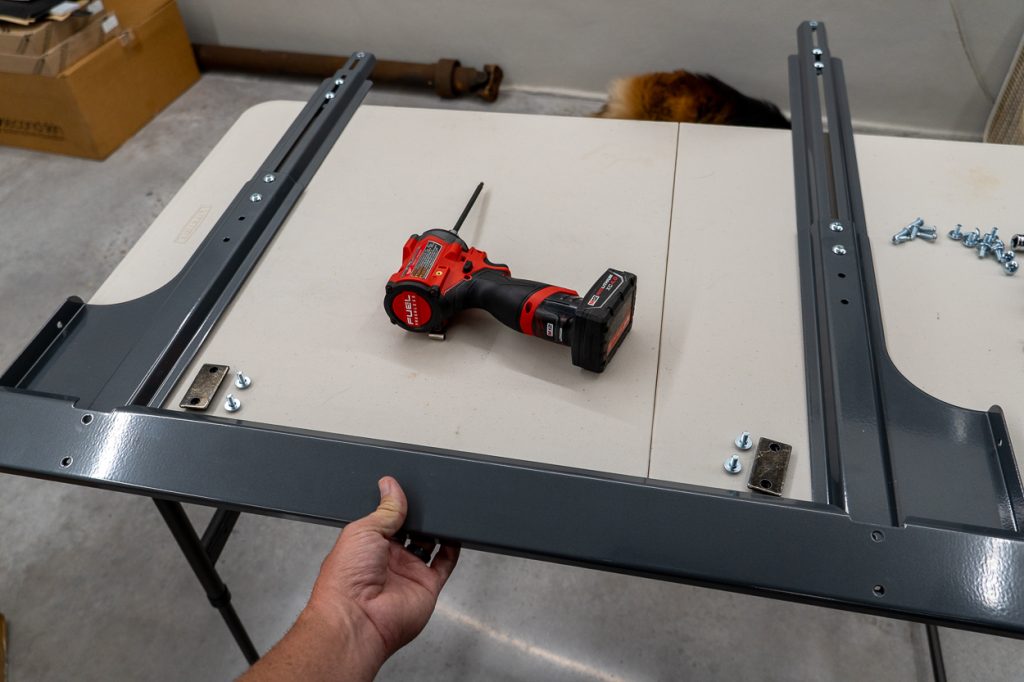
Once the two legs are loosely assembled, attach the front tie bar. This will form the base of the vertical door structure and tie the two floor supports together at the front.
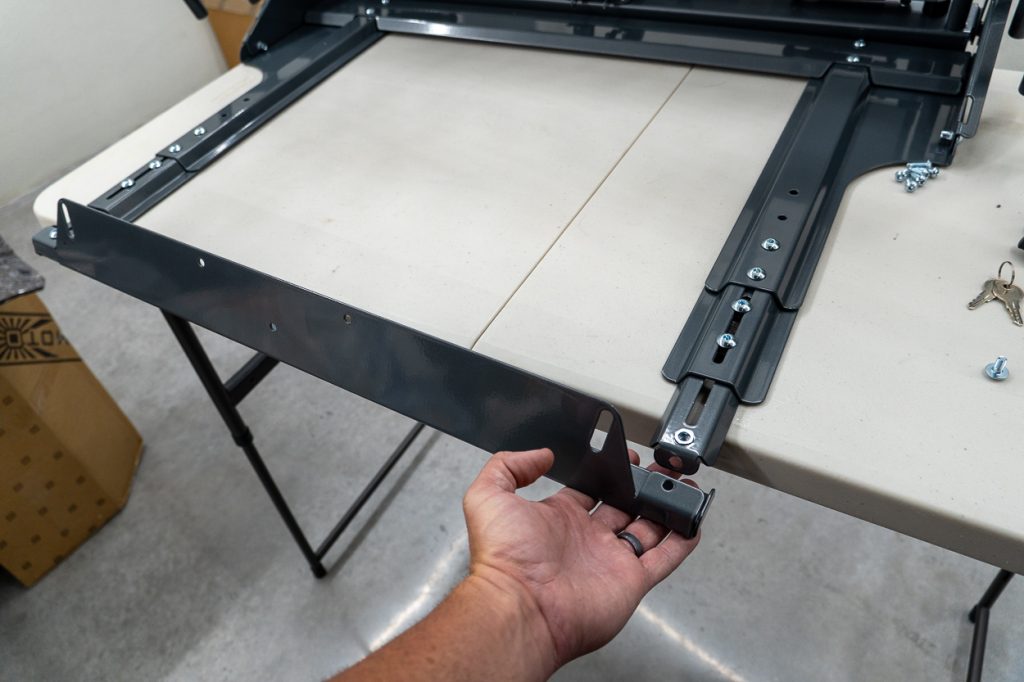
Next, install the rear tie bar. This component keeps the legs parallel and square while also providing the critical attachment point for securing the system to the factory floor D-rings in the 4Runner. It also serves as one of the mounting locations for the optional center dividing panel, turning the system into a two-dog kennel, which I will discuss later.
Step 3. Assemble Vertical Door Components

Start with the adjustable brackets that support the preassembled door structure. The multiple holes at the top of the bracket allow angular adjustment on the door assembly to match the rear hatch opening angle.
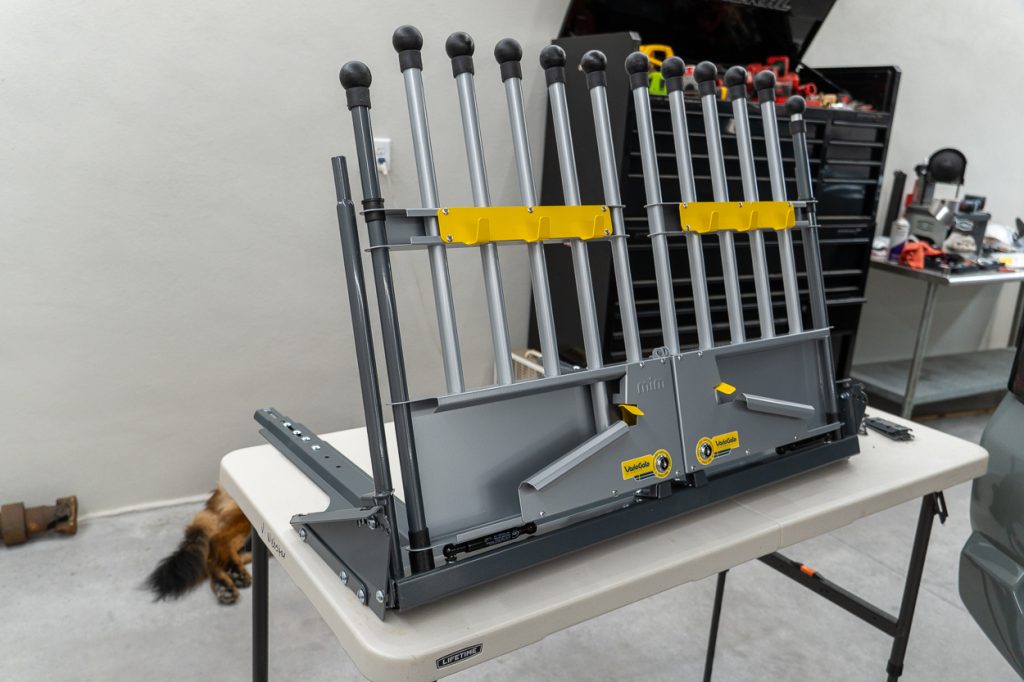
Once the support brackets are attached to the base, bolt the door assembly to the mounting brackets.
At this stage, I recommend placing the system in the vehicle, verifying the angle, and fully tightening all hardware, leaving the adjustment bolts and nuts hand-tight until final fitment, which makes alignment much easier.
Step 4. Install Adjustable Side Wings
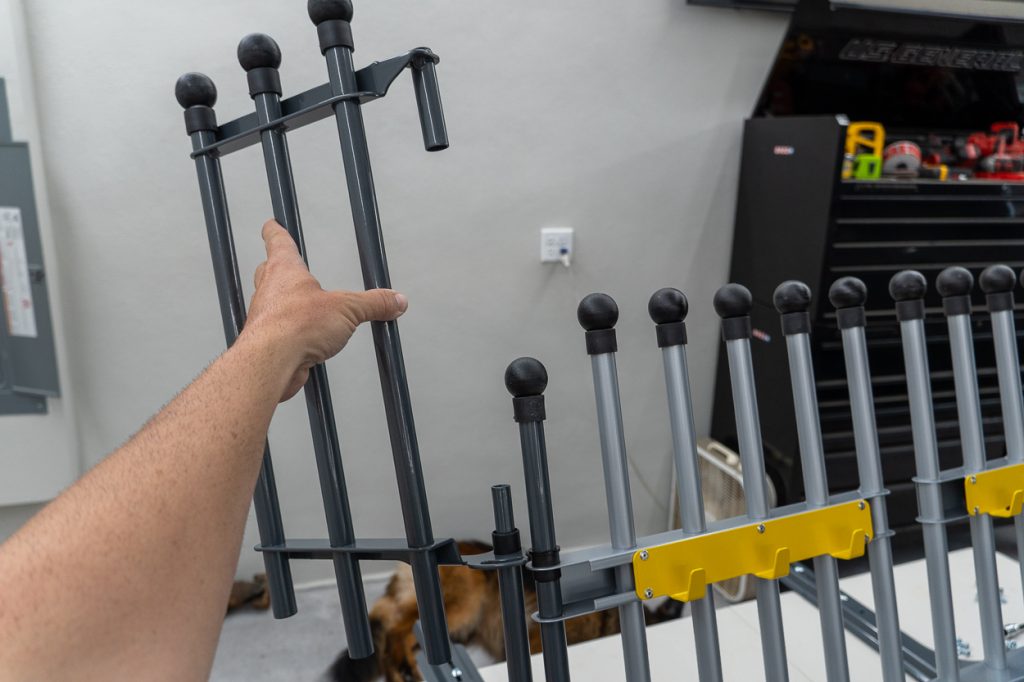
Once you have confirmed that the angle is set appropriately, the adjustable side wings are then installed. These wings close the gaps along the sides of the cargo area, preventing dogs from slipping around the edges of the system.
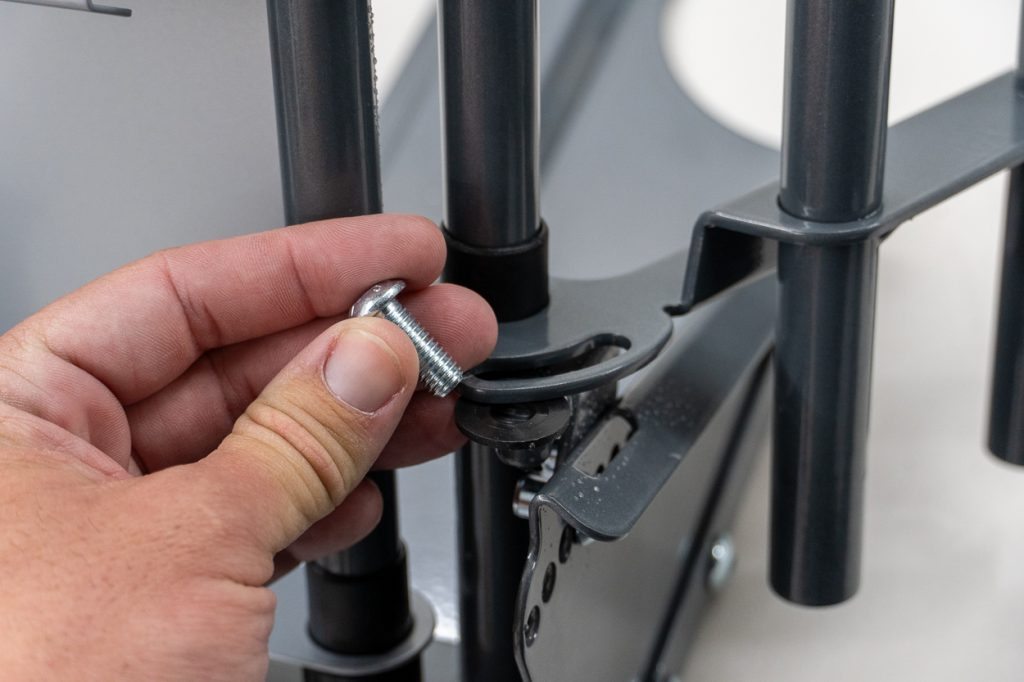
Insert the adjustment locking bolt into the curved slotted hole. Again, it is best to leave this bolt finger tight until you have everything set in the vehicle for final fitment.

The final components of the door structure are the upper support brackets for the adjustable wings. These brackets are critical for rigidity and noise control.
MIM Safe went to great lengths to ensure that their system is very quiet and does not squeak or move in the vehicle once everything is set. These rubber isolation pads make that possible. Insert the nipple on the back of the rubber pad into the hole on the bracket and press firmly; they will slip into place.
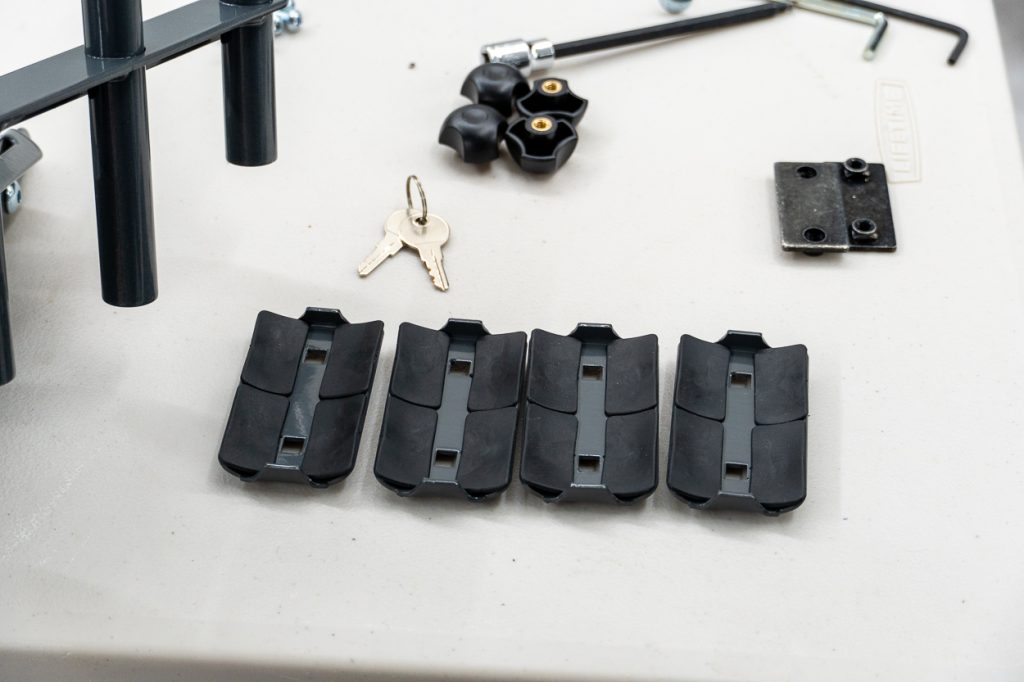
Build all four upper support brackets so they look identical.
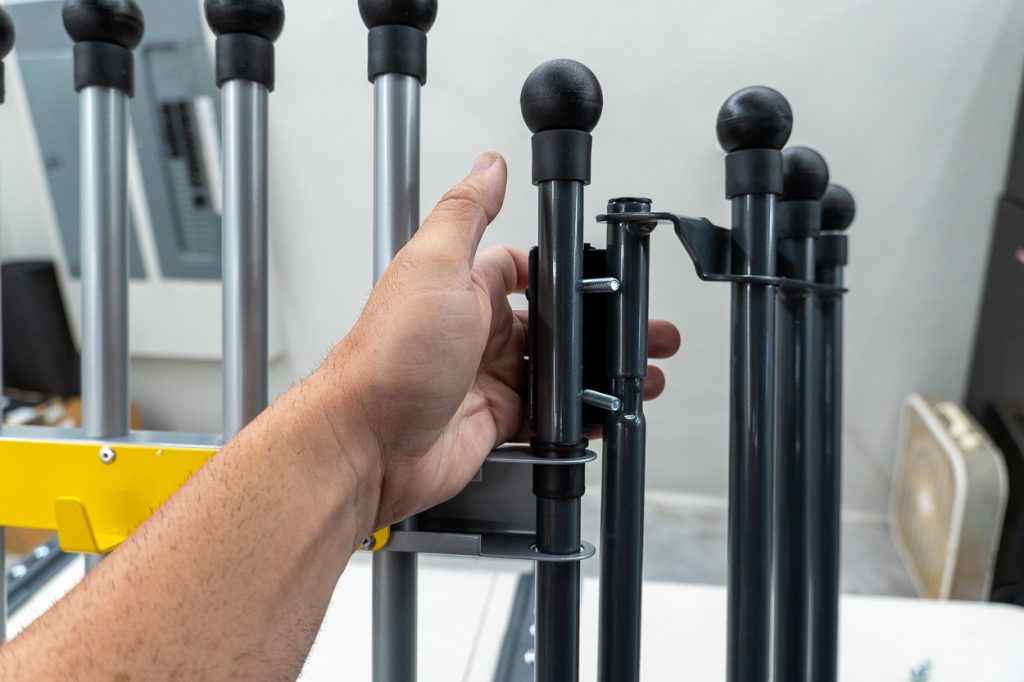
To install them, position one bracket behind the vertical bars. Place another bracket on the front of the vertical bars directly in front of the rear bracket and secure it using two of the carriage bolts and thumb screws.
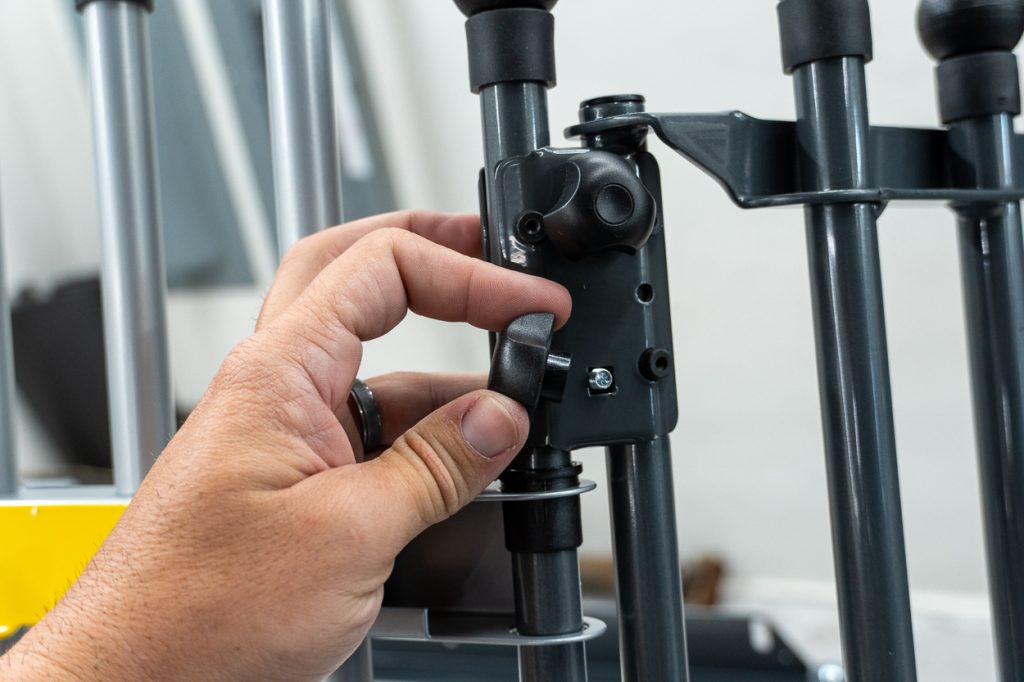
Final tightening should be done in the vehicle, as you will want to adjust the wings to achieve the tightest possible fit to the interior walls.
Step 5. Install System & Final Adjustments
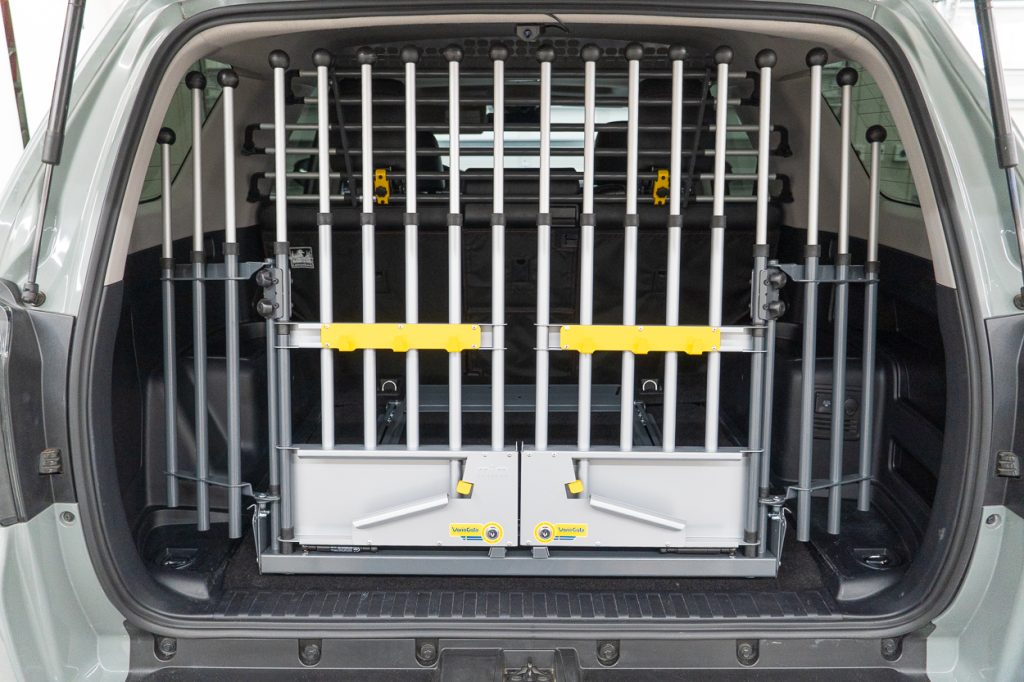
With the main assembly complete, place the system in the cargo area and begin the final adjustments. Once you have everything aligned as desired, tighten all previously finger-tight hardware to lock it in place.
As you can see, with everything adjusted to suit, the system perfectly adapts to the 5th Gen 4Runner platform. I am incredibly happy with the results, and I am certain you will be as well.
If you only have one dog, you can stop here and allow them to have the entire back of the cargo area to themselves. In my case, with two canine buddies, having them separated gives them assigned leg room and prevents one from taking over the entire area, and improves safety. Restricted movement reduces distractions for the driver, prevents accidental escapes when opening doors, and helps protect the dogs and vehicle occupants in the event of a crash or trail-related mishap. That is exactly where the next product comes into play.
Adding Separation (Multiple Dogs) – VarioDivider
If you have multiple dogs, as I do, you’ll want to make sure that you also purchase the MIM Safe VarioDivider. This system will convert the VarioGate kennel into two independent spaces, allowing you to take each dog in and out of the vehicle through its own door.
Step 1. Organize Your Parts

As with the VarioGate System, lay out all your components before assembly. This will allow you to familiarize yourself with how the system will go together again.
Step 2. Assemble Vertical Dividing Panels

Start with the lower divider panel. Similar to the adjustable wing upper supports we previously assembled, install the rubber isolation pads in the holes designated in the instruction manual by pushing the rubber nipple through the allotted hole until it is fully seated.
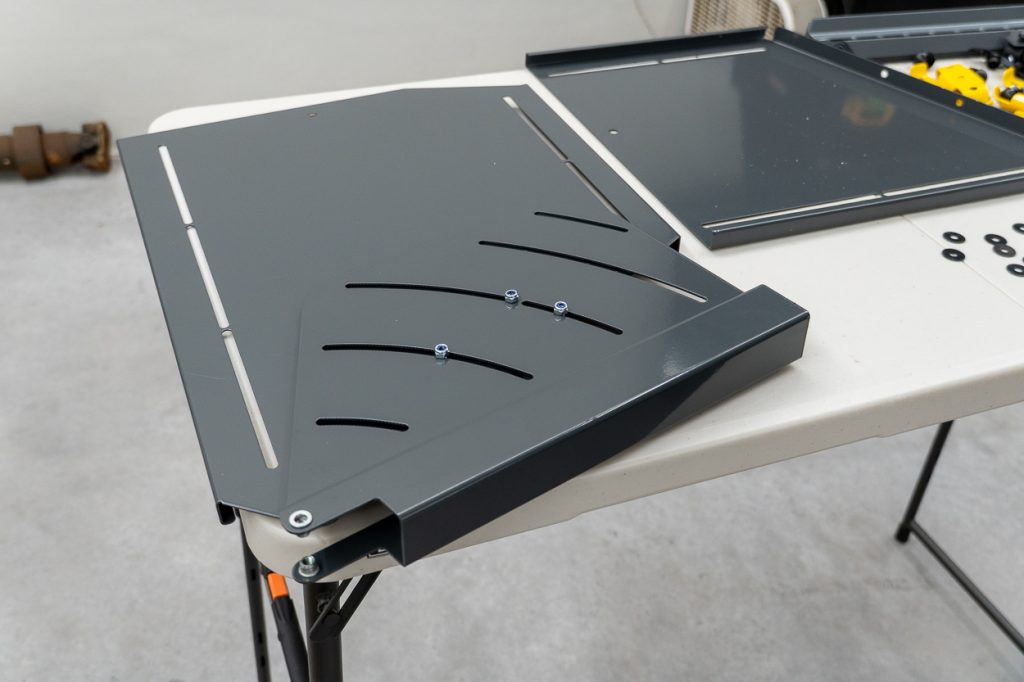
Next, install the front adjustable panel with the supplied hardware. This panel features multiple arched slots that allow it to match the exact angle of the front gate structure selected during the main kennel system installation.
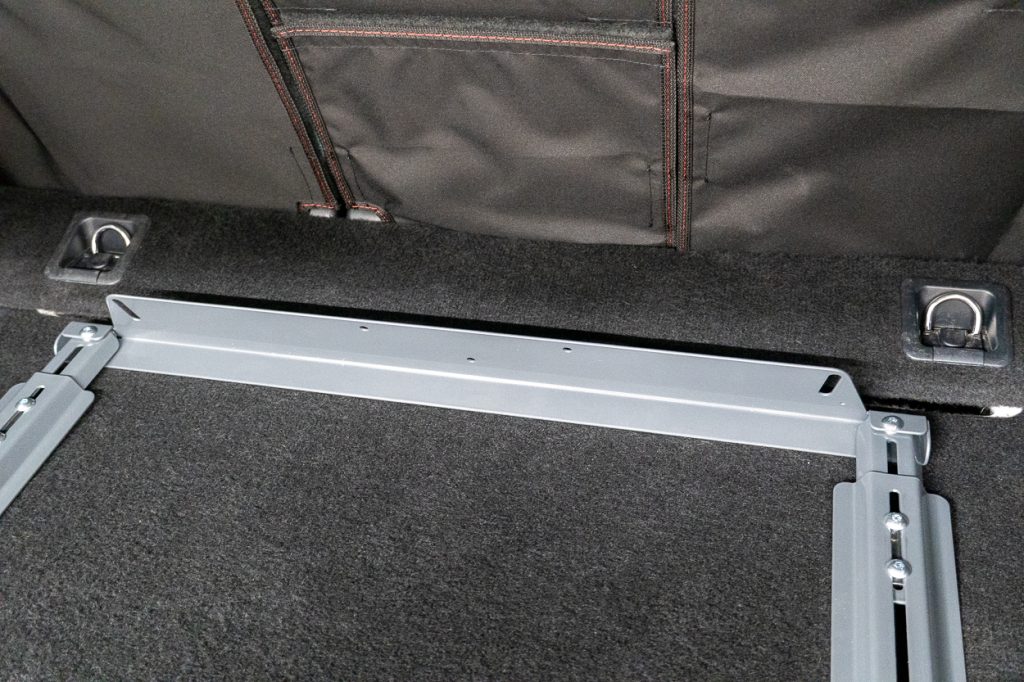
Note the three holes in the rear tie bar. These mounting points correspond with the triangular mounting bracket in the kit.
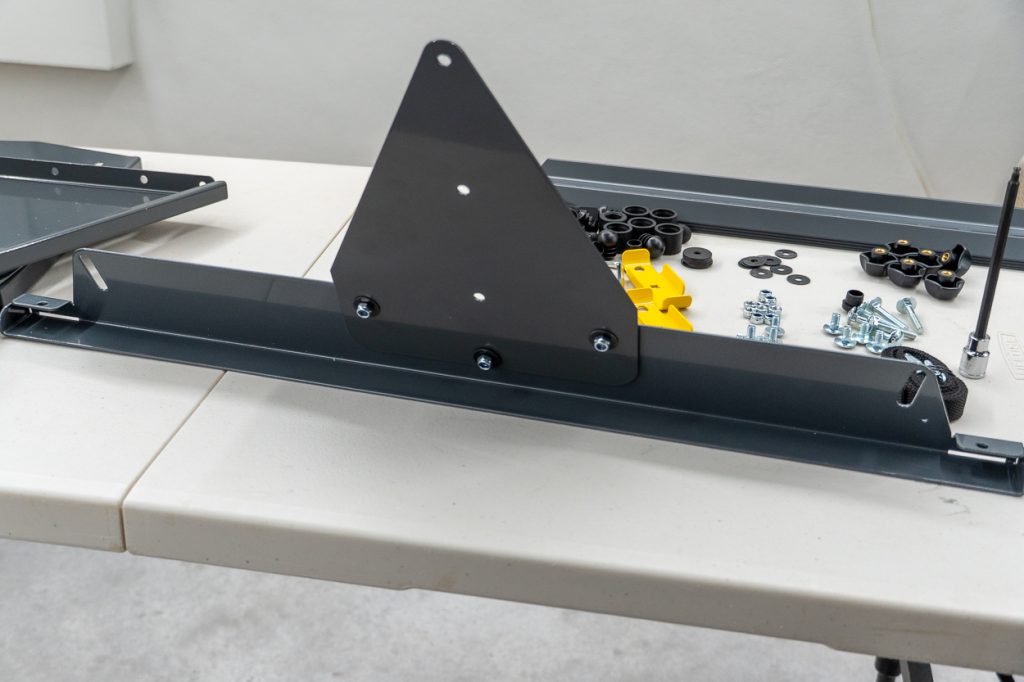
Attach the triangular support bracket to the rear tie-bar using the supplied nuts, bolts, and washers.

Once you have the triangular support bracket in place, attach the rear vertical divider panel to it. The U-shaped channel at the base of this panel allows the two halves to slide within one another, providing depth adjustment to perfectly match your installed VarioGate system.
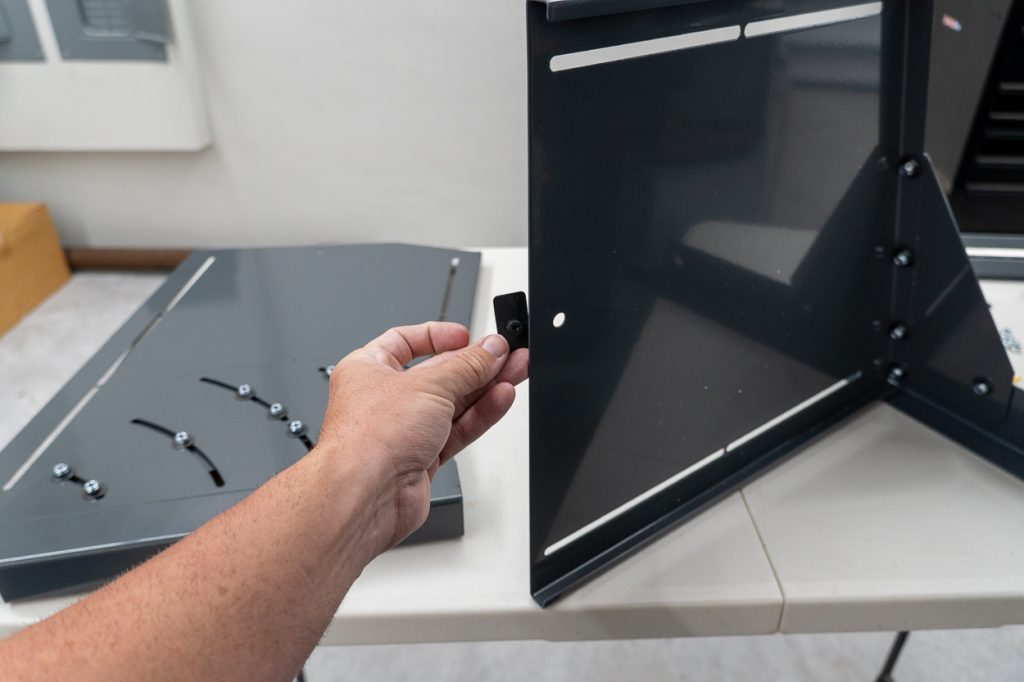
Be sure that you don’t skip installing the rubber isolation pads on this panel as well. MIM Safe’s engineering is seriously well-thought-out, as their extensive use of rubber isolation pads eliminates any rattles once installed.
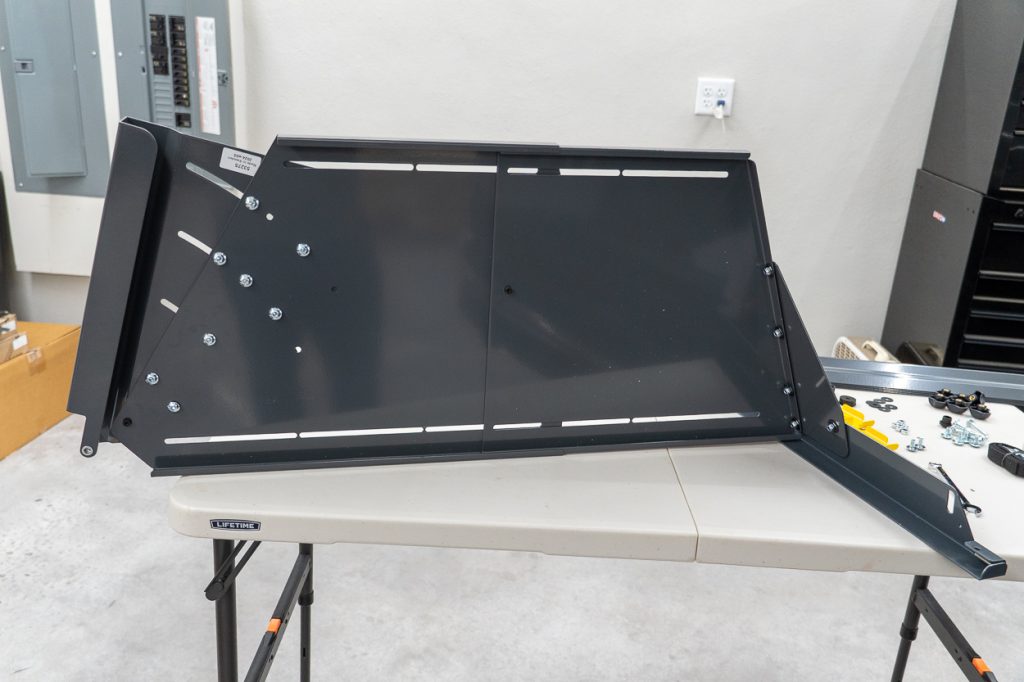
Finally, slide the front vertical dividing panel into the rear U-shaped vertical dividing panel. At this point, you will begin to see how the whole system will form the two independent sides.
Step 3. Assemble Upper Dividing Bars
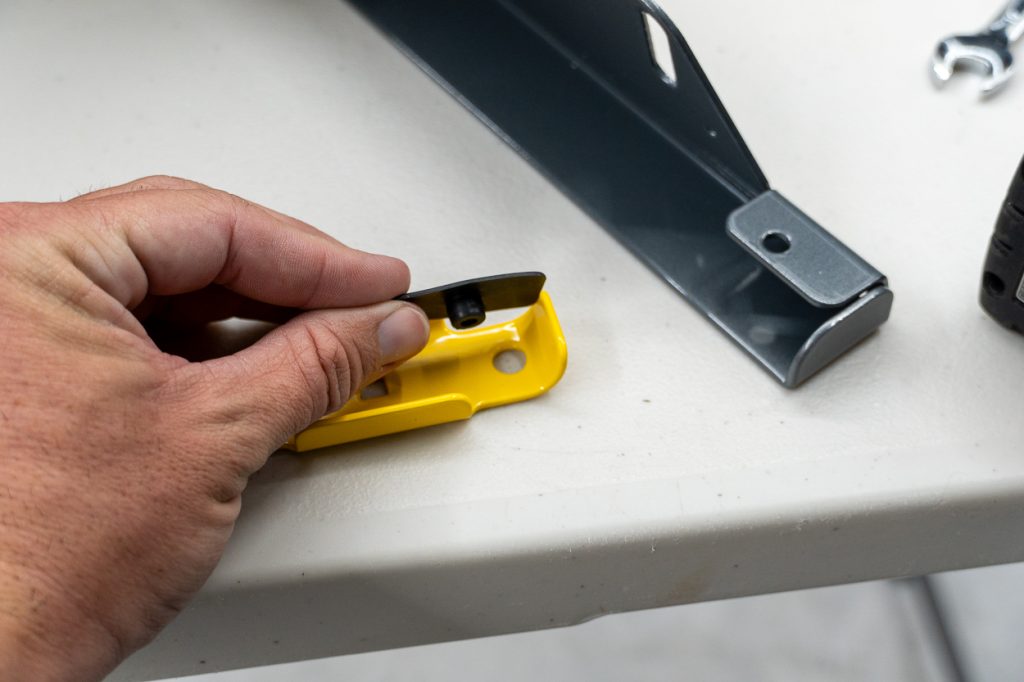
Install the remaining rubber isolation pads into the yellow upper bar brackets.
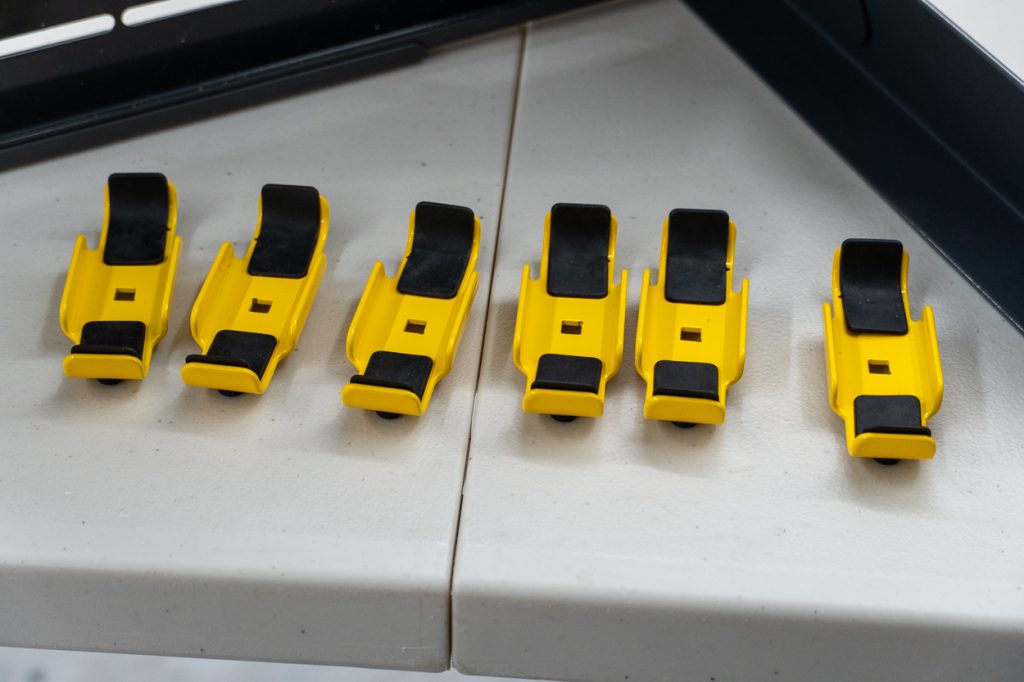
When completed, you should have 6 identical upper bar brackets ready for installation.

The last step before we begin final assembly in the kennel system is to assemble the adjustable upper bars. These bars are what will create the upper division between the two sides. The bar design is a perfect solution, as it maintains the divided space while allowing unrestricted ventilation and airflow throughout the system.
Step 4. Install Lower Dividing Panels Into VarioGate System
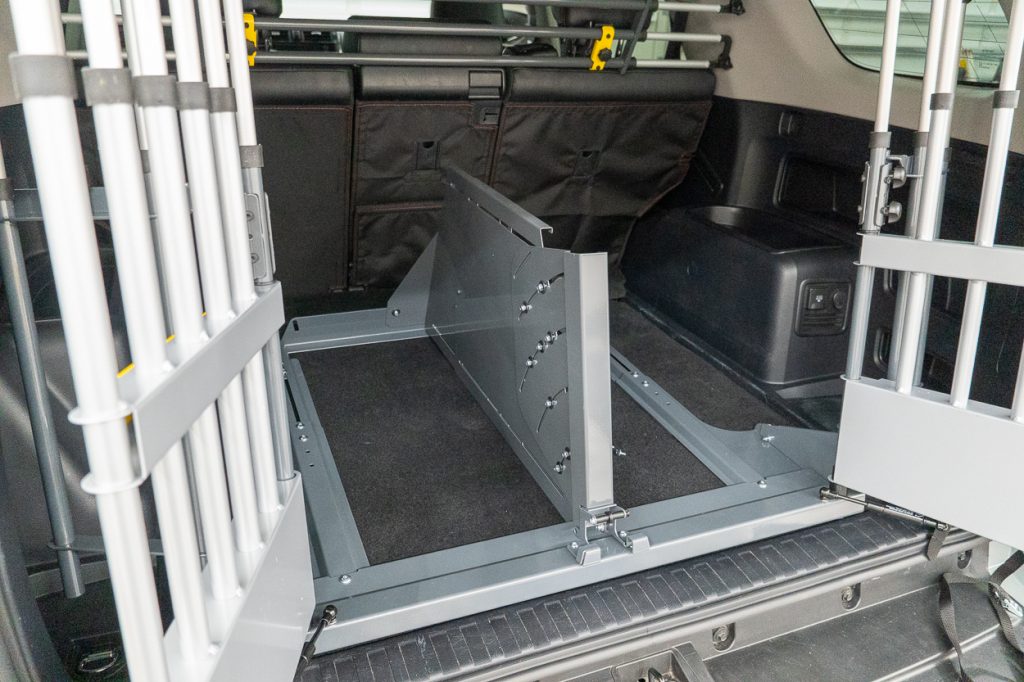
Begin final assembly by installing the lower dividing panel into the VarioGate system using the supplied hardware to attach it to the front and rear tie-bars.
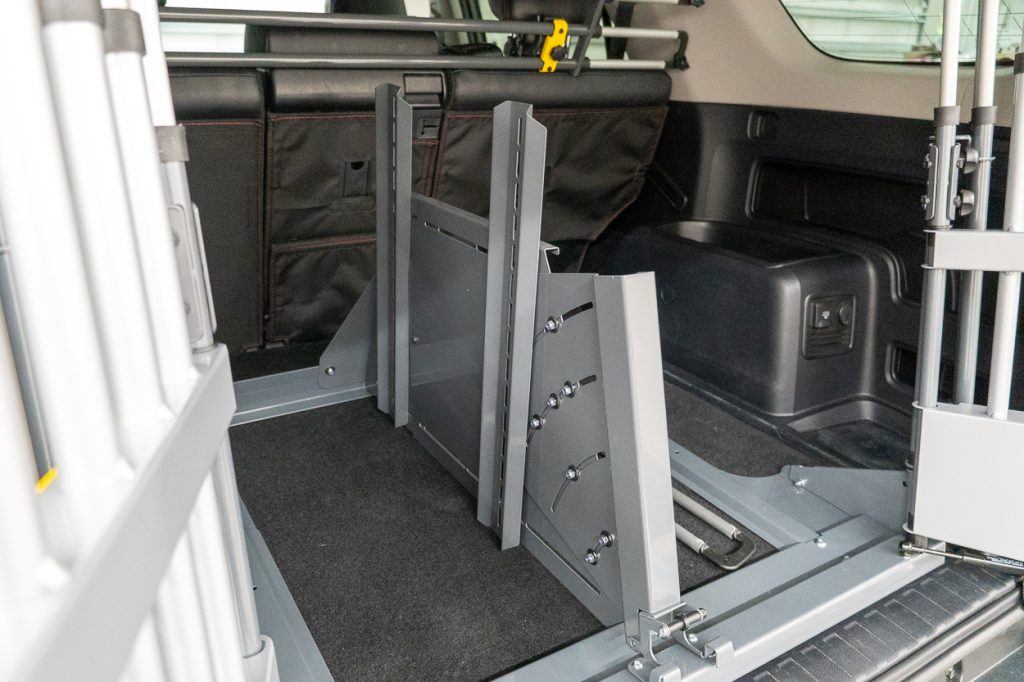
Once the dividing panel is in place, begin assembling the upper dividing bar system by installing the vertical support bars. Like the rest of the VarioGate components, these vertical supports are fully adjustable. Leave the hardware finger-tight until you have decided on the final height of the system for your vehicle.
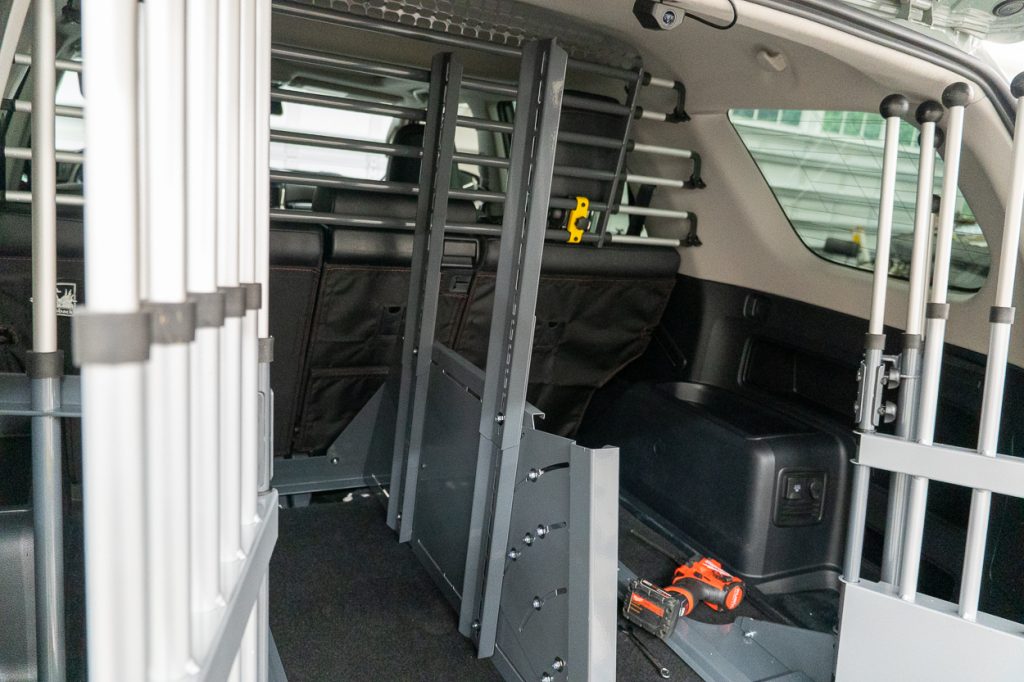
As you can see here, for the stock 4Runner, you will want to utilize the additional support brackets to extend the support brackets and allow the upper dividing bars to reach all the way to the headliner in the cargo space.
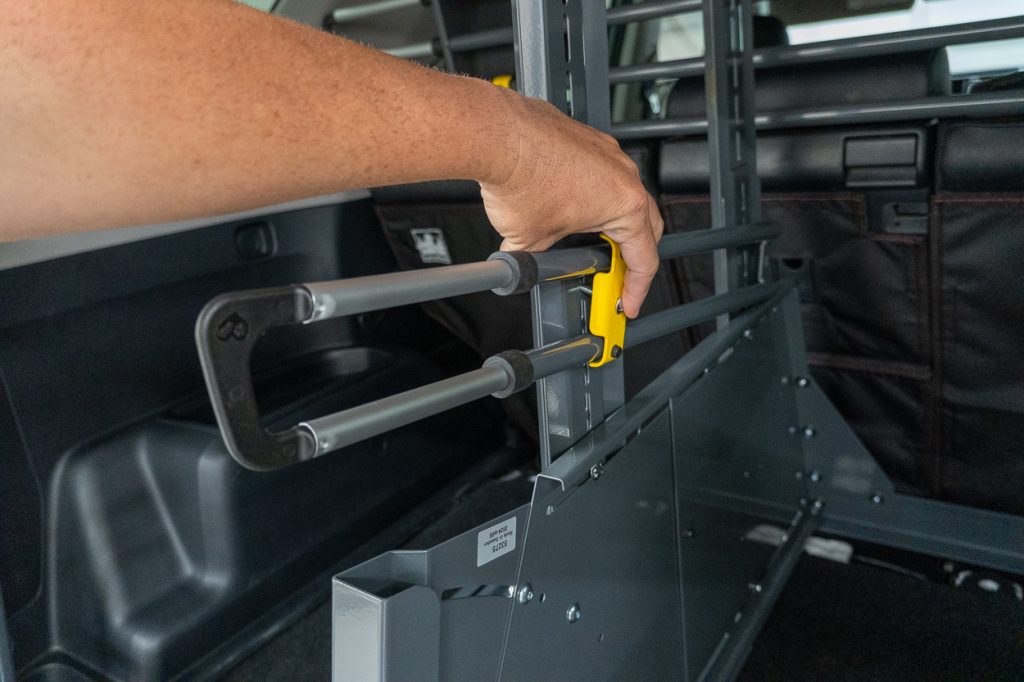
Finally, attach the upper dividing bars using the previously assembled yellow brackets and supplied hardware. You can easily adjust the bars for a clean symmetrical install. If you have an upper MOLLE or storage rack like I will be installing, the height of the upper bar dividers can be lowered to integrate with whichever system you have installed.
Final Thoughts
Safely transporting our canine counterparts should be a top priority. Having a kennel system in your vehicle isn’t just about containment; it’s ultimately about collision safety, just as seatbelts are for the occupants of the vehicle’s passenger compartment. This is why the MIM Safe VarioGate system stands above the rest.
Most cargo barriers, kennels, and crates on the market are designed to keep a dog inside during normal driving. MIM Safe addresses the manufacturing of its product holistically and prioritizes its engineering around what happens if something goes wrong.
MIM Safe takes this to the highest level by being the ONLY manufacturer in the industry to physically crash-test its pet safety product.
For 4Runner owners, building their vehicles around adventure. The VarioGate provides more than just a dog kennel. It provides safe cargo management to help contain your cargo when you aren’t using it to bring your dog along. When you think about how often our dogs ride with us from adventure to adventure, investing in crash-proven protection for them becomes a common-sense responsibility.
After having this system installed in my vehicle and using it to the fullest, carrying my two competition-level German Shepherds, it’s clear why so many dog handlers and owners also consider MIM Safe the only option for protecting their furry loved ones.