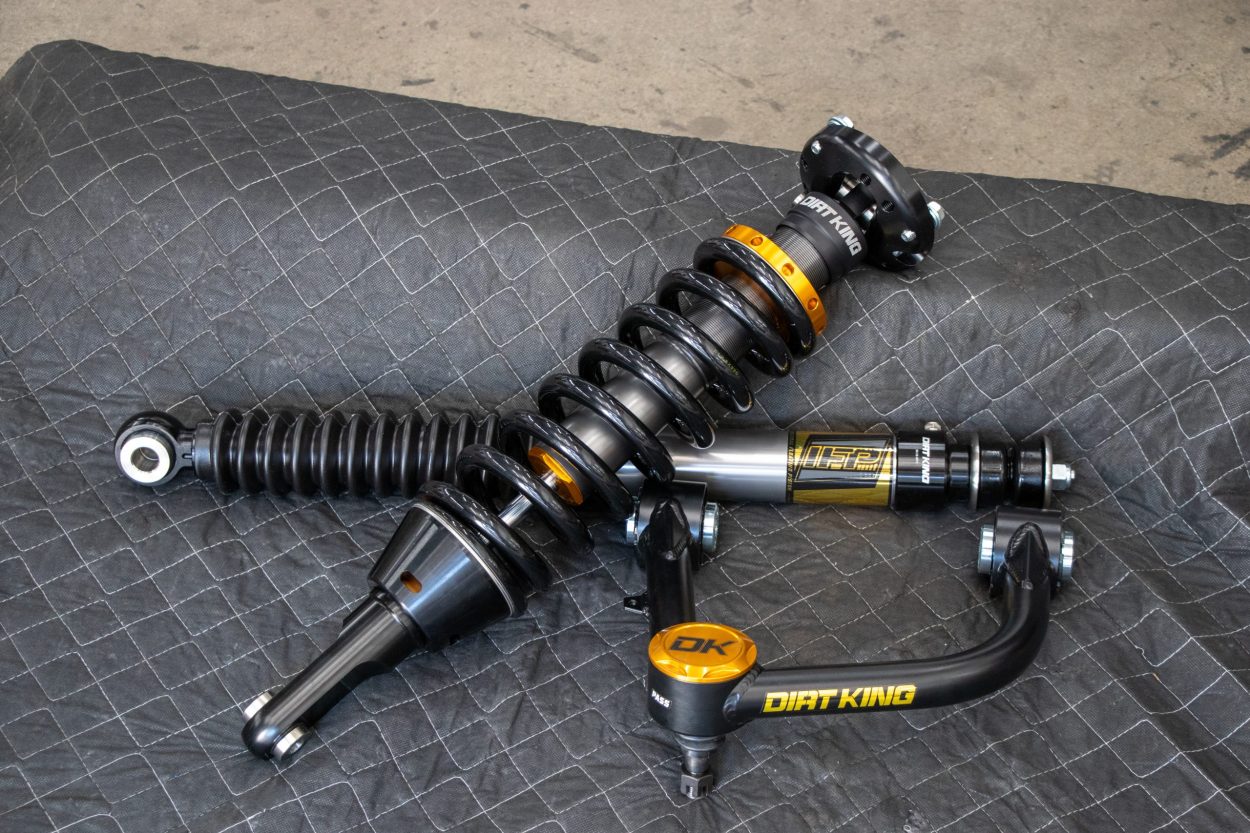
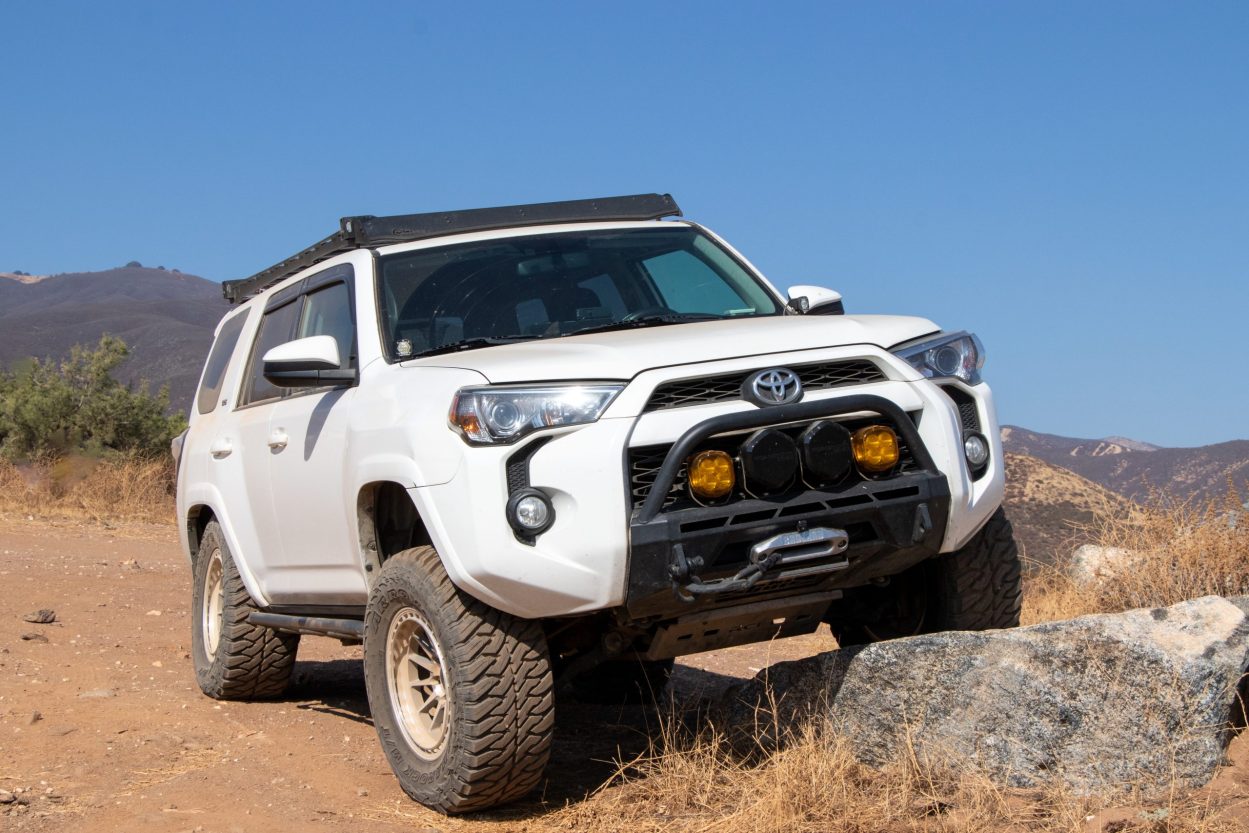
You can’t take full advantage of the additional travel with upgraded suspension without aftermarket upper control arms (UCAs). Dirt King has been around for a long time, making all sorts of arms for Toyota and domestic applications. Their experience has allowed them to perfect several control arm lineups.
With the introduction of the 2.5 DCA and 2.0 IFP shock series, a redesigned UCA that prioritized price and durability was needed to complete the package. This resulted in their newly updated version, designed to handle the rigors of off-road abuse.
Table Of Contents
Overview
Quick Specs & Features
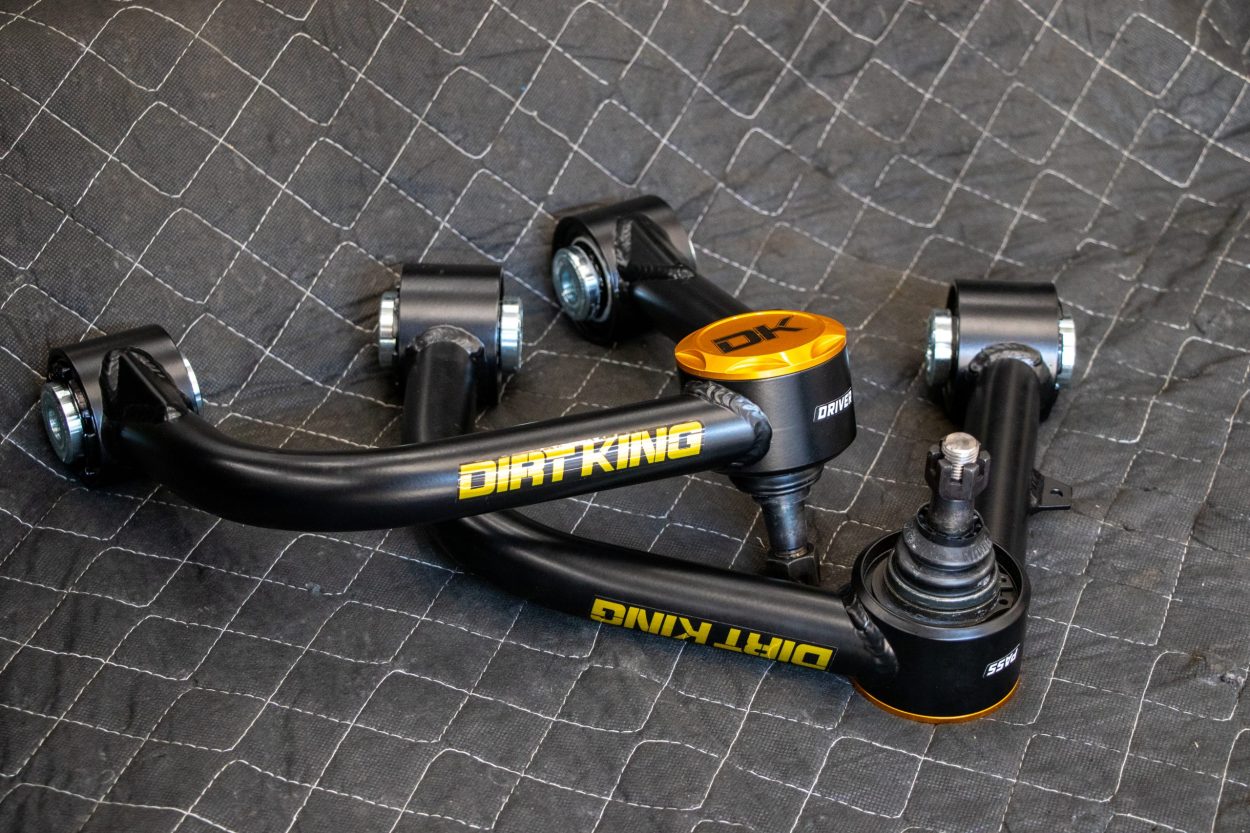
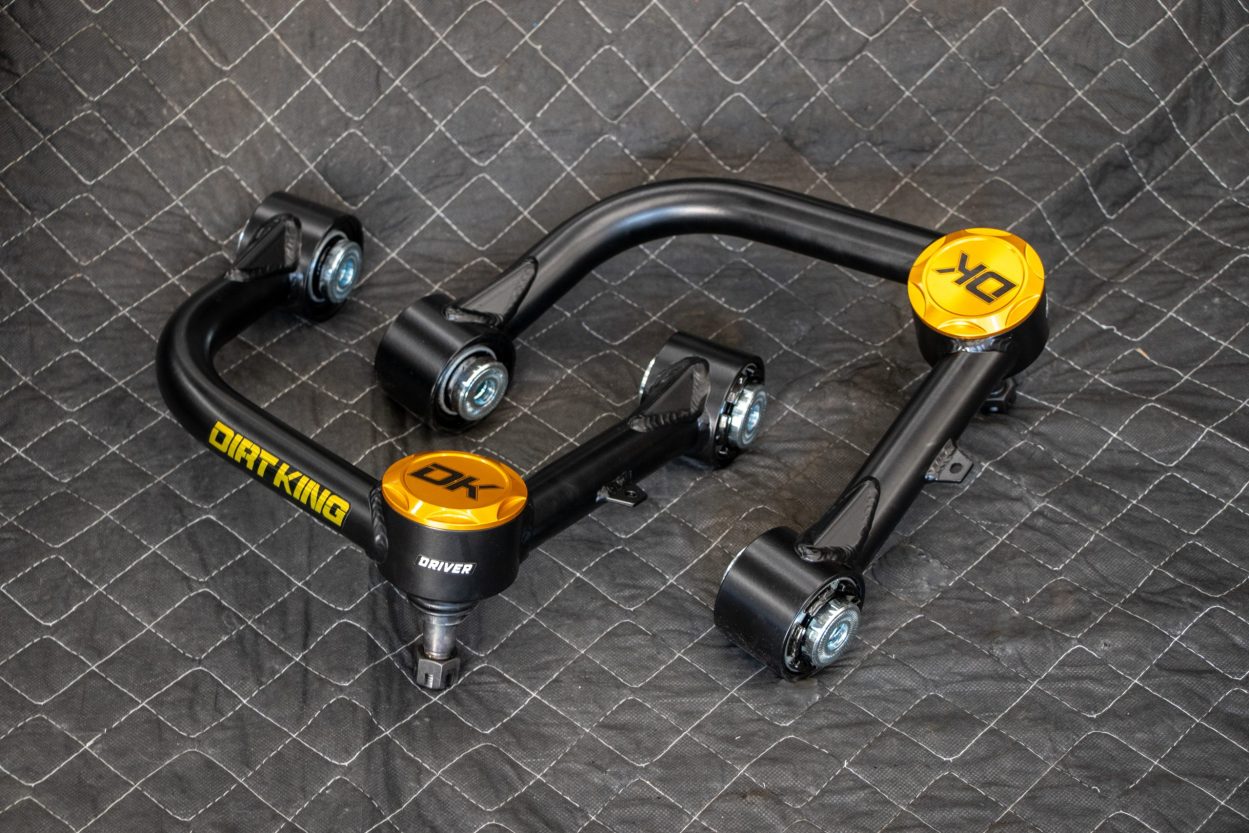
- Constructed with 4130 chromoly tubing
- Suitable for 0-3″ of lift (provide better geometry and performance)
- Additional 1″ of down travel compared to stock
- Zinc-plated components for corrosion resistance
- Durable black powder coat
- Stock track width compatible (not for long travel)
- Probearing SilentSpin bushings (maintenance free, no noise, long lifespan)
- Probearing Pro 4 ball joints (forged housing, 76 degrees of articulation, induction hardened ball stud)
- Sealed debris caps
- Ships preassembled
- Rebuildable
- Comes with new pivot bolts
- Made in the USA
- MIG welded
- Formed steel bushing gussets
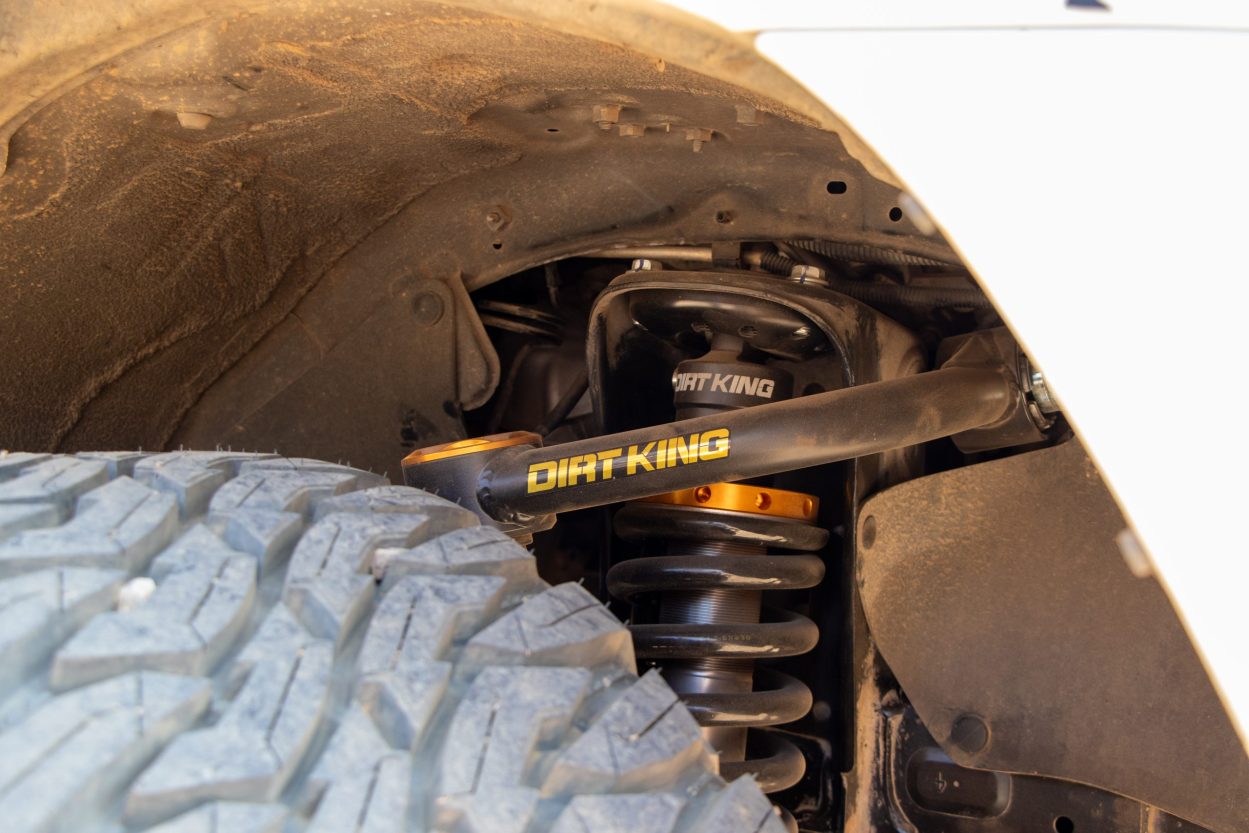
These have been designed and engineered to correct the suspension geometry of our 4Runners when they are lifted. When you lift a 4Runner and keep the OEM upper control arm, the geometry, and structural strength are compromised due to the excessive articulation of the factory joints. Simply put, your OEM arms are not made for lifted applications.
The DK addresses these issues with improved caster settings for improved handling and re-engineered gusset pivot angles for increased articulation and strength.
Probearing SilentSpin Bushings

These bushings offer the best of both worlds: the free-spinning rotational capability of poly bushings and the maintenance-free, noise-free advantages of OE elastomer bushings.
The Probearing SilentSpin bushings are a standout feature of these arms, revolutionizing your suspension’s performance. I haven’t seen many companies making strides to improve upon existing tech. This design ensures your control arms operate quietly and efficiently, reducing the need for frequent maintenance and eliminating the annoying squeaks commonly associated with traditional bushings.
Probearing Pro 4 Ball Joints
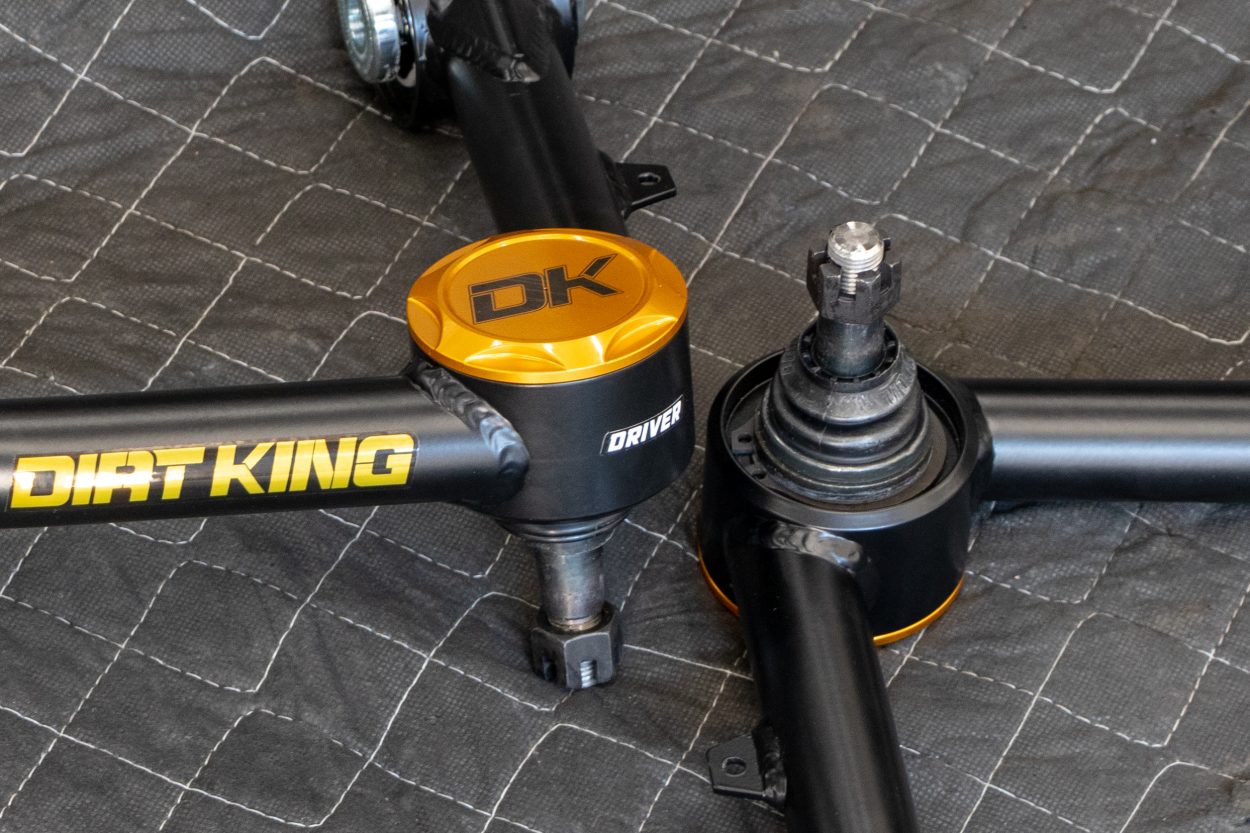
Dirt King understood that if you’re upgrading your suspension, you’re going to expect more of it. Industry standard joints were simply not cutting it. So, in partnership with Probearing, they heavily tested a new type of ball joint design – made to outperform uniballs (yes you read that right), while dramatically improving longevity and strength.
Paired with the SilentSpins, we see a new standard for what’s possible where OEM longevity meets aftermarket performance. Something that has eluded the industry for quite some time. Race truck parts equal race truck maintenance, but these new arms look to close the gap on OE durability.
How They’re Made
As a part of my shop tour, I was walked through the process from beginning to end. Dirt King showed me everything from straight tubing to packaging and shipping.
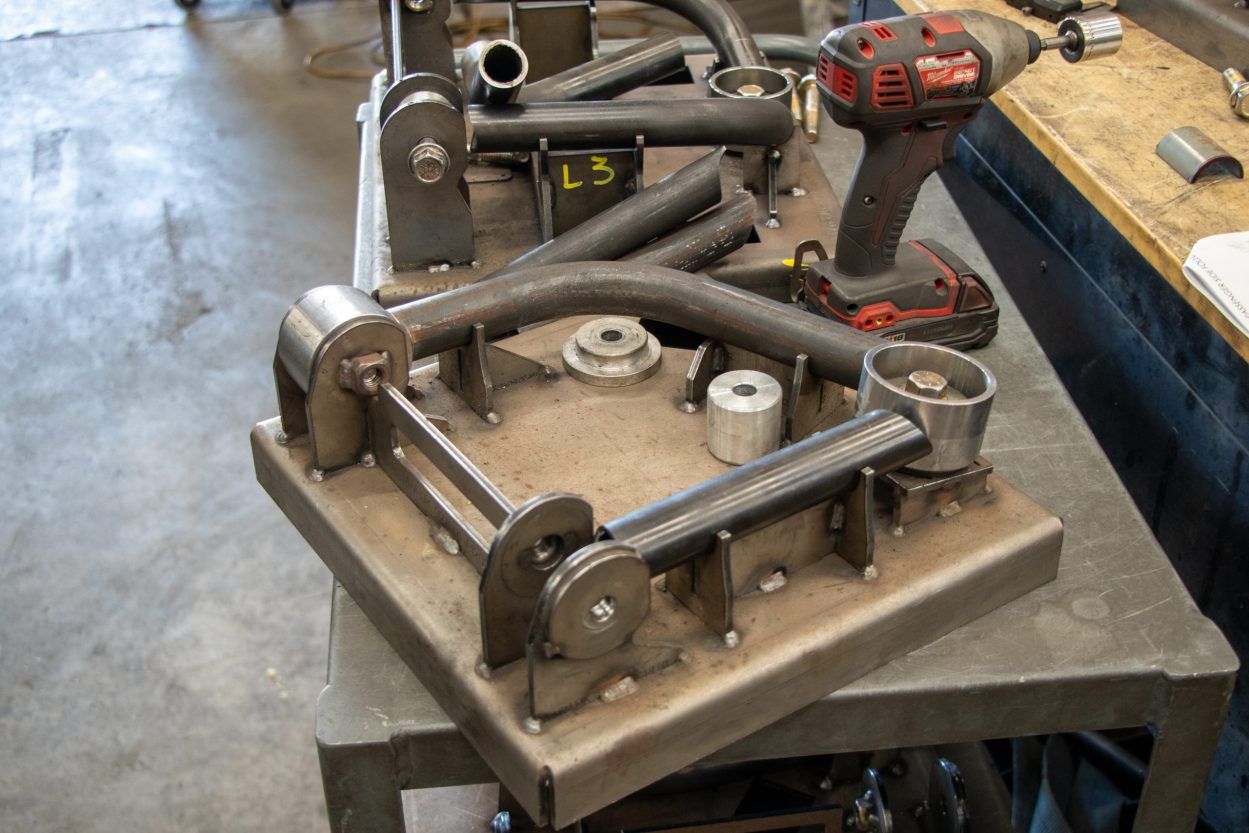
Starting with a straight pipe of 4130 Chromoly tubing, it’s cut and bent into shape. Then, it’s placed in a jig for spot welding.
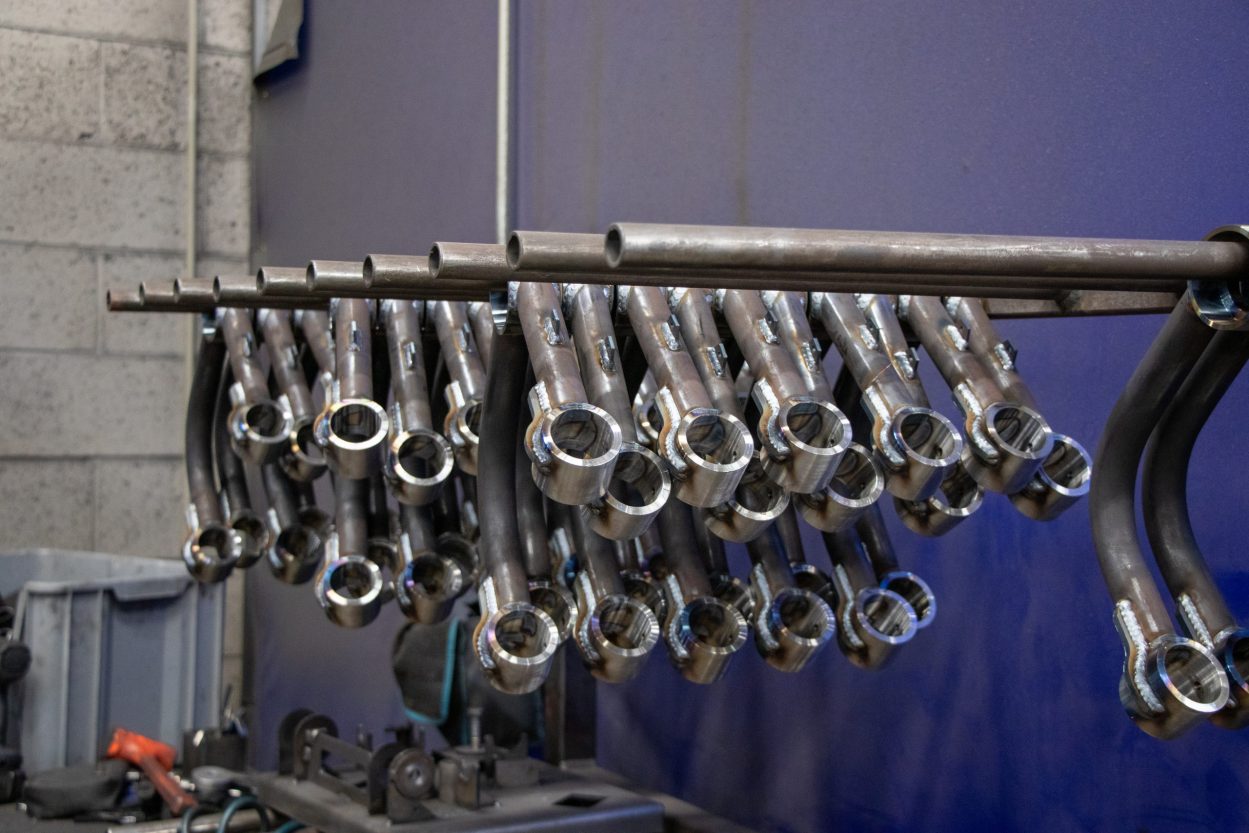
Once the welding is completed, and gussets and brackets are added, everything is deburred and made ready for powder coating. This final step is the only thing not done in-house.
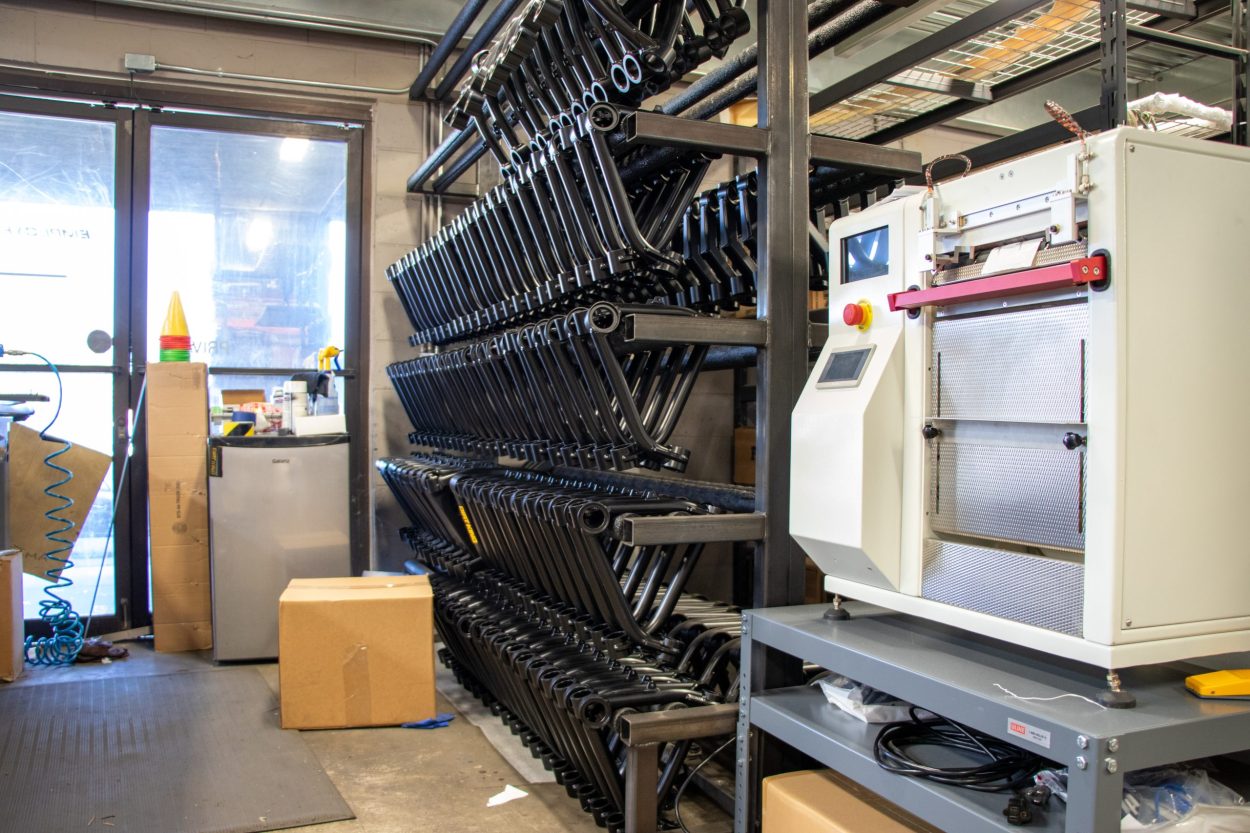
Freshly powder coated and back at the shop, the UCAs are placed on foam-covered racks. Badging is next up, with the Dirt King logo and the driver/passenger side stickers placed.
Finally, the heavy-duty ball joints and bushings are pressed in with the former getting covered by the DK gold dust cap. As mentioned above, these new ball joints are sealed.
All components of these UCAs are rebuildable or replaceable, promoting long-term durability and ease of maintenance. Because of this, these may be the last ones you ever need to buy. They also arrive preassembled with detailed instructions for a straightforward installation.
Installation Overview

While I enjoy learning how to work on 4Runners, I’m not at the point of performing work like this. Fortunately, I live near Dirt King’s headquarters and got them installed there. The team was fantastic, and very used to working with people wanting to document installations.
They highlighted that the their UCAs are designed to be as easy to install as possible. The included instructions are also very well-detailed, leaving little room for questions. With that, here are my abbreviated notes on the installation process.
Step 1. Lift Vehicle
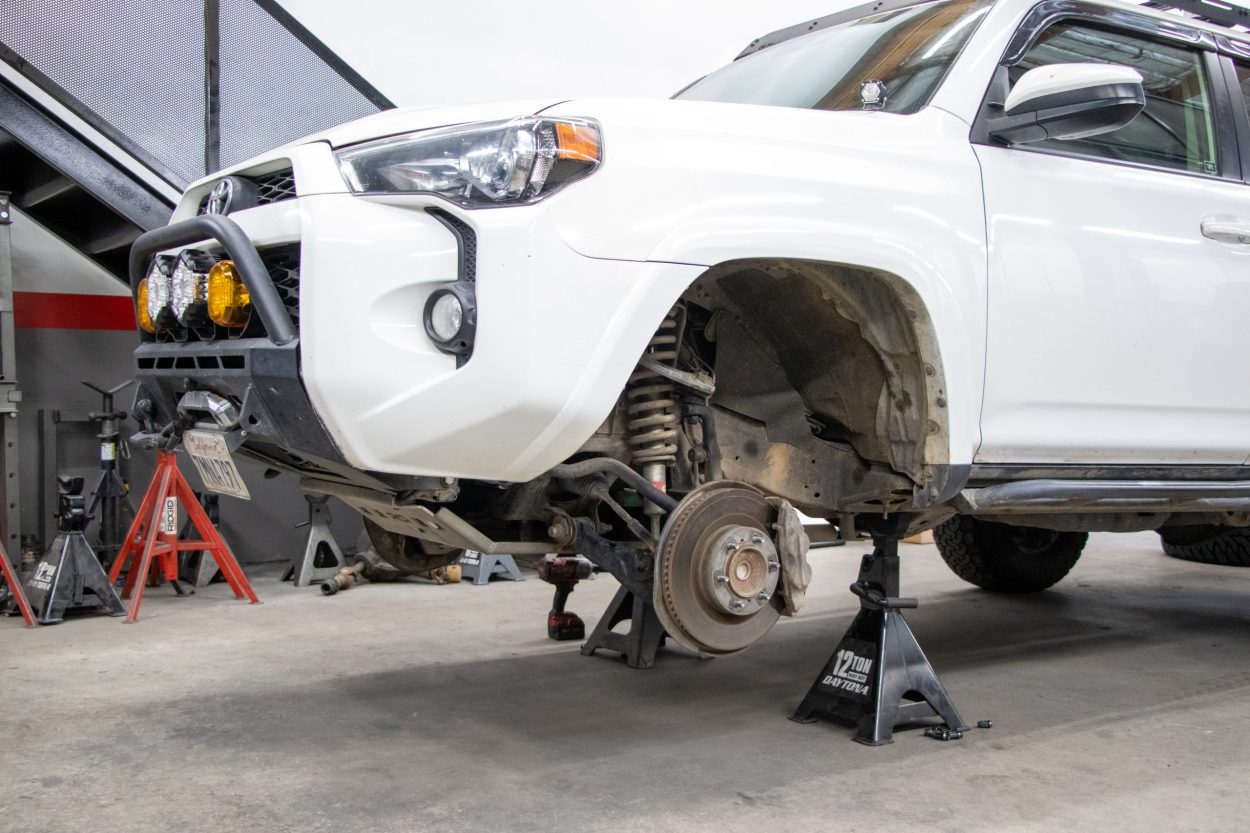
With the 4Runner off the ground, remove the wheel and wheel well liner. The bracket for the brake line can be removed (not the fittings itself), however, this step may not be needed if you’re experienced with suspension installation.
Step 2. Remove Brackets & UCA Bolt
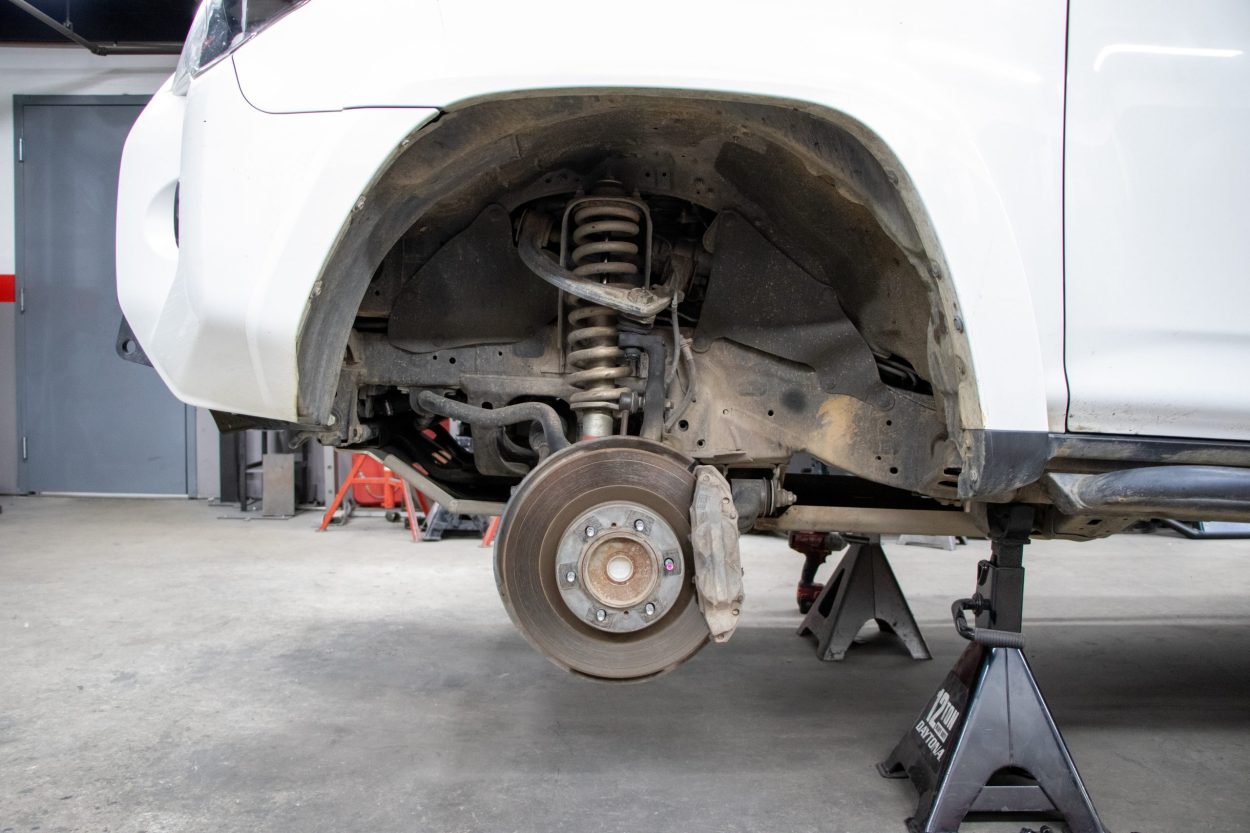
Next, remove the ABS bracket from the UCA and the bracket from the line. Dirt King provides rubberized wire clamps for this.
On the ball joint, remove the cotter pin followed by the castle nut. Support the knuckle to ensure the lines don’t get pulled. Lastly, remove the bolt holding the UCA to the chassis. I’ve read online that this can be the most challenging part due to the placement of other things within the engine bay. All it took was adjusting some of the wires inside the bay and the bolt could be easily pulled out.
Step 3. Install New UCA
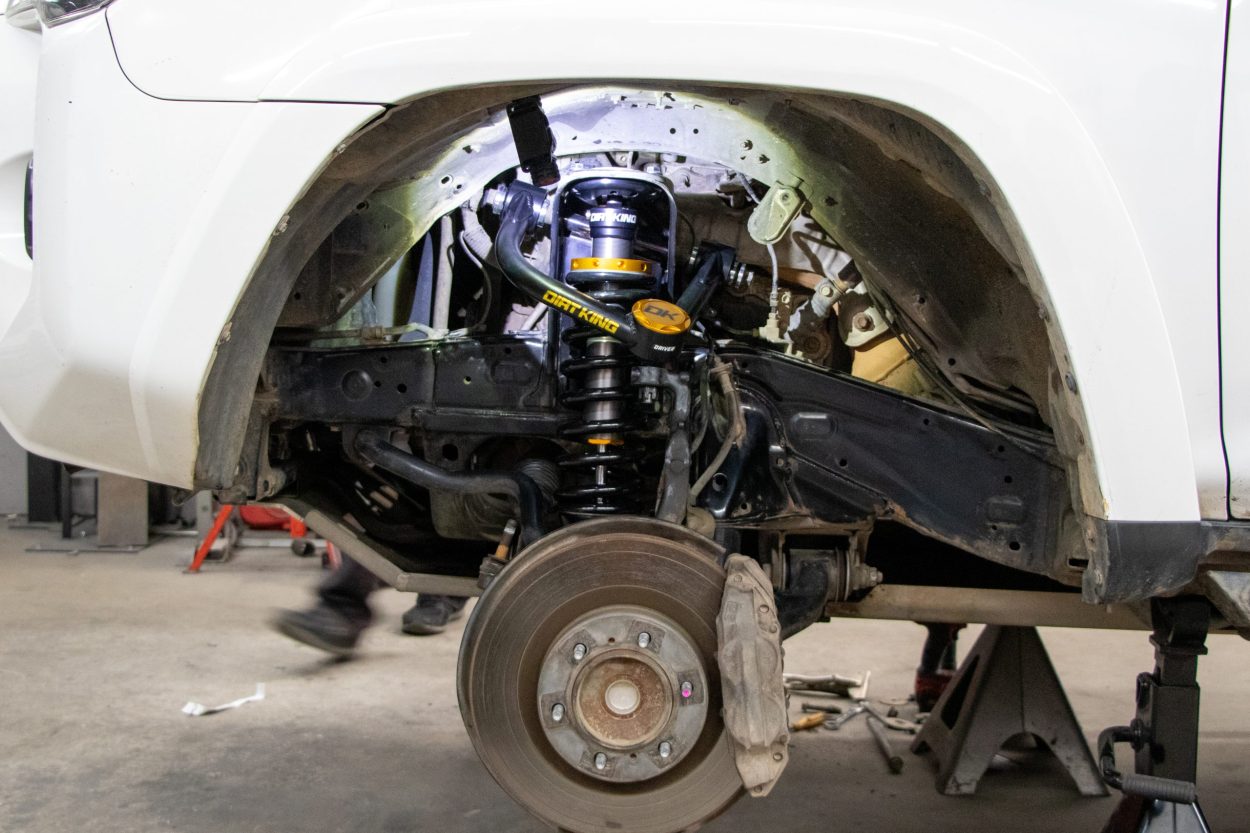
To install the Dirt King UCAs, perform the removal steps in reverse order. Replace the UCA bolt with the provided washers from Dirt King and torque the nut to 85-ft lbs.
Finally, install the castle nut, torque it to 81-ft lbs, and install the cotter pins. Install the wire clamps for the ABS, and if you removed the brake brackets torque to 24-ft lbs.
Step 4. Get An Alignment
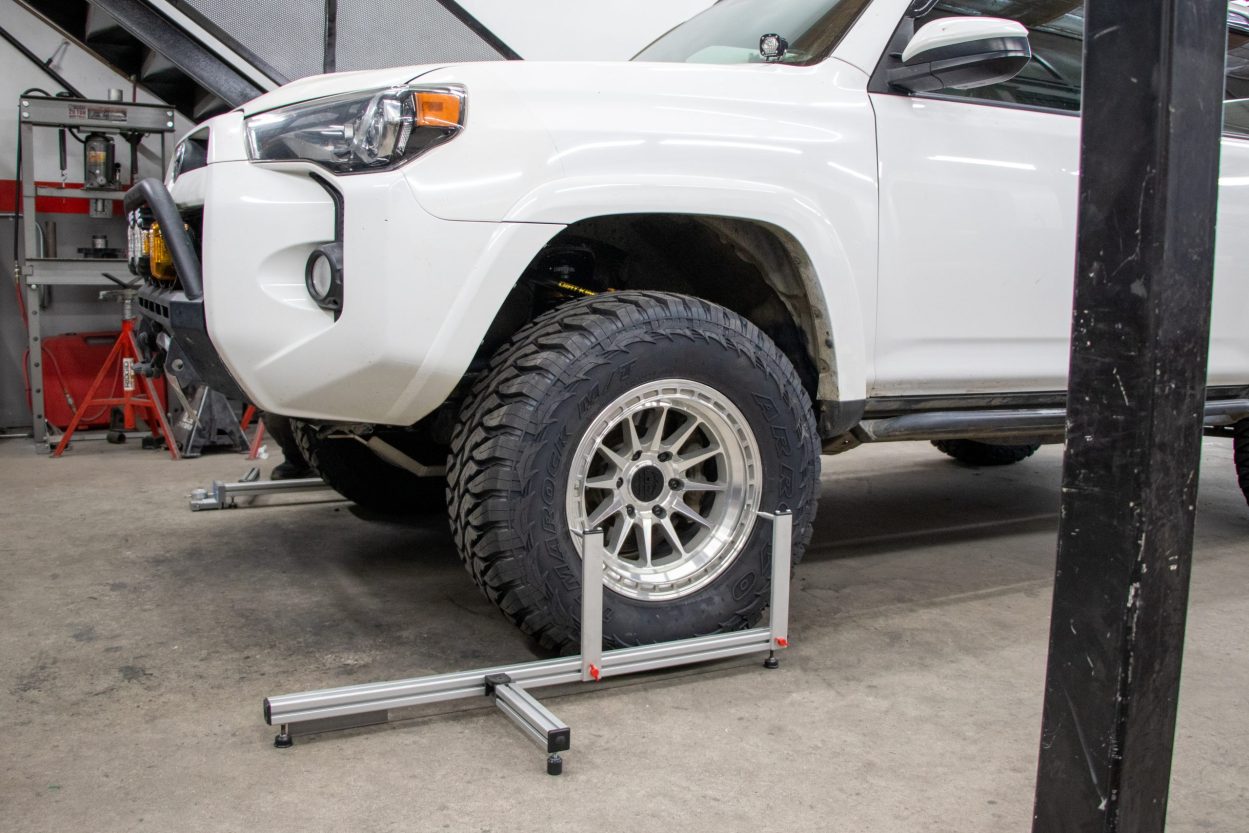
With everything completed, make sure to get an alignment done ASAP. The shop was kind enough to get the wheels pointing in the right direction for me, as I planned to visit my local alignment shop afterward.
Final Thoughts
I’ve had Dirt King’s 2.0 IFP suspension for a few thousand miles now and the difference compared to my previous suspension (Eibach) has been night and day. My previous UCAs, in particular, were probably my biggest mistake, having multiple warranty replacements within only a few years of ownership.
Right away, I noticed that the multiple noises I had been trying to track down with mechanics were gone. Paired with the 2.0 IFP shocks, my 4Runner has never felt smoother or more capable, both on and off-road. I’m not the most tame driver off-road, so I look forward to testing these components’ long-term durability.
Great write-up on the Dirt King UCAs! I recently upgraded my setup and the ride quality improved a lot. If anyone’s also exploring Bilstein or lift options, check out suspensionlifts.com — they’ve got solid gear and detailed info for Toyota builds.
I’ve had the same suspension on for a couple thousand miles also. Great product.
One new thing that tripped me up on my install, is they DK UCAs now come with a nylon locking nut instead of a castle nut. This tripped me up as I went to tighten the nut the whole shaft was turning and I couldn’t get it to tighten. After talking to DK, the bottom of the shaft is a hex 8mm, so you can put a wrench on that and then tighten the nut to spec.