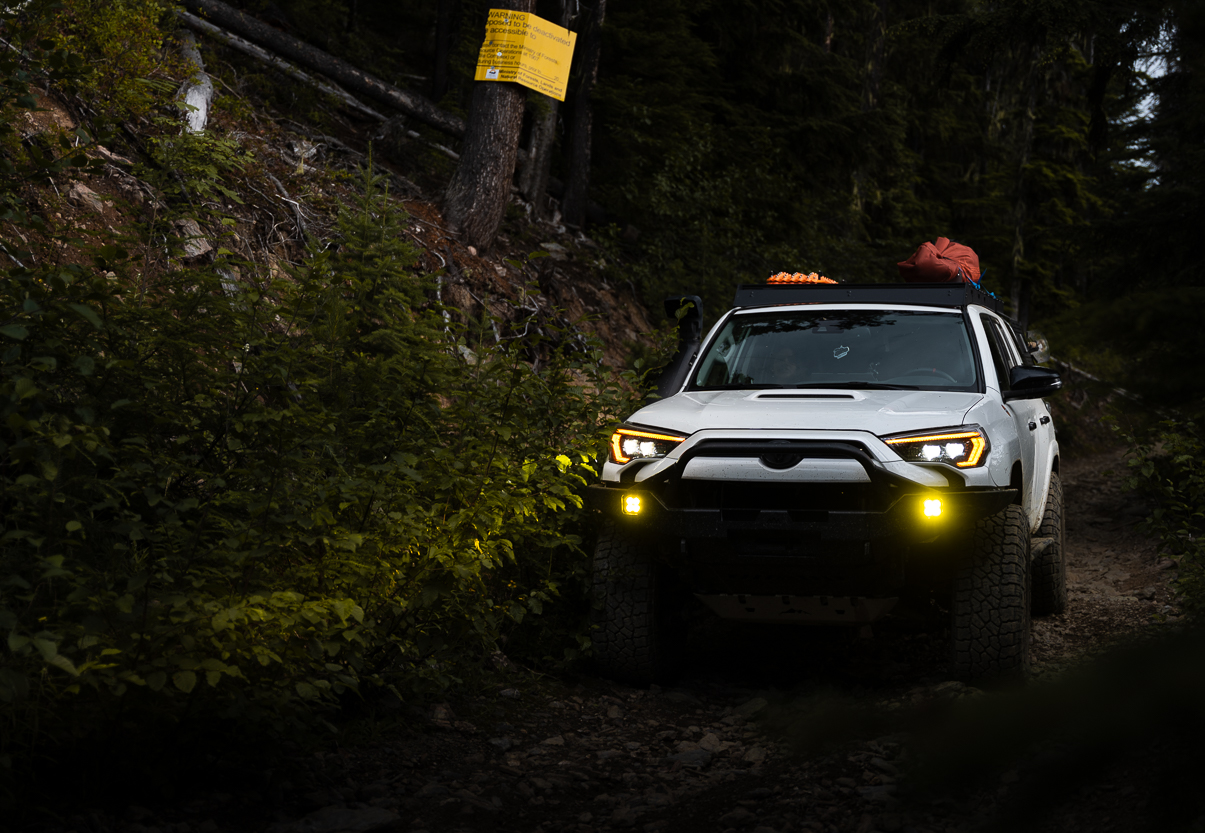
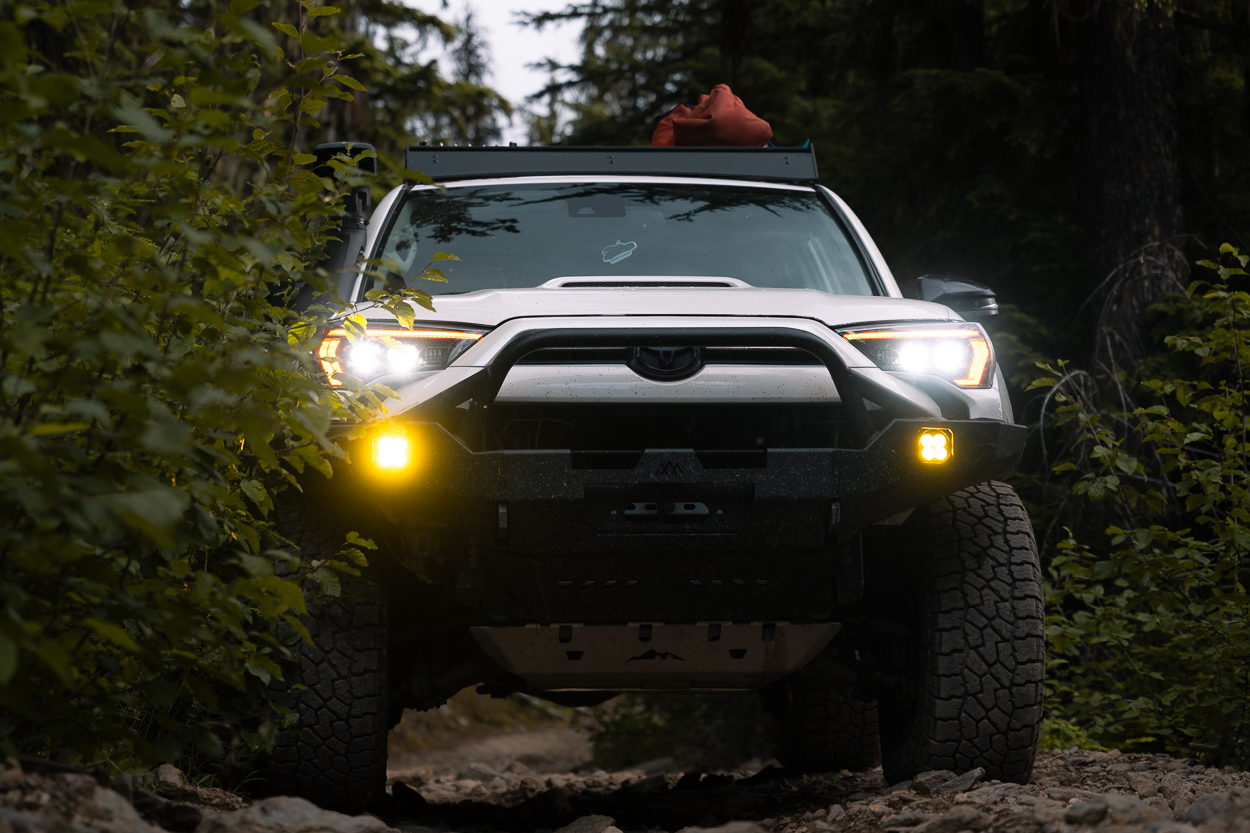
Upgrading the headlights is one of the most transformative modifications you can make to a 5th Gen Toyota 4Runner. Not only does it improve nighttime visibility, but it also sharpens up the front-end appearance. After years of dealing with dim OEM halogens, I installed the new Morimoto XB Evo LED Headlights — and the results were game-changing.
Below, I’ll cover the installation process (with a few notes for those with aftermarket bumpers), driver options, and share my review after testing them out on and off the road.
Table Of Contents
Why Should You Upgrade?
The factory halogens on the 4Runner have always been underwhelming, both in output and style. The XB Evo headlights are a direct plug-and-play solution that brings several benefits…
- Modern aesthetics: Sequential LED DRLs, sharp projector beams, and a sleek design that instantly updates the front end. DRLs can be switched from white to amber.
- Performance: A sharper beam pattern, brighter light output, and consistent color temperature compared to OEM.
- Durability: Fully sealed housings and OE-grade fitment built to handle daily driving and trail abuse.
- Driver flexibility: Morimoto gives you the option of two driver setups. Normal drivers, which are DOT/SAE compliant (street legal), and Supercharged drivers, which deliver maximum light output for off-road use only. This allows owners to tailor performance to their exact needs.
In short, they’re designed to look like they should have been OEM, but perform at a much higher level. with the flexibility to choose how far you want to push performance.
Tools Required:
- 10mm socket & ratchet
- Trim removal tool or flathead screwdriver
- Soft cloth or blanket
Step 1. Remove Radiator Cover Trim
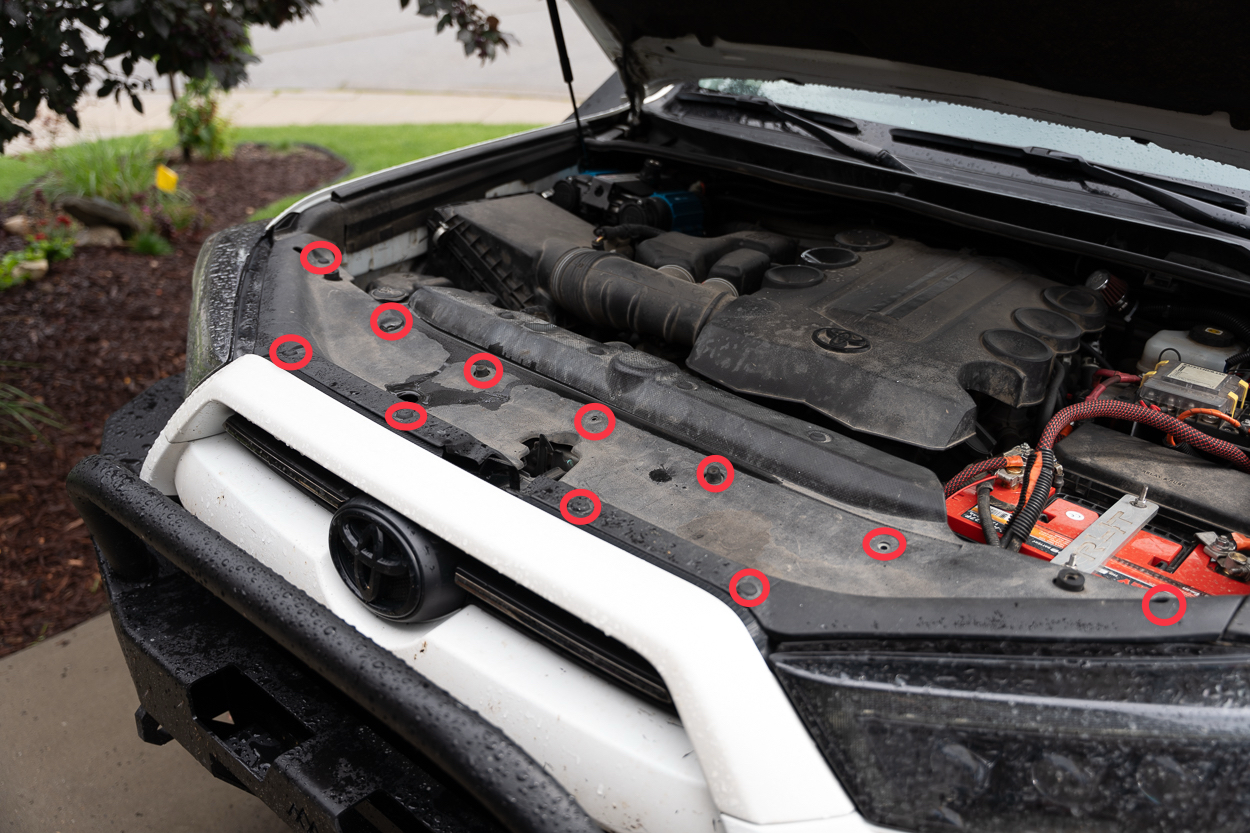
The first step is to remove the long plastic cover that sits directly above the radiator and grille. It’s held in with a series of plastic clips. Use a trim tool or flathead screwdriver to pop them out and lift the panel free. This gives access to the bolts and clips underneath.
Step 2. Loosen Upper Grille Section
Next, remove the clips that hold the upper grille in place. There are a handful across the top and bottom edges. On some models, such as those with a TSS sensor, there’s also a 10mm bolt in the center that needs to come out. The grille doesn’t need to be fully removed — just pulled forward slightly so you can reach the headlight bolts behind it.
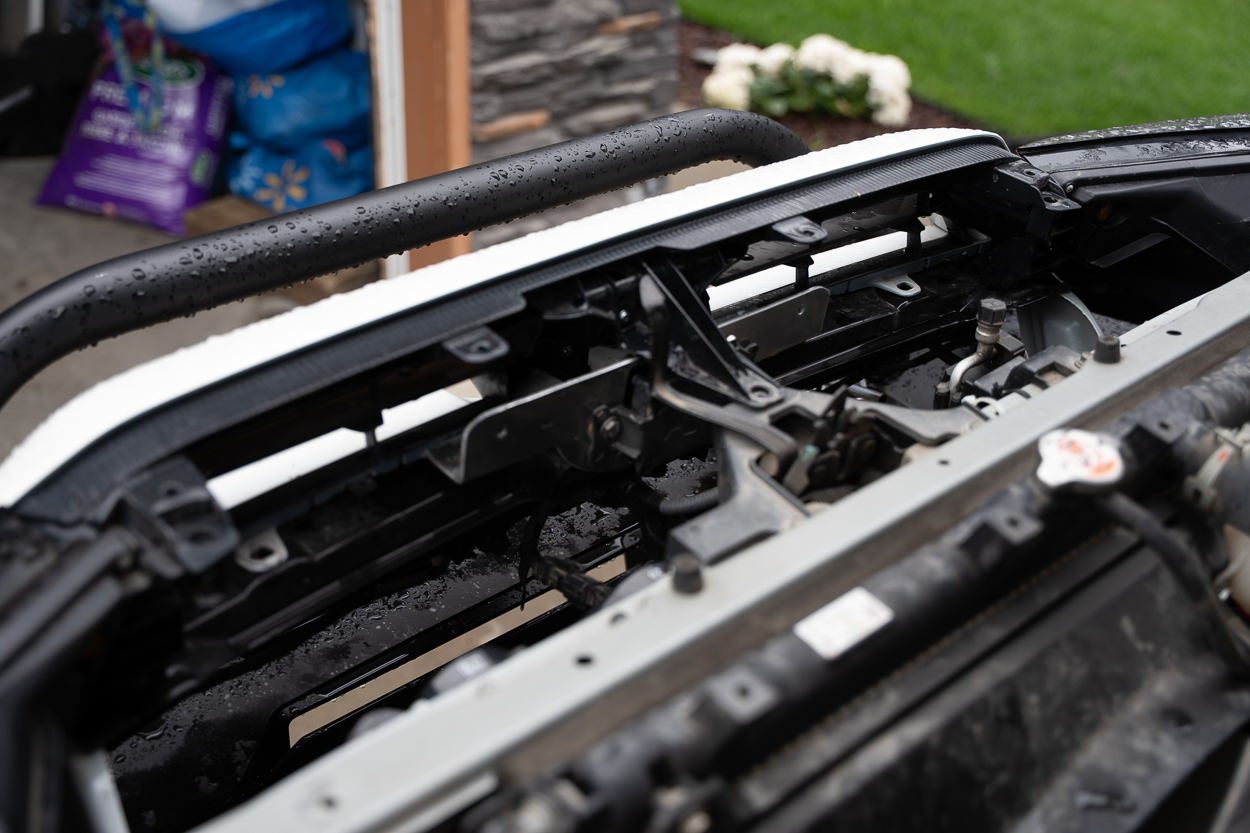
Step 3. Remove Bumper/Trim
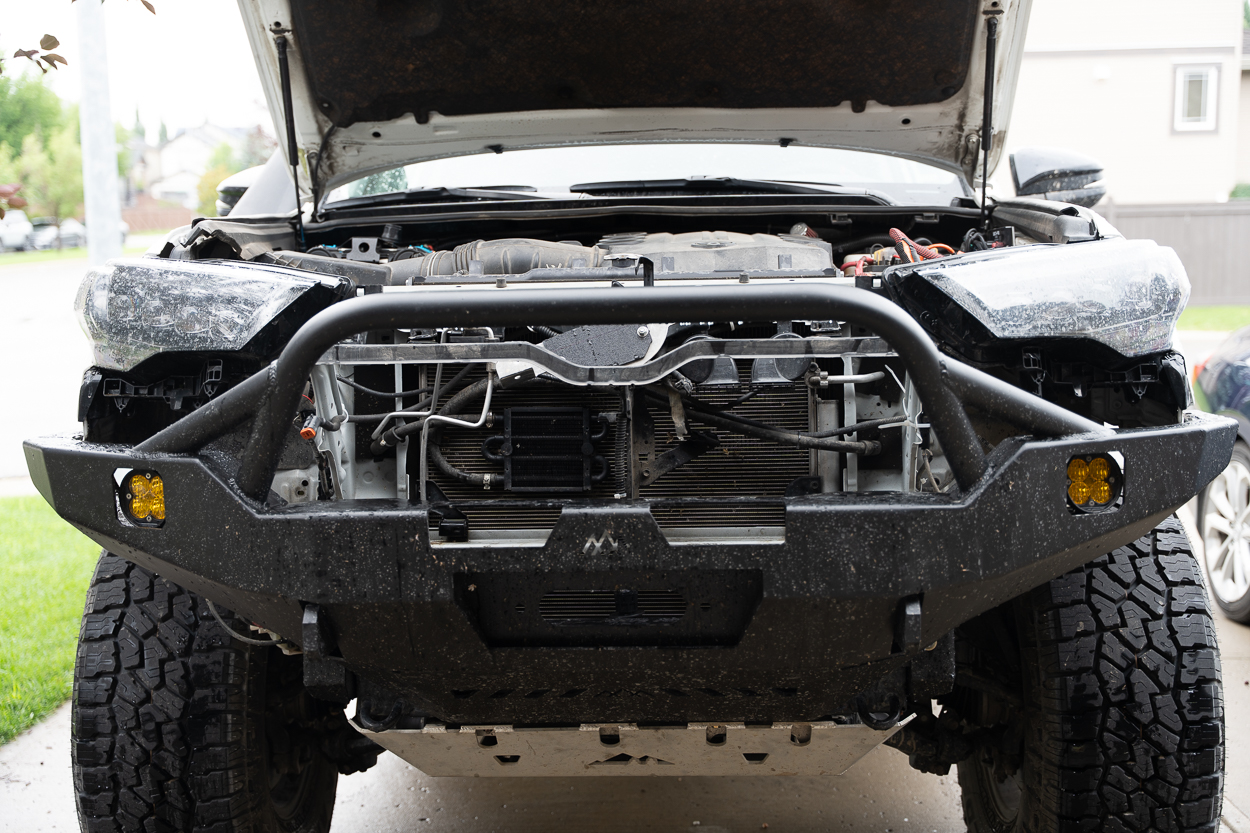
If you have the OEM front bumper, you’ll need to unclip and pull back the bumper cover. There are screws inside the wheel wells and several plastic retention clips along the bottom and sides of the vehicle. It can sound a little rough as the clips pop out, but that’s normal.
Since I was running an aftermarket bumper (Backwoods Adventure Mods), I only needed to remove the top portion of the OEM bumper trim, which saved me time. Your process may vary depending on the setup.
Step 4. Unbolt Factory Lights
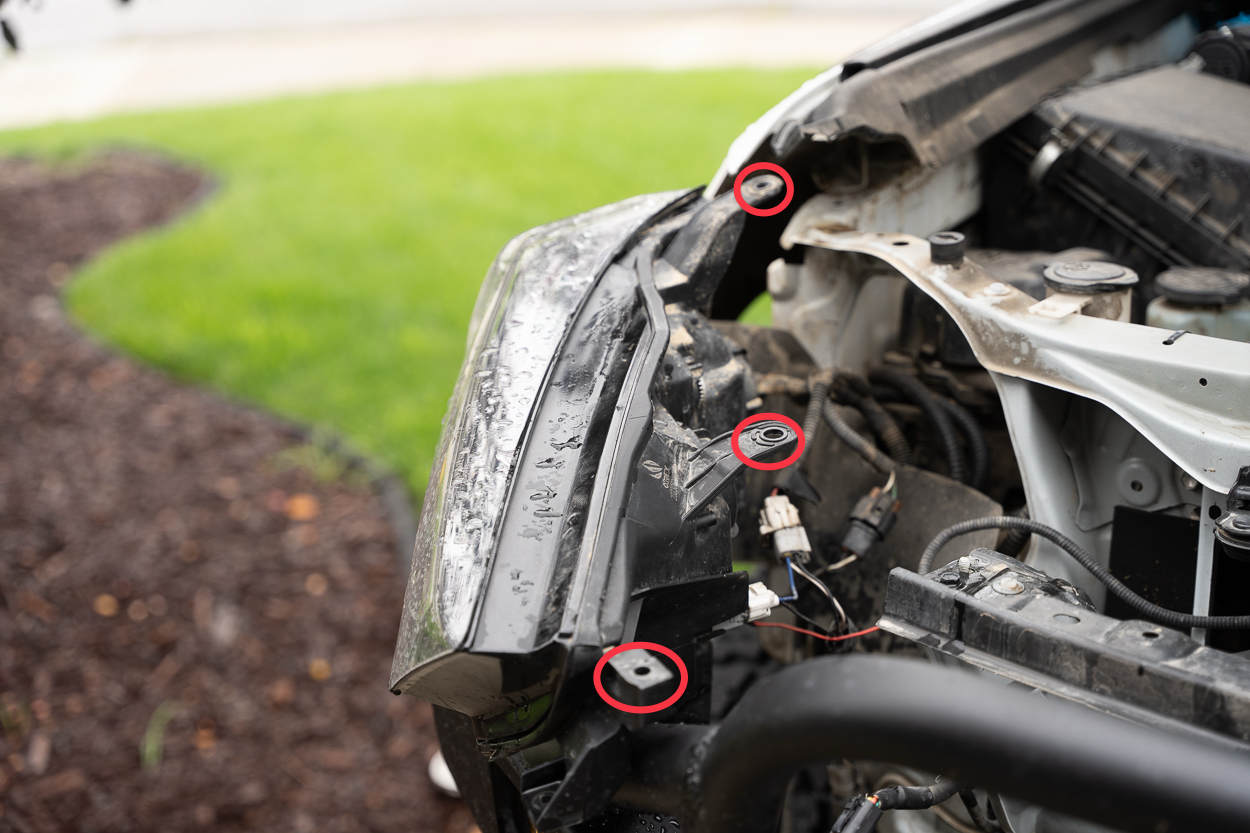
A series of 10mm bolts secures each headlight assembly. Two are on top, one is tucked near the fender, and another is behind the grille area. A long extension or screwdriver makes access easier. Once the bolts are out, carefully pull the housing forward.
Step 5. Disconnect Wiring Harnesses

The OEM headlights are plugged in with several harnesses for the low beams, high beams, and signal/marker lights. Unplug each connection before fully removing the assembly. A second set of hands helps here to avoid dropping or scratching anything.
With the bolts out and harnesses disconnected, you can now slide the stock headlights free of the body. Set them aside on a soft cloth or blanket to prevent scratches.
Step 6. Transfer Brackets
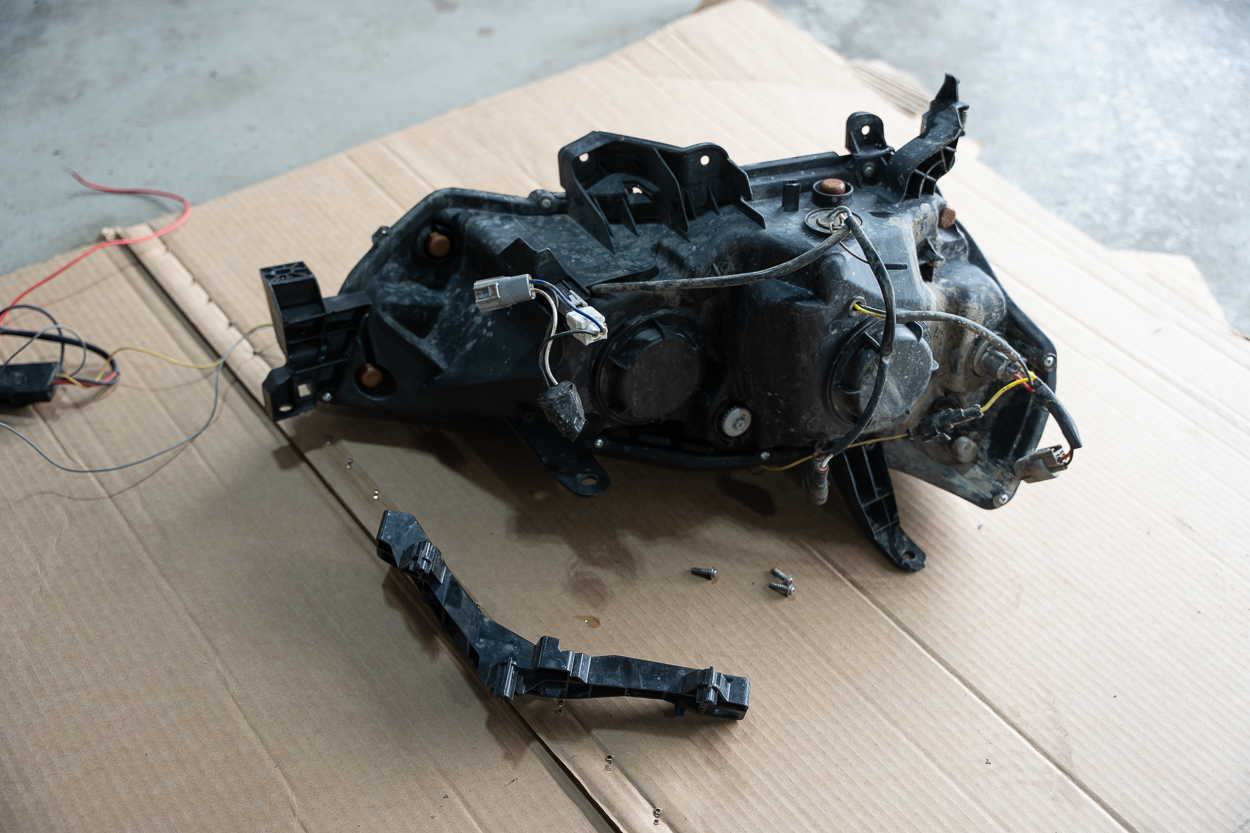
The factory headlights use small stability brackets that need to be swapped onto the Morimoto housings. Remove the screws from the old assemblies, transfer the bracket, and secure it onto the new XB Evos.
Step 7. Install & Connect New Lights

Position the new XB Evo headlight into place and reconnect the main harness. The kit is plug-and-play, so no splicing or wiring modification is required for the primary connections. Morimoto supplies a fuse tap wire for the DRLs. I tapped this into the INJ engine bay fuse, which provides power only when the ignition/accessory is on. This ensures the DRLs function correctly without draining the battery when the vehicle is off. Secure the headlights with the same 10mm bolts you removed earlier. Repeat for the other side.
Turn on the ignition and cycle through the DRLs, low beams, high beams, and turn signals to make sure everything works as intended. This is much easier to troubleshoot now than it was after the bumper was back on.
If you removed the full OEM bumper, carefully align it back into place, ensuring all clips snap securely into place. Reinstall bolts and clips, and replace the radiator cover. If you only removed the plastic upper trim like I did, reinstall that section and secure it with clips/bolts.
Step 8. Adjust Beam Pattern
The XB Evo headlights include adjustment screws for fine-tuning vertical and horizontal aim. Use a flathead screwdriver or an 8mm wrench to align the beam pattern properly against a wall or garage door. This ensures the best visibility without blinding oncoming traffic.
Driver Options: Standard Vs. Supercharged
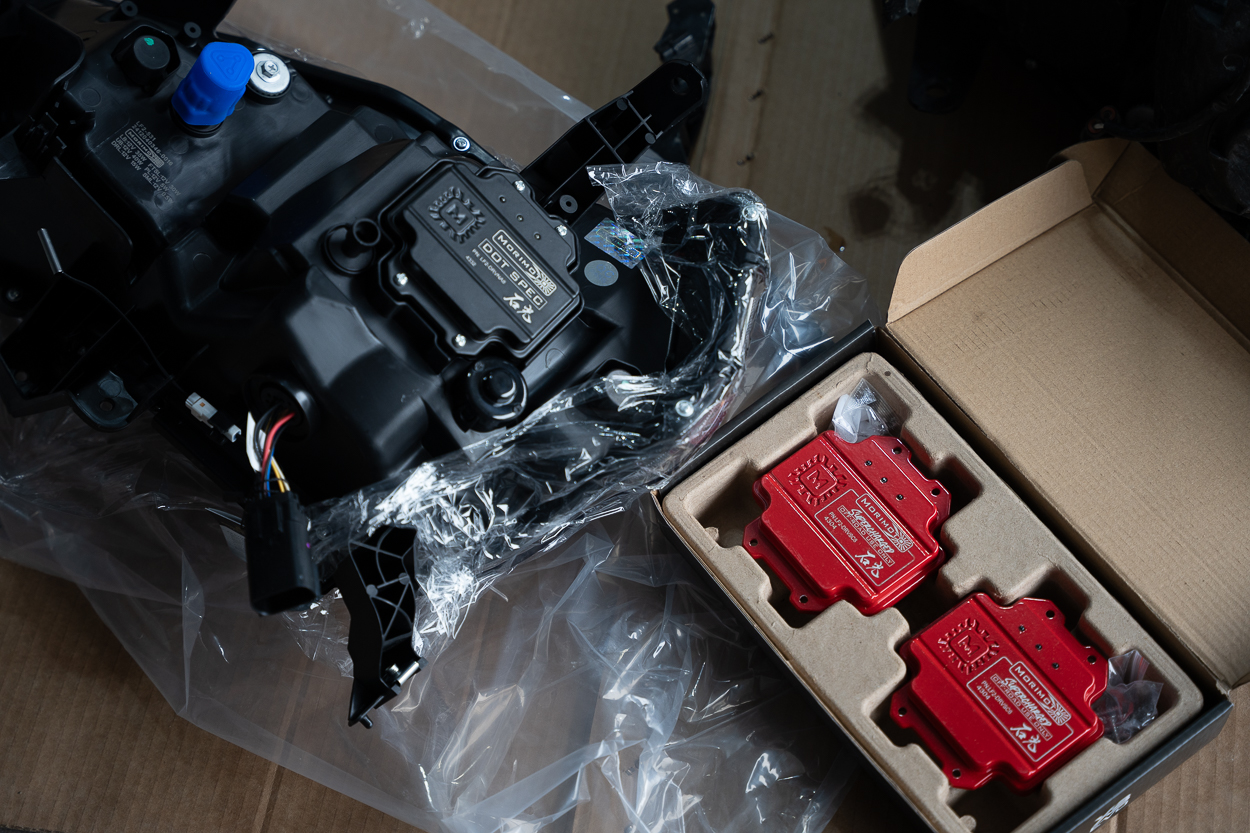
One of the standout features of the Morimoto XB Evo headlights is the ability to choose between two driver options, depending on how you plan to use your 4Runner.
Normal Drivers (Street Legal)
- Designed for DOT and SAE compliance, making them fully street legal.
- Provide excellent light output with a sharp beam pattern suitable for daily driving, highway cruising, and city use.
- Ideal for most 4Runner owners looking for a reliable upgrade with no compromises on legality.
Supercharged Drivers (Off-Road Use Only)
- Maximize the XB Evo headlights’ potential, delivering even greater light output.
- Perfect for off-road adventures, overlanding trips, and technical trails where maximum visibility is critical.
- Not street-legal due to high brightness levels, so they should be reserved for off-road or private property use.
They do make a big difference, and I highly recommend you add them.
First Impressions
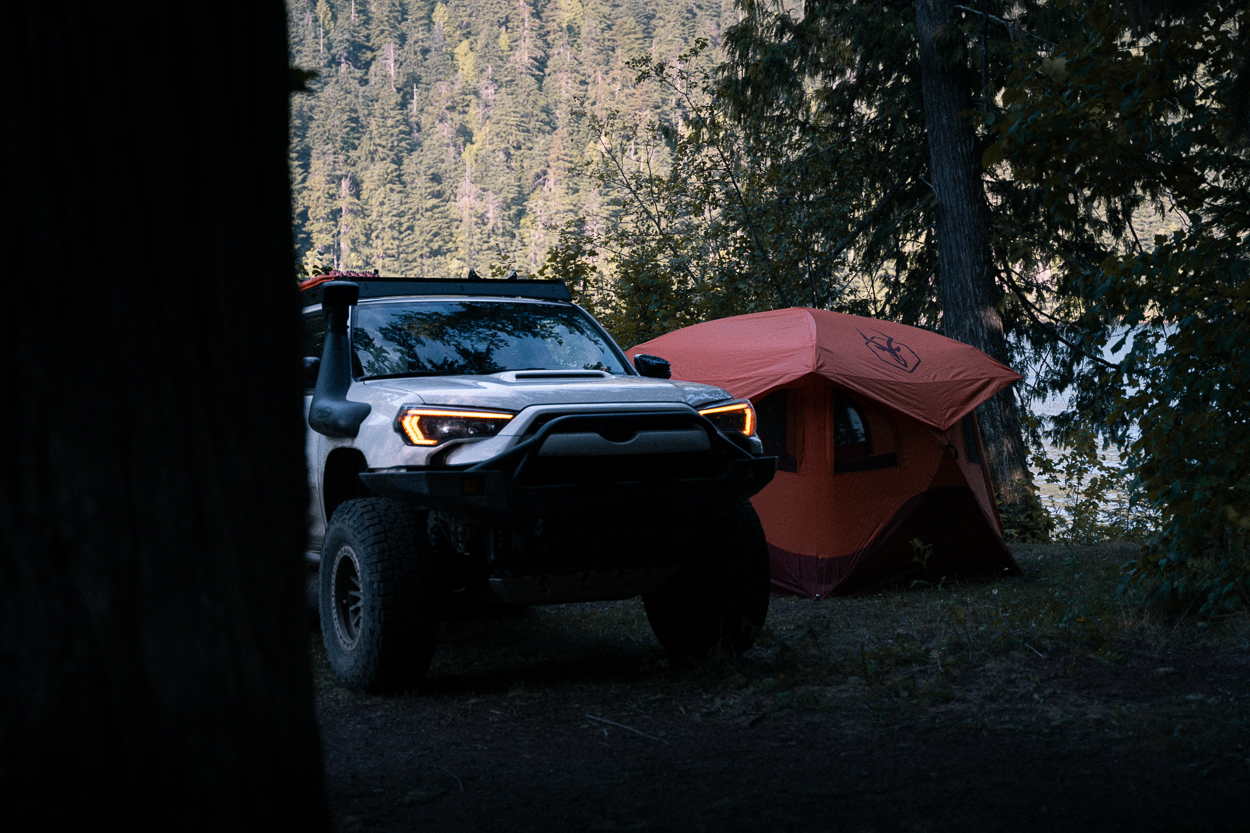
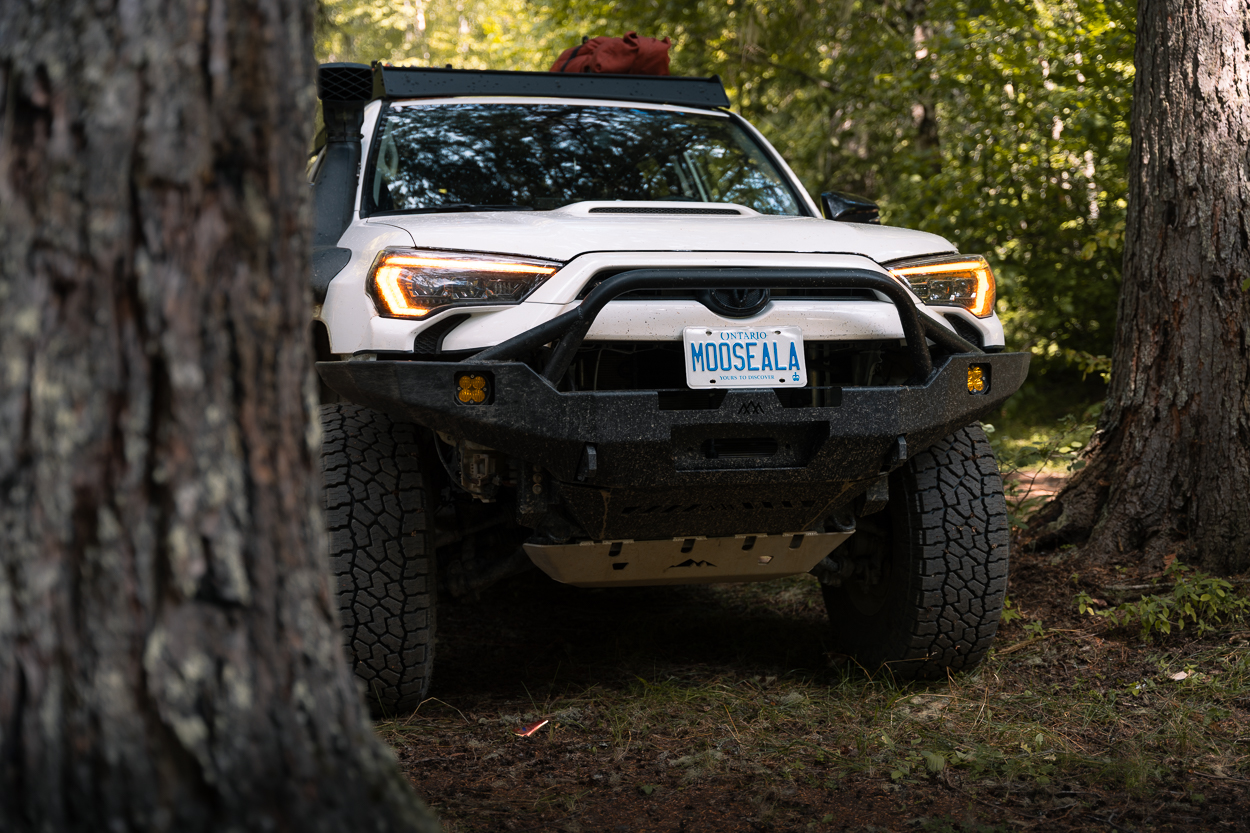
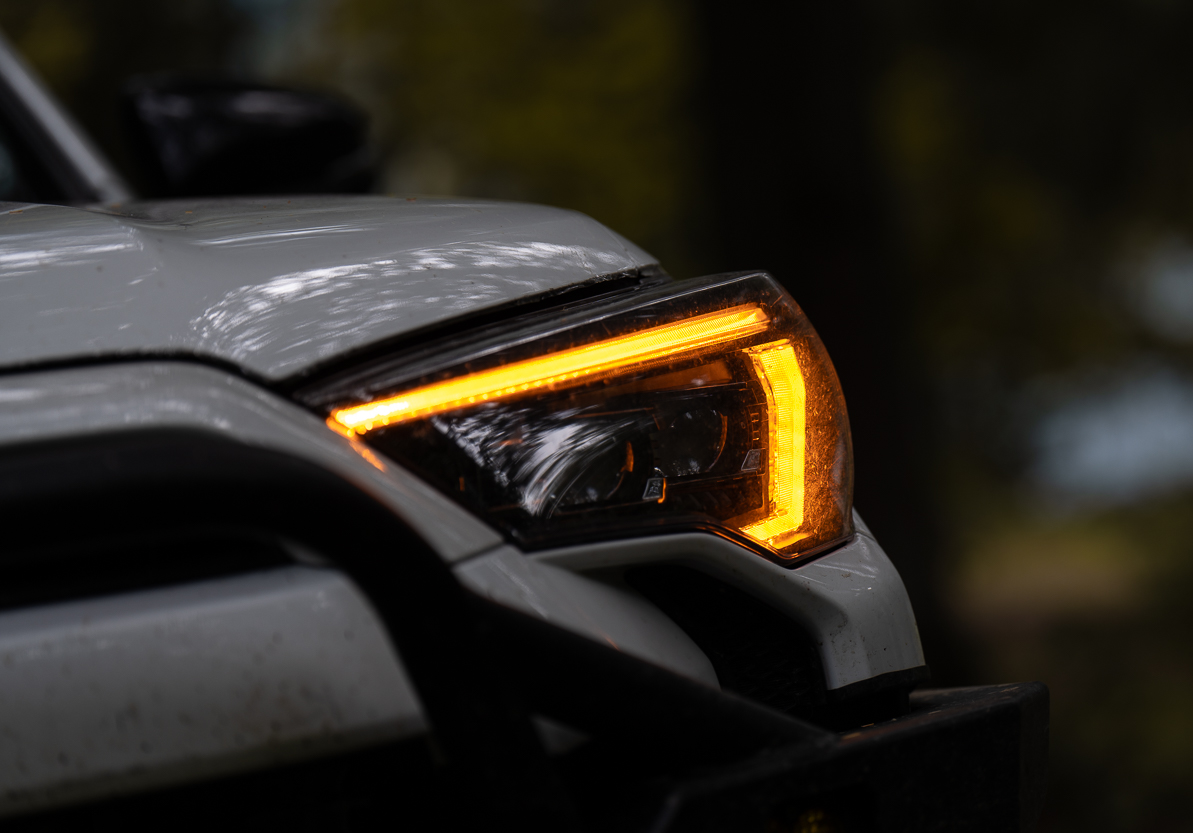
Right out of the box, the Morimoto XB Evo headlights make a strong impression. The build quality feels premium, with solid housings, crystal-clear lenses, and an OEM-like fit that gives confidence before even starting the installation. The design is modern and aggressive, featuring sharp LED projectors that resemble those found on a high-end SUV.
Once powered on, the DRLs are bright and crisp, instantly transforming the 4Runner’s front end. Compared to the stock halogen headlights, the difference is night and day. Both in terms of style and functionality. The sequential turn signals are smooth and eye-catching, adding a unique touch that sets the rig apart on the road.
Overall, the XB Evos appear to have been designed specifically to elevate the 5th Gen 4Runner, delivering both aesthetics and performance in one package.
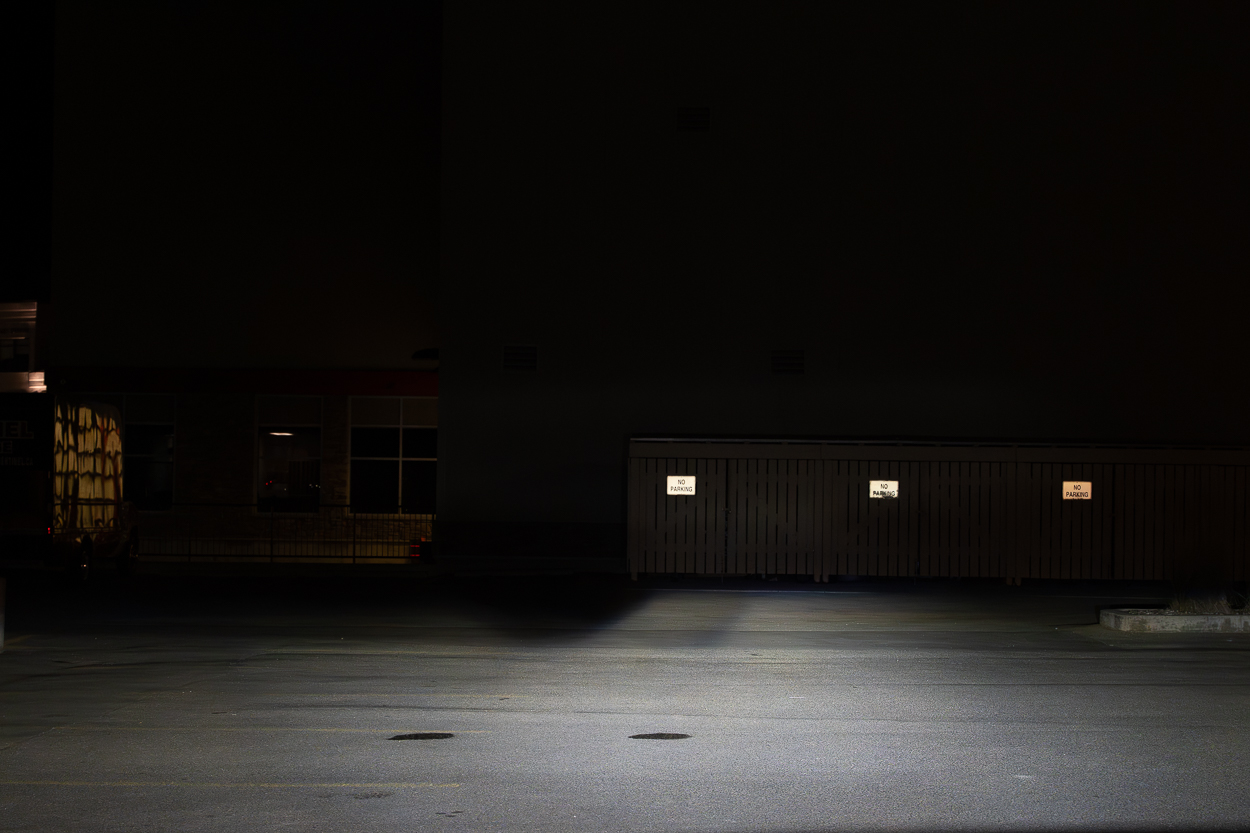
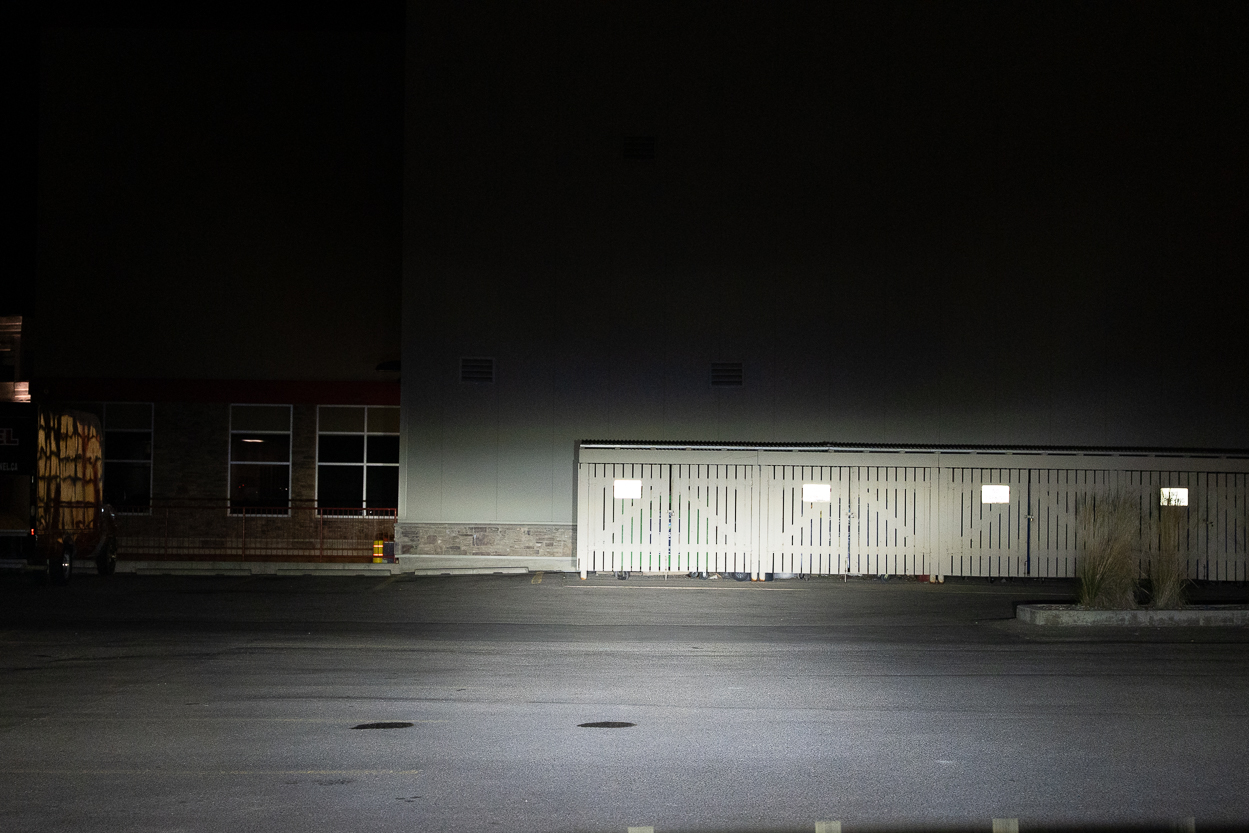
Beam Pattern & Cutoff

Low Beams (Open Area)
High Beams (Open Area)
Low Beams (Narrow Alley)
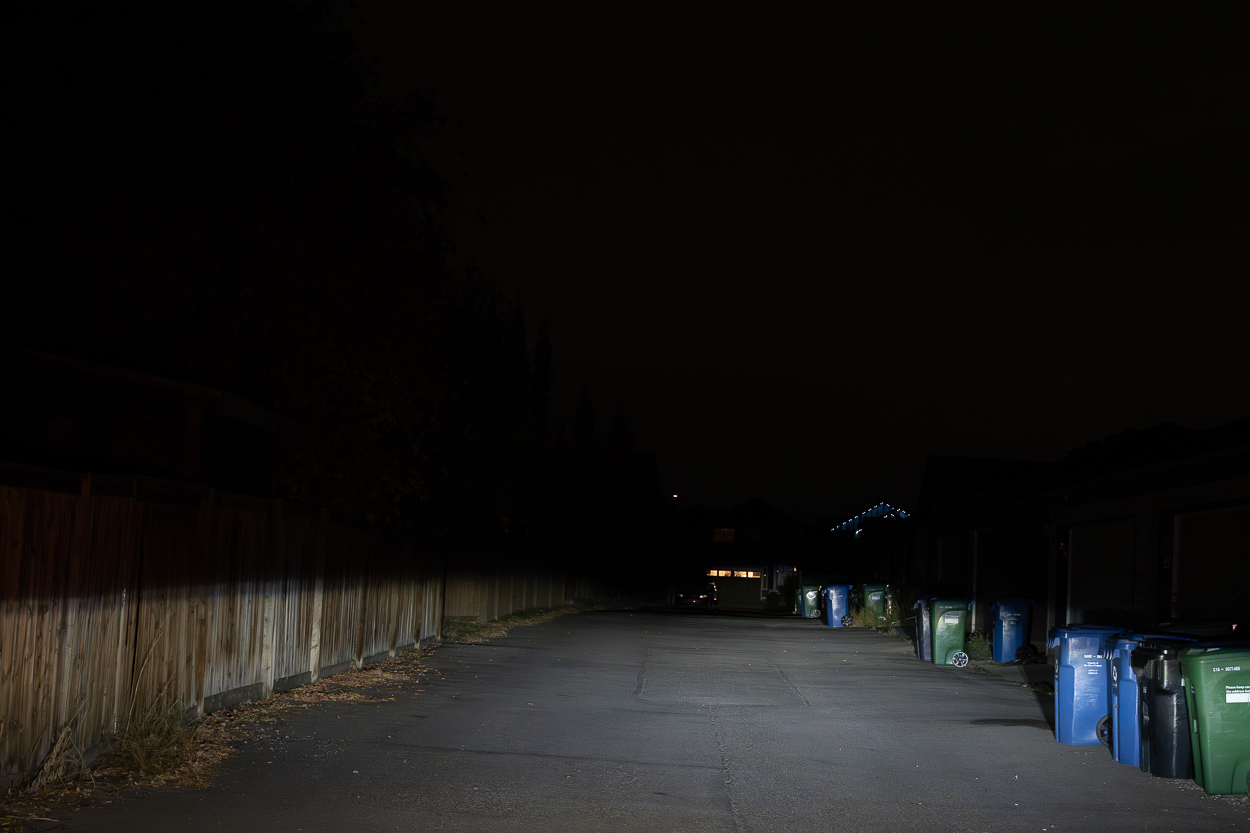
High Beams (Narrow Alley)

Final Thoughts
The Morimoto XB Evo LED Headlights are one of the best upgrades you can make to a 5th Gen 4Runner if you value both function and form. While installation requires removing the bumper (or at least the top trim), the process is straightforward, and the results are well worth it. With the choice between Normal and Supercharged drivers, owners can tailor their setup to match how they use their rig. Whether as a daily driver, a weekend trail machine, or an overland build.
After testing them on highways, back roads, and trails, I can confidently say that these headlights transform nighttime driving. They deliver a sharper, safer, and more modern driving experience – and they look incredible doing it. For anyone considering this upgrade, the XB Evo LEDs strike the perfect balance of style, performance, and reliability.