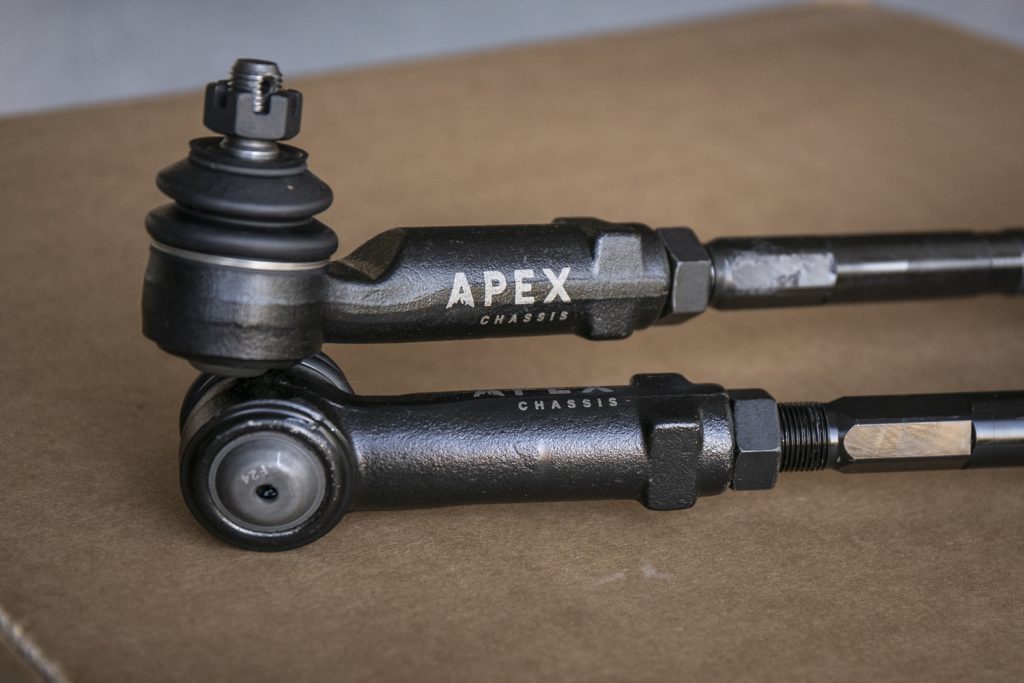
The Tacoma and 4Runner platforms have never seen a factory-length tie rod with ball joints that is larger in diameter all the way around—until now.
Most aftermarket options are pieced together using a wide range of parts: larger outer ball joints from bigger models (like the Land Cruiser and Tundra), heim joints, custom-length center shafts and inner joints, and/or clevis end kits. No company has ever offered a ball joint tie rod packaged as an OEM replacement “upgrade kit” for the 5th Gen 4Runner until Apex Chassis.
Sure, there are a few kits available that include stainless rods, heim joints, through bolts, misalignments, and clevis end kits. However, most of these kits are designed for double shear and/or long travel. Not many companies provide upgrade kits for factory-length setups, aside from JD Fabrication and a couple of others. While these other tie rods are incredibly strong, they may be overkill and overly complicated for some builds, as most require double-shear spindle mounts. Additionally, while heim joints are very strong and deliver impressive off-road performance, they aren’t ideal for daily driving comfort and require more maintenance.
Ball joints are generally more comfortable than heim joints because they offer smoother, more controlled articulation with less vibration, making them better suited for everyday driving platforms.
I’ve run both ball joints and heim joints over the years. After years of abuse, my heim joints still drive well, but they clunk and click when turning. Heims are great for those looking to push their rigs off-road, while ball joints are better for those who prioritize comfort and longevity. I like both for different reasons, but it all comes down to personal preference.
Apex offers a solution for those who want stronger factory-length rods, aren’t running double shear, and seek a more comfortable ride. Another huge benefit of Apex is that it’s just easy. It’s a plug-and-play kit that you can install in your driveway in about an hour.
Note: These will also work on the FJ Cruiser. Check their site below for fitment confirmation.
Find It Online:
- Apex Tie Rods (2010-2024): Check Price
Table Of Contents
Apex Vs. Stock

Before we start the installation, I wanted to show you the size difference between the factory tie rods.
From the top to the bottom:
- Stainless Steel: 1″ shaft tapered to 1 1/4″ with Heims
- Apex Chassis: 21mm (.8″) center shaft with 31.9mm (1.25″) outers
- OEM: 17.9mm (.7″) center shaft with 23.7mm (.9″) outers
- Moog: 17.9mm (.7″) center shaft with 23.7mm (.9″) outers
Step 1. Set Truck on Jack Stands
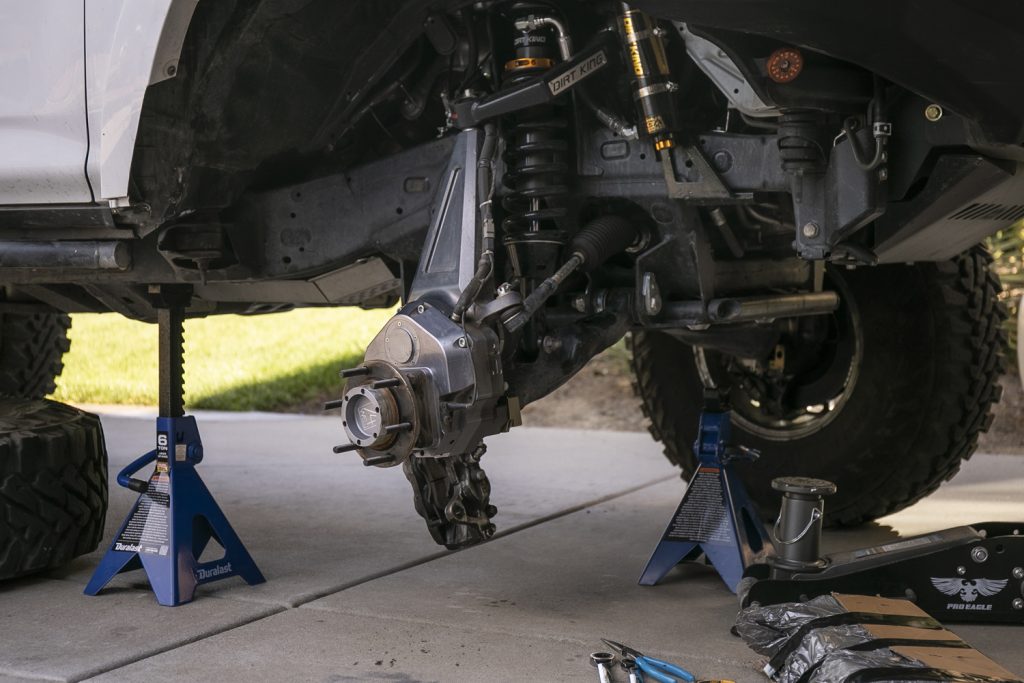
Set your truck on jack stands.
Step 2. Remove Inner Boot Clamp
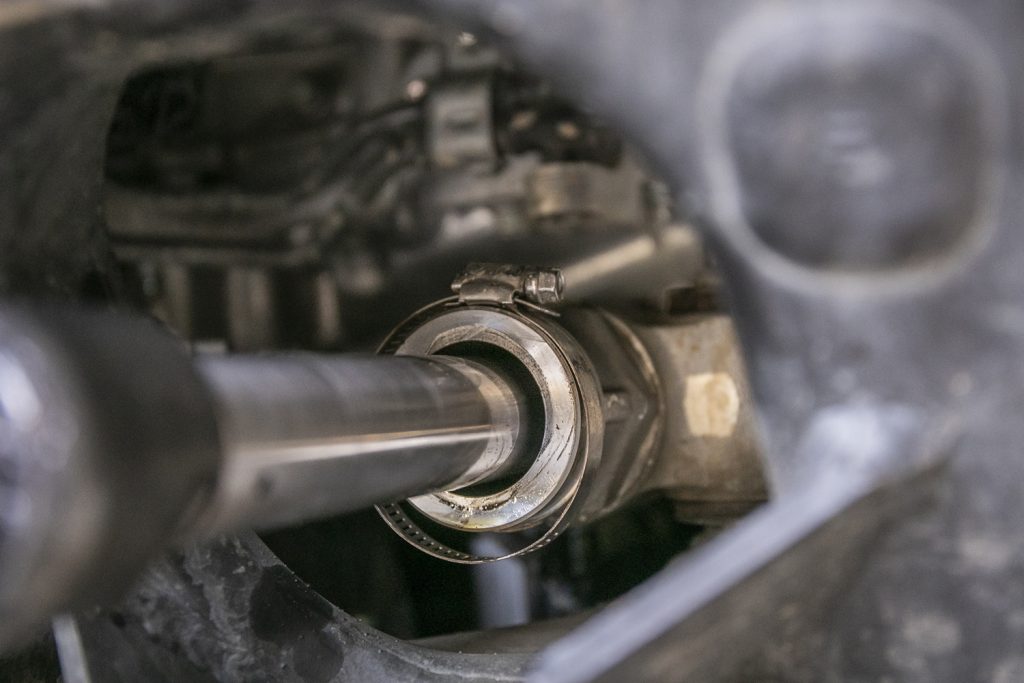
You can reach the inner boot clamp from the front of the vehicle just above the cross-member. Loosen with the clamp with a flathead screwdriver or socket.
Step 3. Remove Outer Boot Clamp
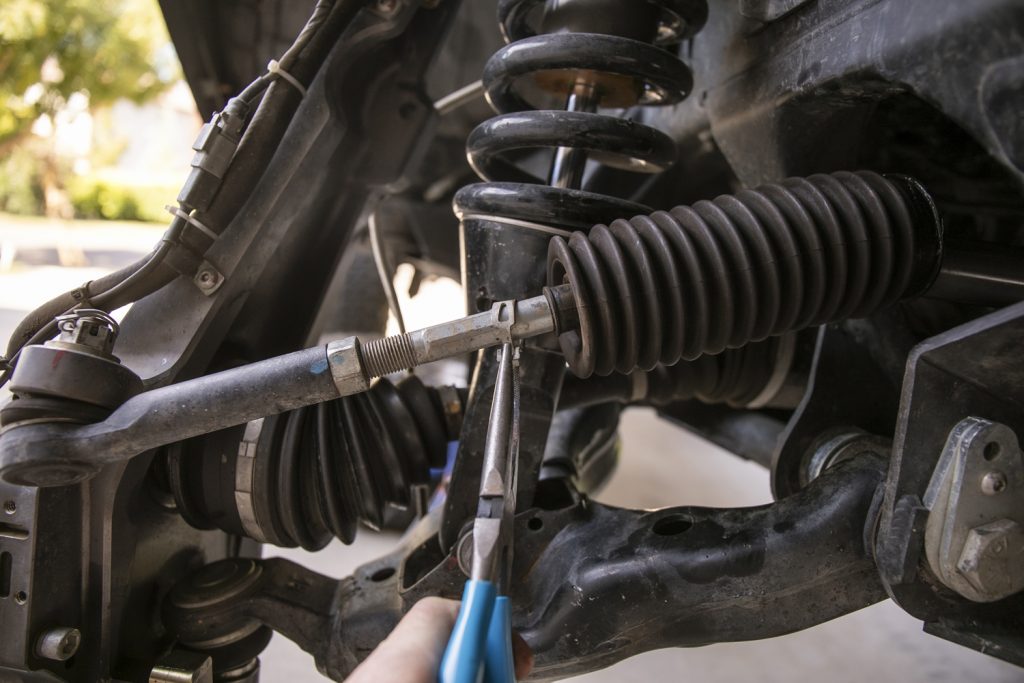
Remove the clamp, then slide the boot down and off to access the inner joint.
Step 4. Measure Length
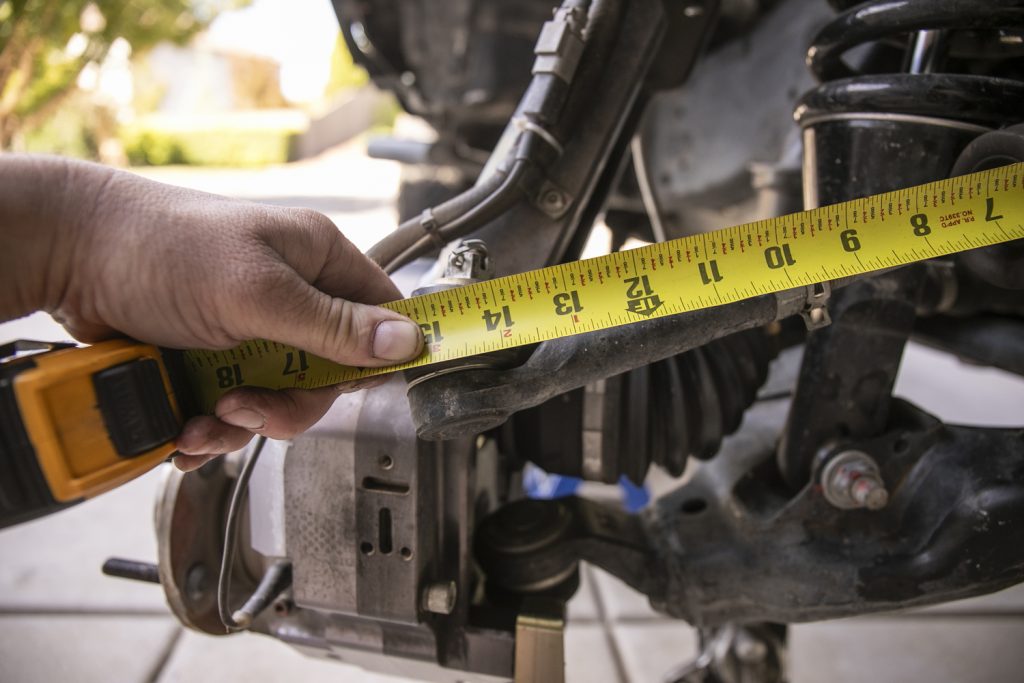
Start by measuring where the center of the ball stud connects to the knuckle then to the end of the inner tie rod that connects to the rack. You’re measuring from the edge of the inner joint to the center of the ball stud on the spindle. Write down this measurement for later use. My measurement was around 14.5″ however yours can be different.
Step 5. Remove Cotter Pin
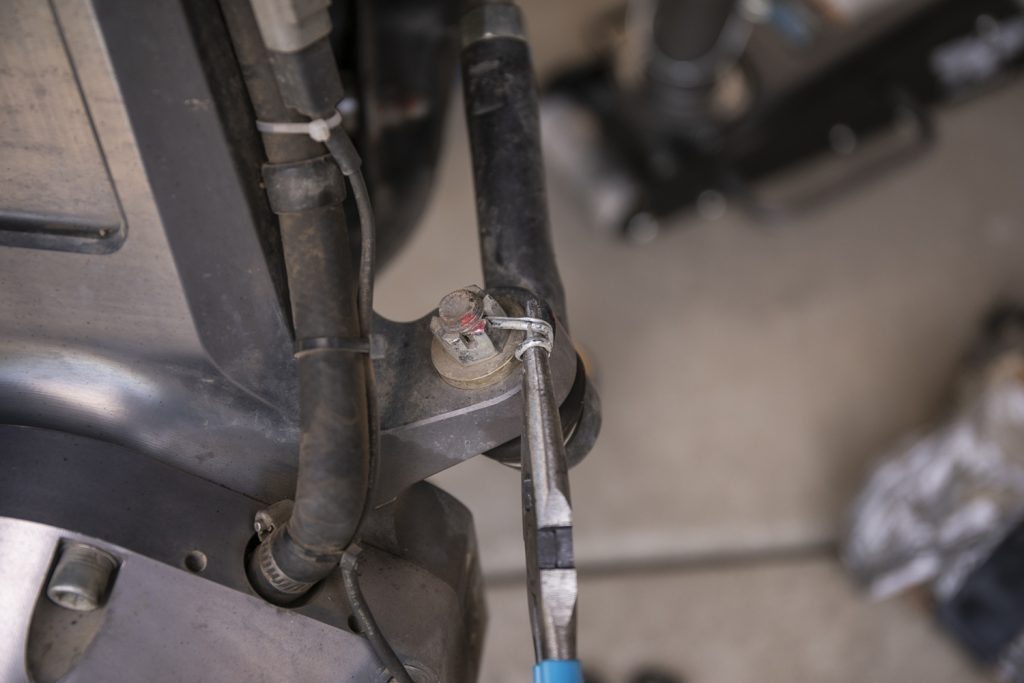
Remove the cotter pin from the castle nut and ball stud.
Step 6. Remove Castle Nut
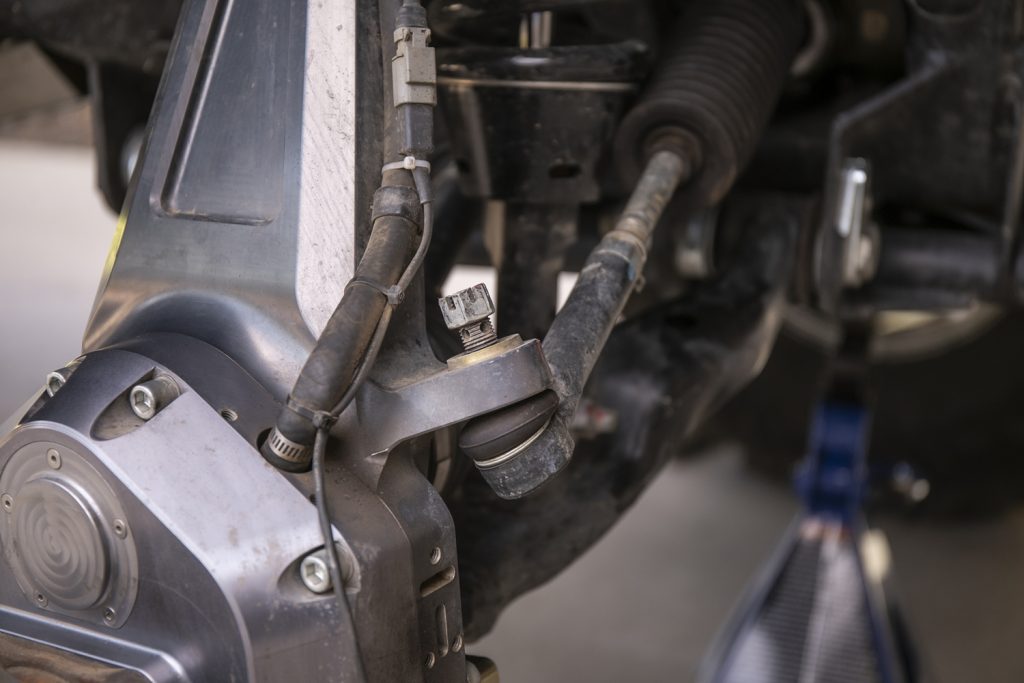
Remove the castle nut.
Step 7. Remove Ball Joint
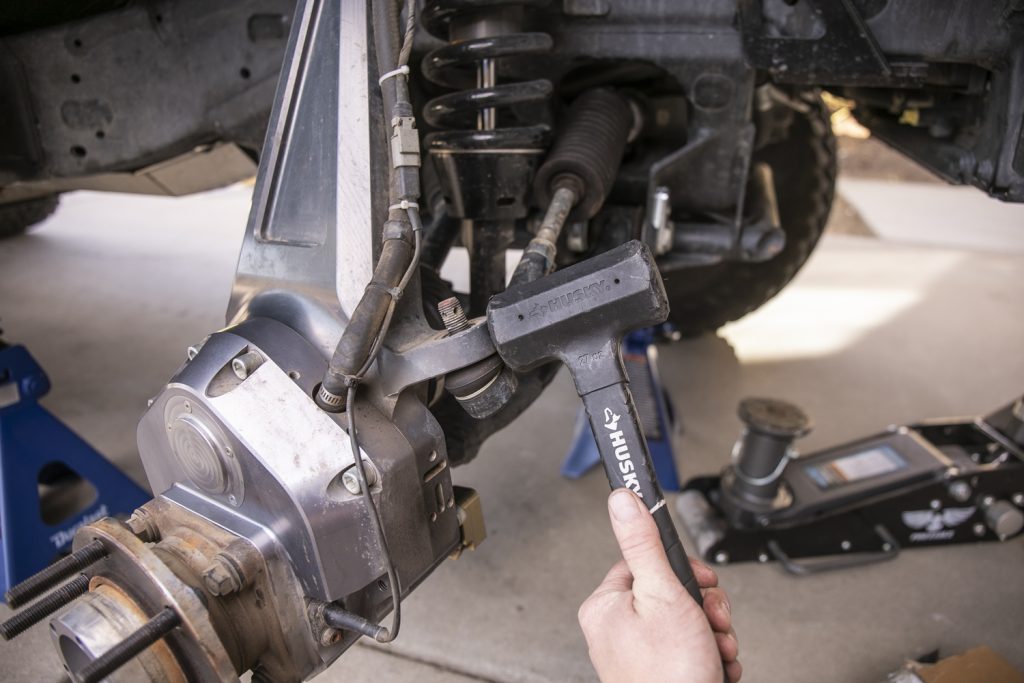
Disconnect the outer tie rod from the knuckle and remove it. You can do this one of two ways, either use a ball joint separator tool or a sledgehammer. I was unable to use either since I have aluminum portal boxes. Hitting the aluminum with a hammer would destroy the boxes and I don’t have a ball joint separator.
I tried to hit it with the dead blow but it wasn’t working. No surprise. I ended up using a punch on the ball stud and hitting the punch with a hammer. With this method, you risk destroying your current ones but it worked. Most of you guys probably aren’t running portals so just hit the side of your spindle with a hammer and it should knock the joint loose.
Step 8. Loosen Jam Nut & Remove Outer
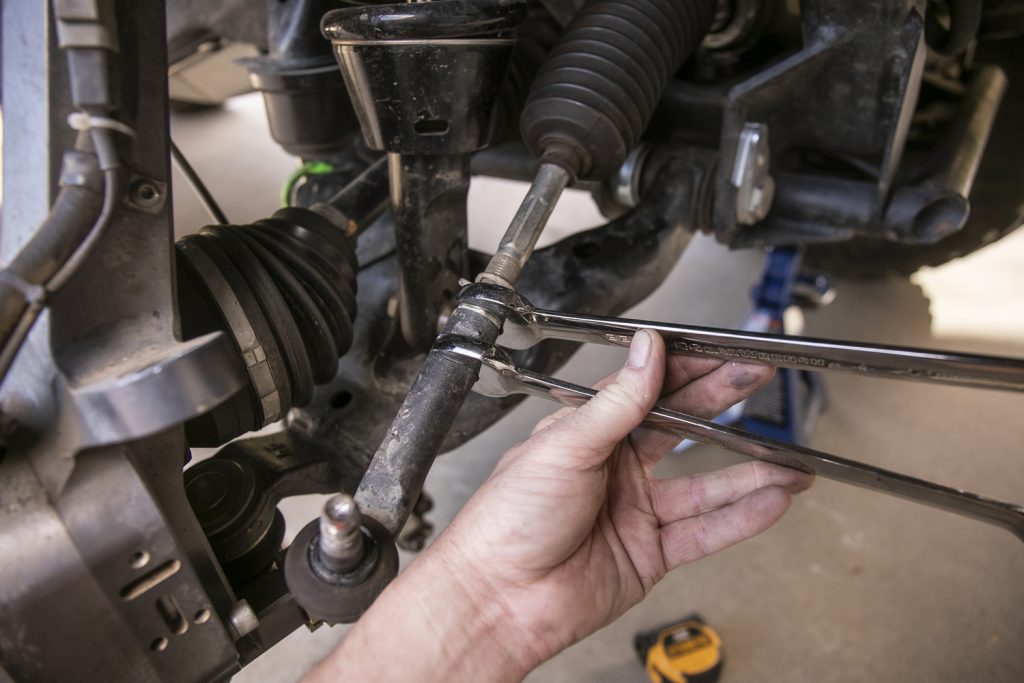
Loosen the jam nut and the outer rod end with a couple of open-end wrenches.
Step 9. Remove Inner Tie Rod
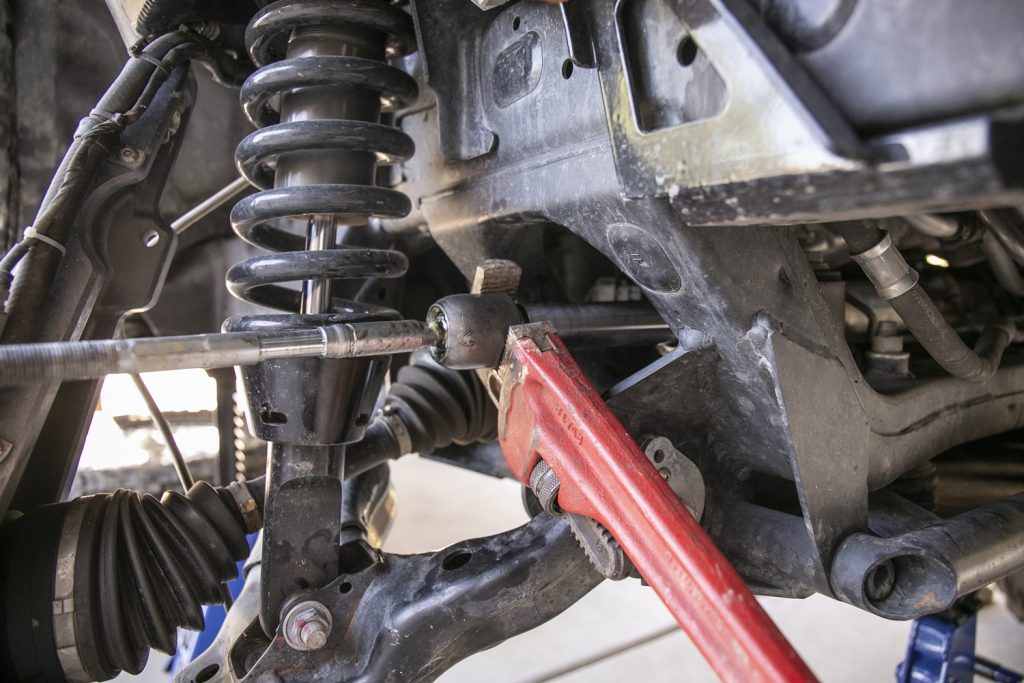
I did buy the Lisle 45750 Inner Tie Rod Tool which many people have claimed to use for the 5th Gen 4Runner – but it did not work on my 2023 SR5. The inner was too big to fit inside the tool so the attachments would not reach the lip on the inner rod end. I ended up returning it to Auto Zone.
I did see a comment on the OEMTOOLS 27178 Master Inner Tie Rod Removal Tool Set on Amazon that said it worked for a 5th Gen. You may want to try that tool.
I defaulted to the old trusty pipe wrench and it did the trick. If you have an adjustable wrench that is larger than 1.5″, that will work as well.
You will need to start your truck and turn your tire full lock so the steering rack pushes out the inner rod as far as possible.
After you turn full lock, shut your truck off and proceed with the removal and re-install of the new ones.
Step 10. Install Apex Inner Rod
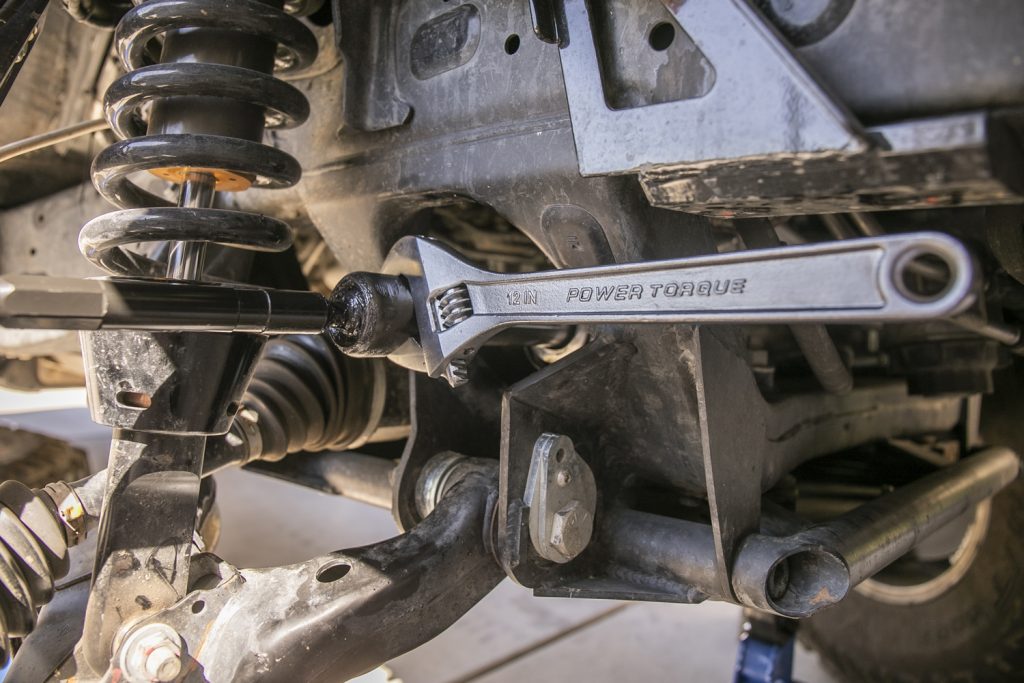
Disassemble the new APEX assembly by removing the outer tie rod and boots.
Thread the inner into the steering rack and tighten it to 60 ft-lbs. using a removal tool and a torque wrench.
Since I did not have the proper tool to utilize my torque, I just tightened it down to feel. If you don’t have a ton of experience wrenching on your truck, I highly recommend finding the right tool.
Step 11. Install New Boot
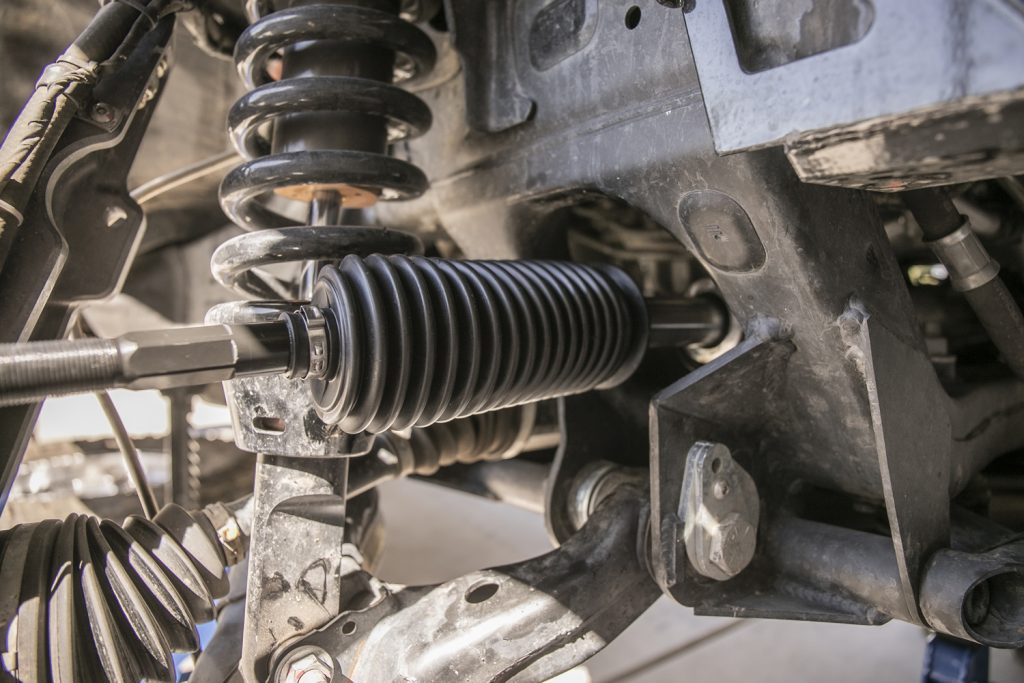
Slip the boot over the top of the steering rack and install it with the supplied zip tie or re-use existing clamp.
Step 12. Install Outer Clamp
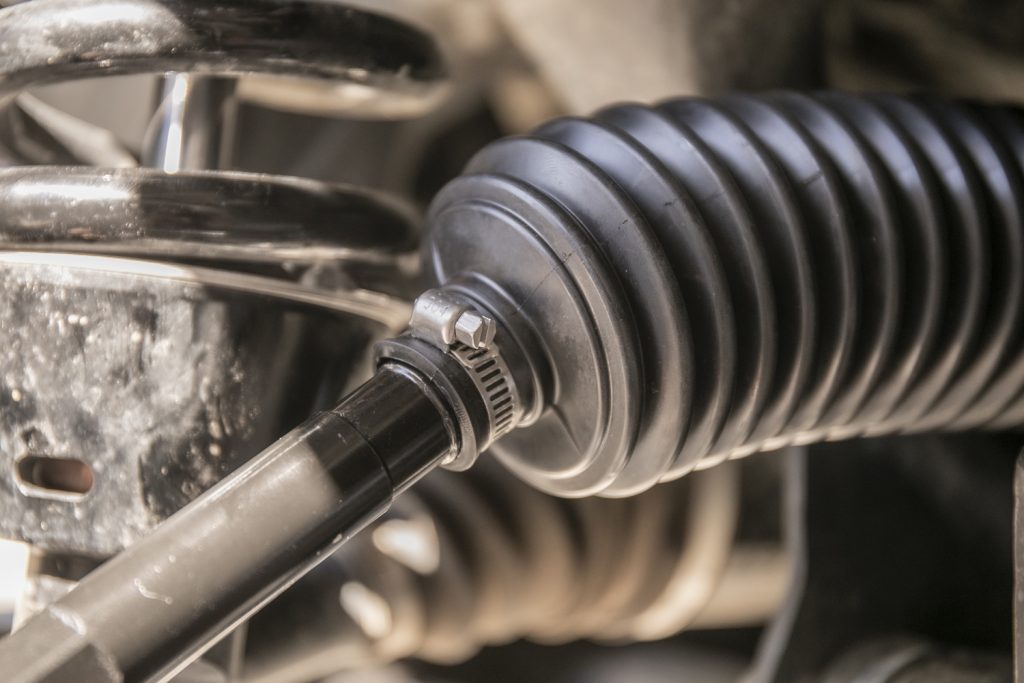
Install the outer clamp with the boot in the groove of the tie rod. I chose to use a different hose clamp that’s easier to take on and off. Do not over-tighten these clamps. The boot needs to move back and forth on the shaft slightly.
Step 13. Set Outer Length
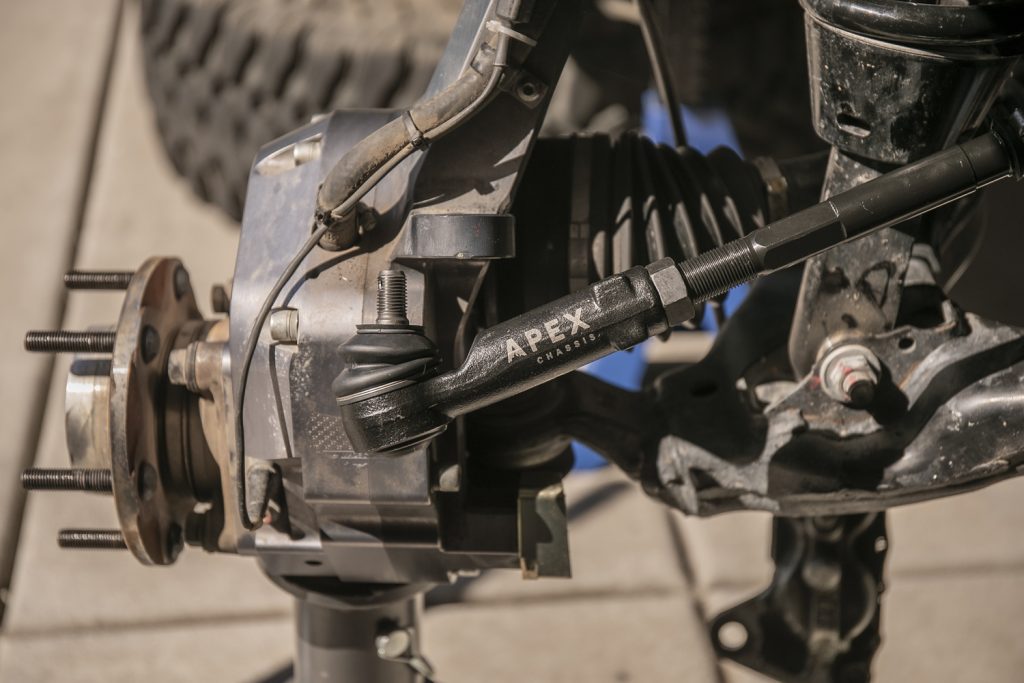
Thread the outer to the inner and adjust to the measurement taken previously.
Step 14. Torque Castle Nut, Add Cotter Pin
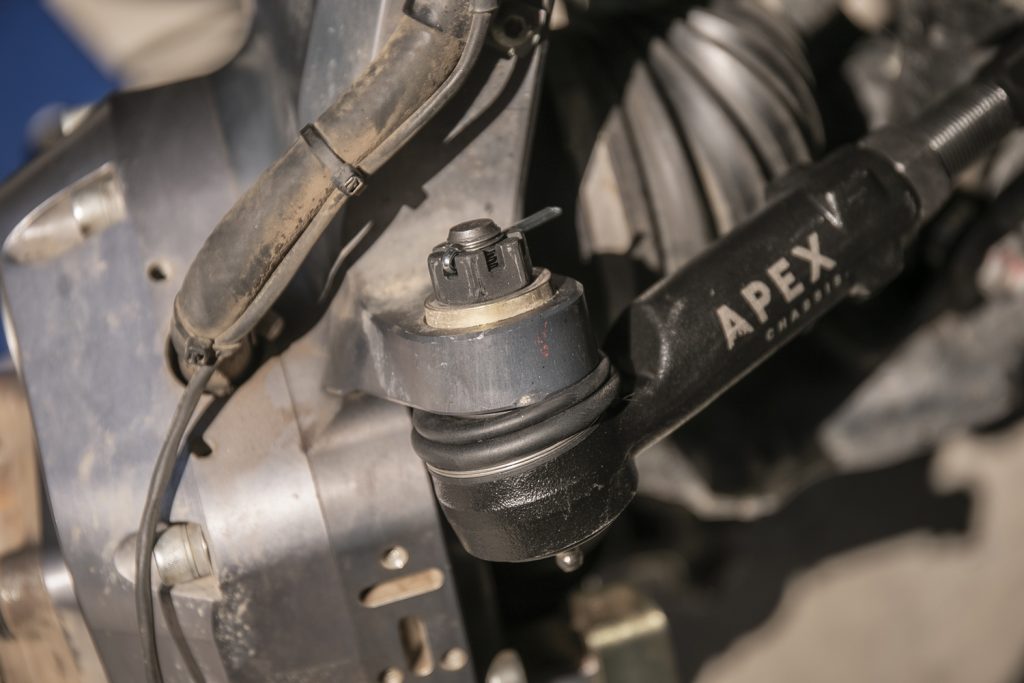
Install the outer rod into the knuckle, or portal in my case, and tighten the castle nut torque castle nut (22mm) to 67 ft/lbs.
Install cotter pins. If you cannot see through the castle nut and stud, continue tightening until the cotter pin can pass through.
Step 15. Tighten Jam Nut
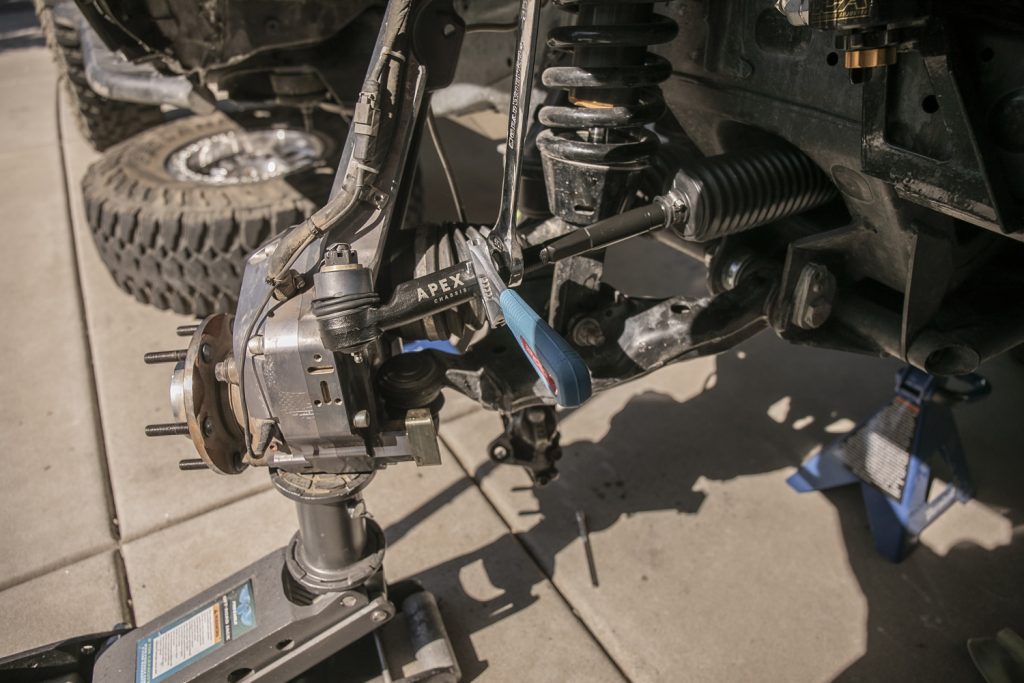
We recommend using a medium-strength thread locker (blue Loctite 243 or blue Permatex 24206 or other preferred brand) under the jam nuts, then tighten the jam nut(26mm) to 60 ft/lbs.
Step 16. Zerk Fitting
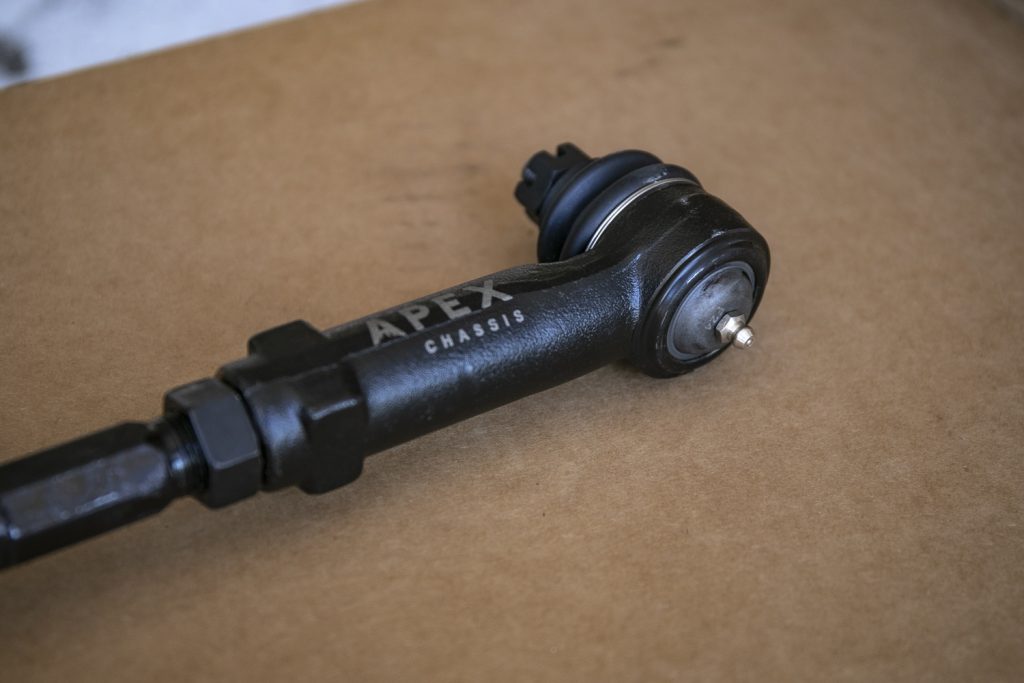
Install the grease zerks. Apex tie rods come pre-greased; however, a small amount can be added if necessary. DO NOT OVERGREASE. Over greasing can cause the boot to rip or come apart which isn’t covered under the warranty.
At this point, we highly recommend engaging a professional to get the alignment set. We use Stellar Built in Sacramento.
Check boots and jam nut torque at oil change intervals.
Final Thoughts
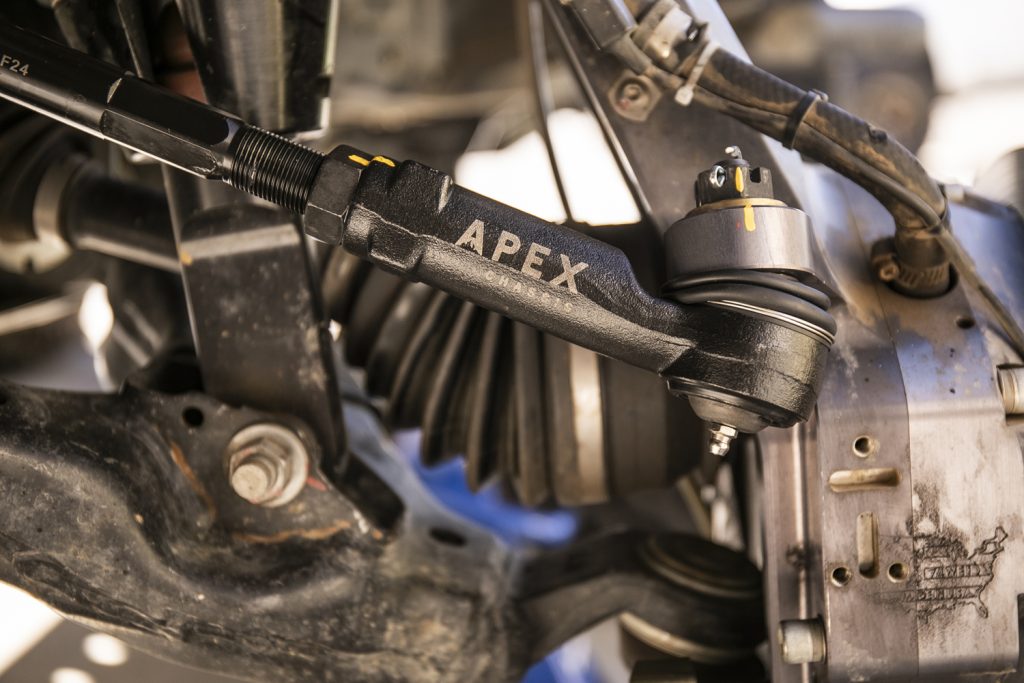
At a glance, this is one of the most impressive plug-and-play kits that’s been missing from our market for quite some time.
For guys running factory-length setups, this is a killer option.
It should be noted though that since you’re installing a stronger tie-rod, you want to consider upgrading your steering rack in the process. We will eventually install the new 74Weld steering rack but for now, we’re running the setup on our factory rack. We’re heading out this weekend for a 2-3 day trip to hit some technical trails out in Northern California. I’ll have a follow up review dropping soon and let you know how they perform both on and off-road.


So will these newer robust tie rods transfer the weak point now to an internal component that can’t be trail fixed. Isn’t that the whole point of the OEM design where the tie rod would break under stress vice an internal steering component?
Brenan,
kind of same page, my tie rods are shot and was looking to upgrade to these while replacing along w LCA’s. I’m only on 285/75/17’s or almost 34”s and don’t go too crazy mostly Johnson valley, Anza Borrego SoCal stuff. Have heimed UCA’s and Fox 2.5 coilovers but you really think I should stress stock steering rack? Or should I just stick w stock tie rods for just $150 less than these bad a** units?
But 74weld doesn’t make a steering rack for the 5th gen 4runner only for the bronco.
It’s in production. Will be released this year. They are working on the final QC as we speak; housing design refinement, internal rack and pinion fitment, plug-and-play mounting refinement, pressure testing, etc. It’s definitely something that’s going to change the way we all look at steering racks. It will require a steering pump upgrade kit the howe kit from JD fab but it will be worth it at the end of the day.
Will replacing with this help with steering wheel shake at 55 mph+?
After making sure your front end components are all sound, I suggest you make sure your wheels are clean inside and out then get them balanced by a competent shop using a « Hunter Road Force » balancer.
steering wheel shake could be anything. Wheels not mounted correctly, tires not balanced, tie rods not seated properly on the rack, etc. Start with your wheels and tires and go from there.
no
finally a solution that doesn’t rely on heims!
Awesome product.
This product looks great, and I’m sure many people will be eager to install it. However, there’s a key reason why this “upgrade” isn’t widely adopted—and you touched on it briefly.
The center shaft of the tie rod acts as a fuse in your steering system. If enough force bends the tie rod, that same force could damage your steering rack. Replacing an inner tie rod is significantly cheaper and faster than replacing the entire steering rack.
A better upgrade would be to strengthen the steering rack itself. Brenan, this is a topic I haven’t seen covered on the site yet, but as far as I know, there are two popular options: Tundra and Land Cruiser (LC) racks. Both require some modification to fit, but there are companies offering bolt-on (or nearly bolt-on) solutions, like toyo-steering.com and solomotorsports.com.
Factory Tundra and LC racks also use much stronger tie rods, making these Apex tie rods unnecessary or incompatible after upgrading the rack. So, in my opinion, if you’re hitting the trails hard and bending your tie rods, it makes more sense to put that $450 toward a new rack.
For now, while I save up for a steering rack upgrade, I simply carry a spare tie rod with me on the trails. That said, there’s no denying these Apex tie rods look fantastic—no complaints there! But the need of them is questionable.
I hear you 100%, however, there is a known problem with upgrading the rack on factory-length setups as well. Although you can swap in a modified Tundra rack and/or Land Cruiser 200 series rack onto a factory-length setup, it’s not ideal, and here’s why.
Most who have tried to run an aftermarket rack on factory length run into issues with VSC (vehicle speed sensor) or VSS (vehicle stability control), which both need to be reset after installing a rack and most guys don’t do that.
Furthermore, many shops, let alone your average guy don’t know how to reset VSC and VSS or fix those issues as they arise. And even if they are corrected through a reset, the codes/lights will eventually come back. I know three guys who have installed either the Solo rack or a Land Cruiser rack on factory length and have had this issue.
I was originally thinking about going the same direction and spoke with Solo, StellarBuilt, Basik Biker, 74W, and others about this issue. No one has the exact solution. I have not spoken with Toyo steering yet.
Now for longer travel setups, it’s fine. Why? I’m honestly not sure. I run the 200 series land cruiser rack on my JD Fab 2.25 LT and it’s fine. No VSS or VSC issues at all.
I’ve spoken with a few Toyota specialty shops (Stellar Built, SD Truck Shop, etc.) about this issue. None of them recommend installing an aftermarket rack on factory length because of the stability and speed sensor issues. It’s always intermittent and hard to track down. Even the modified Tundra rack from Solo “designed for OEM length” still causes issues with VSS and VSC.
74W is working on an OEM length rack for the 4Runner and the Tacoma right now and that is supposed to be compatible with VSS and VSC and should be ready for production here in the next few months. So why install Apex on a factory steering rack?
1. My ball joints were shot on both tie rods and I needed new tie rods.
2. I’m upgrading to a 74W rack compatible with factory length, and will not cause issues with speed sensors or stability sensors.
I just wheeled back-to-back trail systems (Deer Valley and Niagra Rim) with these APEX rods on the factory rack and walked out just fine. I think it depends on the trail you’re wheeling. For most guys wheeling moderate overland stuff and even semi-technical trails like Deer Valley, it’s fine. Would I recommend installing 40″ tires on a stock rack with these rods and then running Fordyce? Absolutely not.
Hi Brenan,
Thanks for bringing up the VSC/VSS issues—it’s interesting because I haven’t heard much about them before. I’m genuinely curious to learn more. What’s the actual impact? Are we talking about dash lights only, or does it affect something else too?
Here’s an issue I’ve come across, and it might actually be related or the same. Tundra and LC racks are wider, which messes with the geometry. Logically, to fix it, you either need to widen the front wheels or shorten the rack itself.
So, it’s either an expensive, wider LT front suspension or a modified rack with a shortened center shaft. If I remember correctly, that’s what Toyo and/or Solo offer—they take a new Tundra or LC rack and shorten the shaft, which, in theory, should restore the correct geometry.
Is this what your three guys installed or they simply put a wide factory Tundra rack?
One could think of shortening the inner tie rods to make the overall width correct. But, this approach will limit the front suspension travel.
I’m really curious about the 74W rack and how they plan to address this problem. I might hold off on buying a Toyo rack for now, depending on what they come up with. Hopefully, their rack won’t cost as much as their portals! 😀
The issue with swapping in these racks goes beyond just dashboard warning lights. It can affect the ABS system as well. From what I’ve heard, people who’ve tried these aftermarket racks on factory length are experiencing ABS problems, including the system mistakenly triggering the brakes. While the VSS/SC can influence ABS, the relationship isn’t easy to diag. It doesn’t seem to be a simple cause-and-effect where a VSS or VSC fault automatically triggers ABS braking. Instead, a fault in these systems can create error codes that affect braking, but ABS typically only activates the brakes when it detects wheel slip or lockup.
ABS may be getting confused by incorrect data from the steering system. The VSS might be sending faulty information, or there could be issues with the steering ratio, steering angle, or steering pressure readings from the power steering sensors. This mismatch between what the ECU expects and what it’s actually receiving could lead to the ABS mistakenly thinking there’s wheel slip when it’s actually a steering-related issue.
I went down the rabbit hole of trying to install a Solo Tundra rack and this is essentially the feedback I got from multiple shops and people who tried to run it.