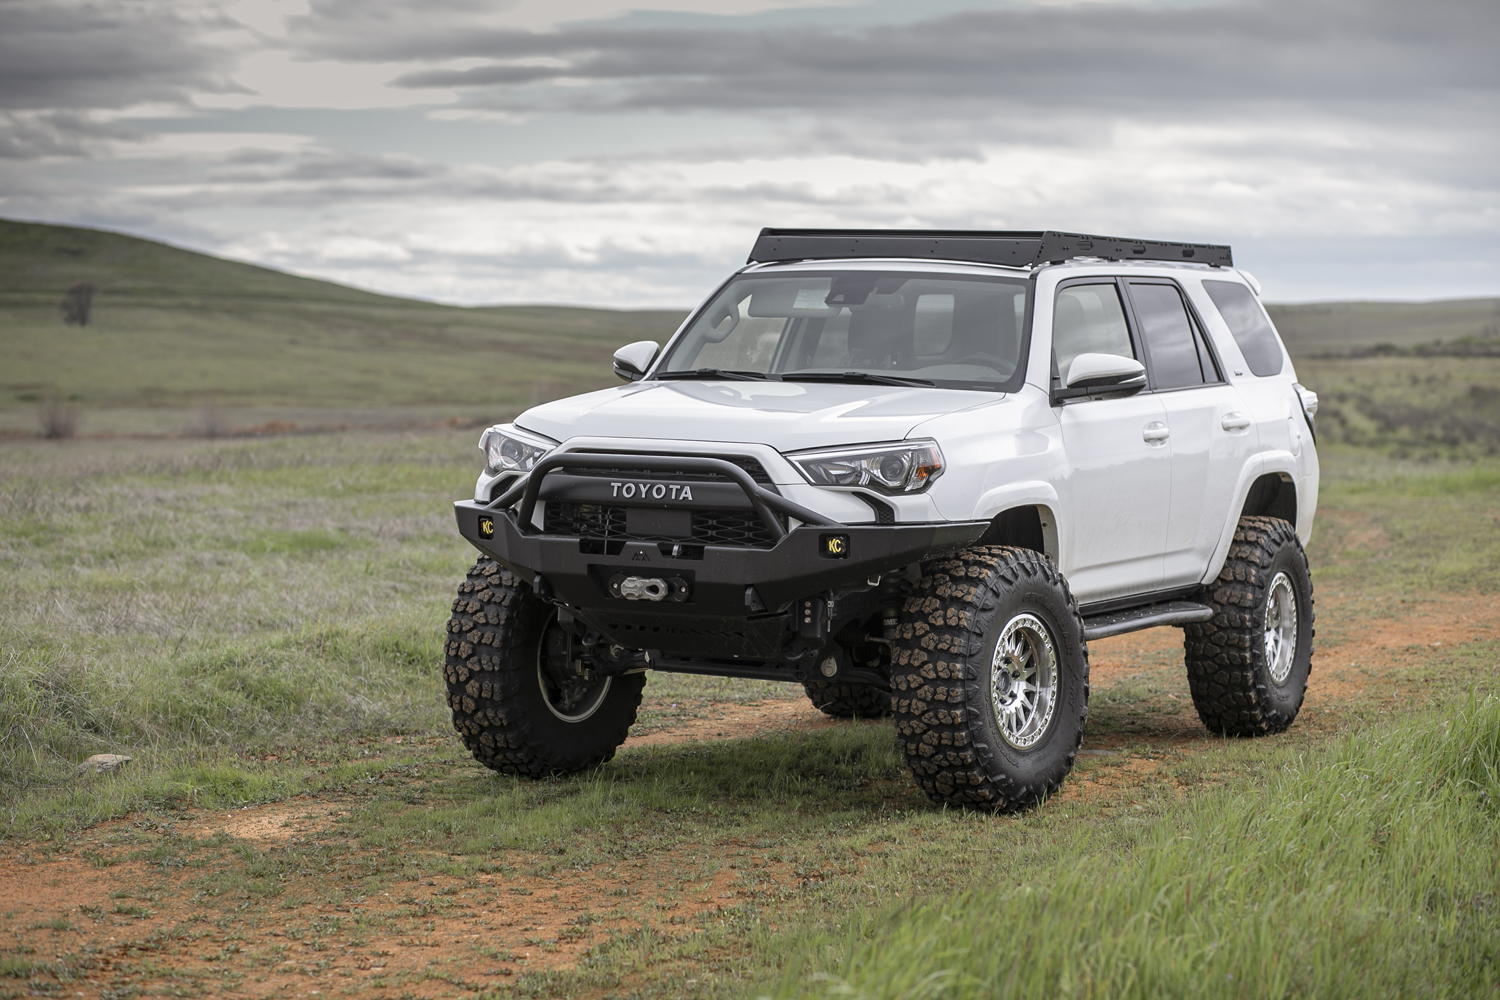
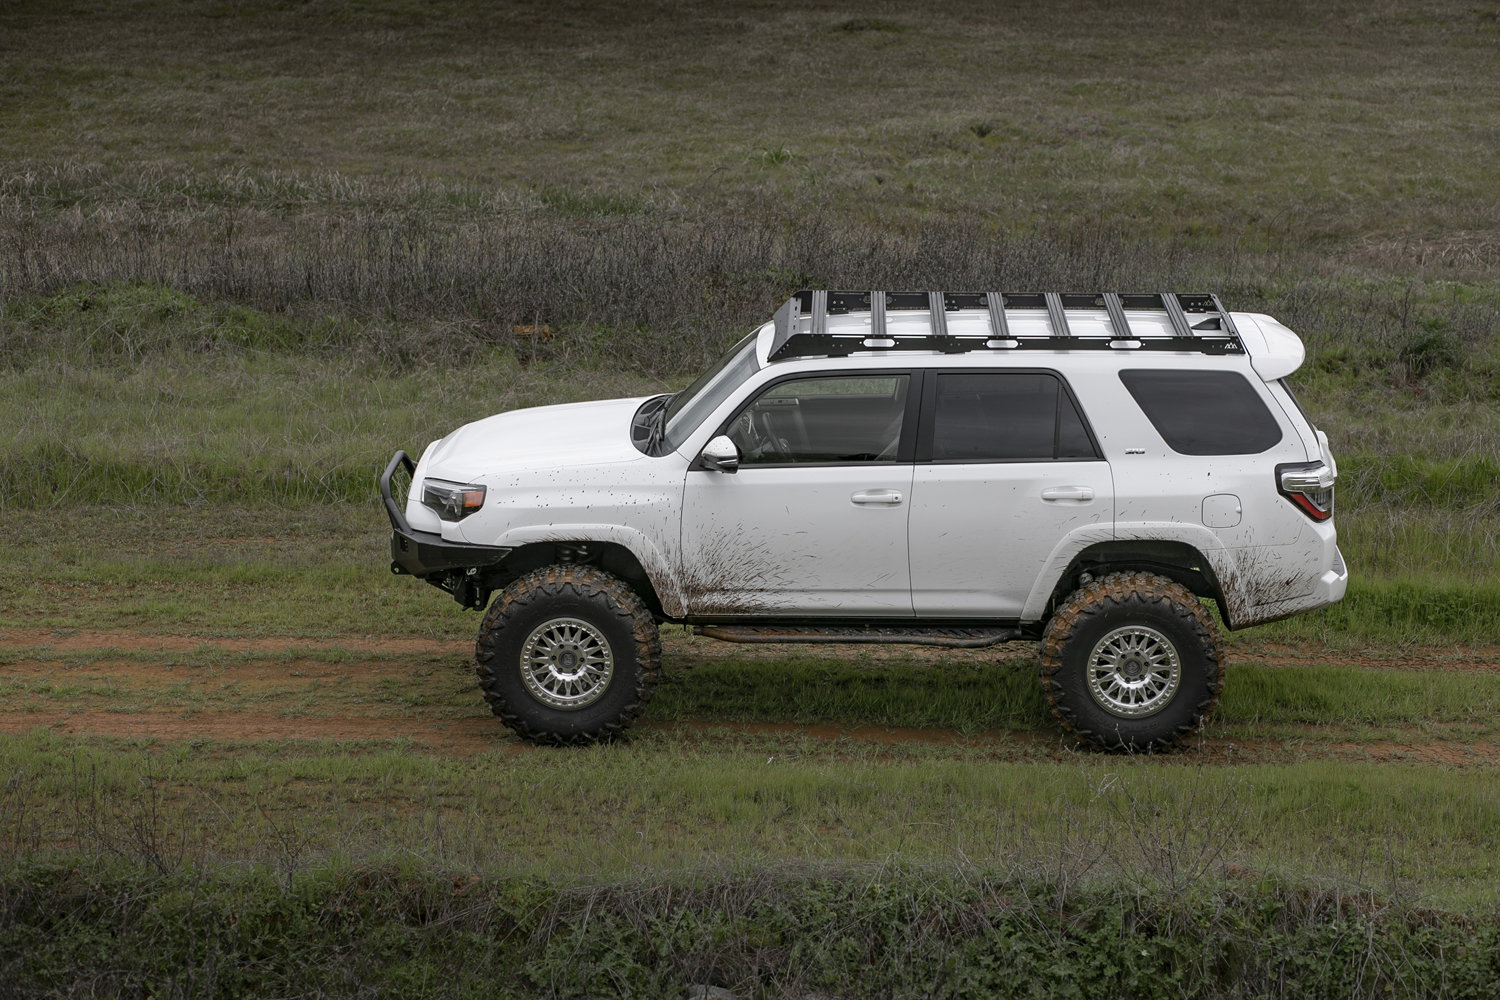
After 6 months of testing the DRIFTR rack, we’ve grown to really appreciate its performance. DRIFTR stands out with more built-in features than nearly any other rack on the market, including a new rear fairing design and impressive crossbar strength for heavy gear or rooftop tents.
Backwoods Adventure Mods has a long history in manufacturing. They manufacture 4Runner, Tacoma, Tundra, and many Van parts as well. We’ve run their Hi-Lite bumper for about 7 months and it’s held up great so far. We’ve slammed the bumper on rocks quite a few times and even though the shell is aluminum, there are still no dents. The entire line of armor and racks is overbuilt for strength and functionality. These guys really beat the crap out of their products before bringing them to market.
Off-Road Testing
Speaking of strength and functionality, let’s dive into what makes the new DRIFTR rack so impressive.
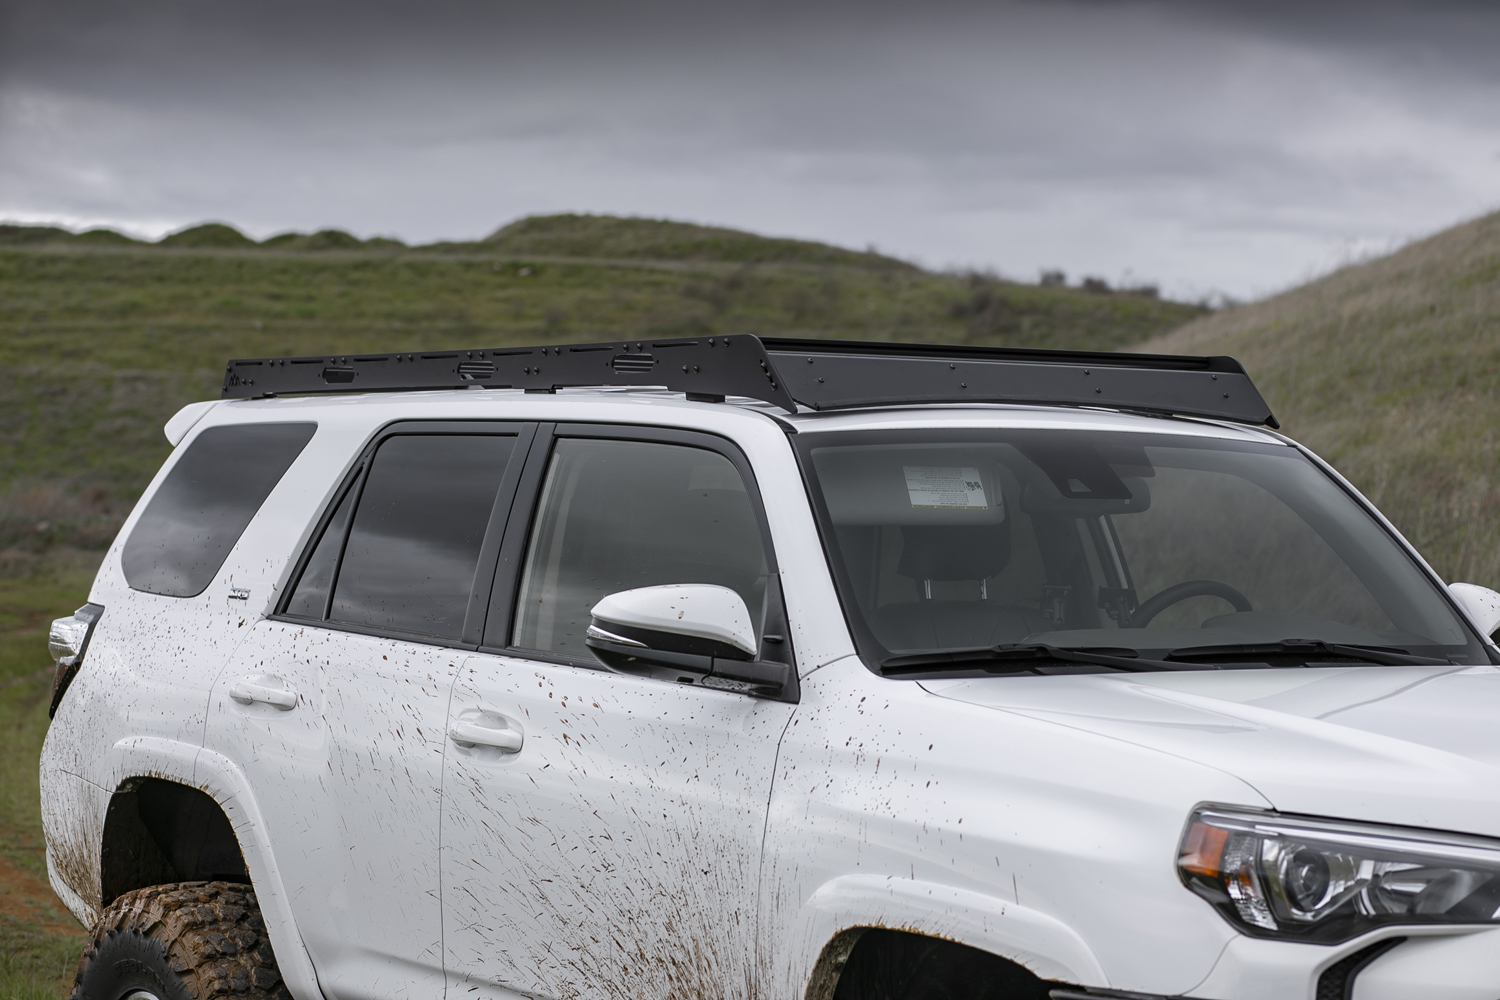
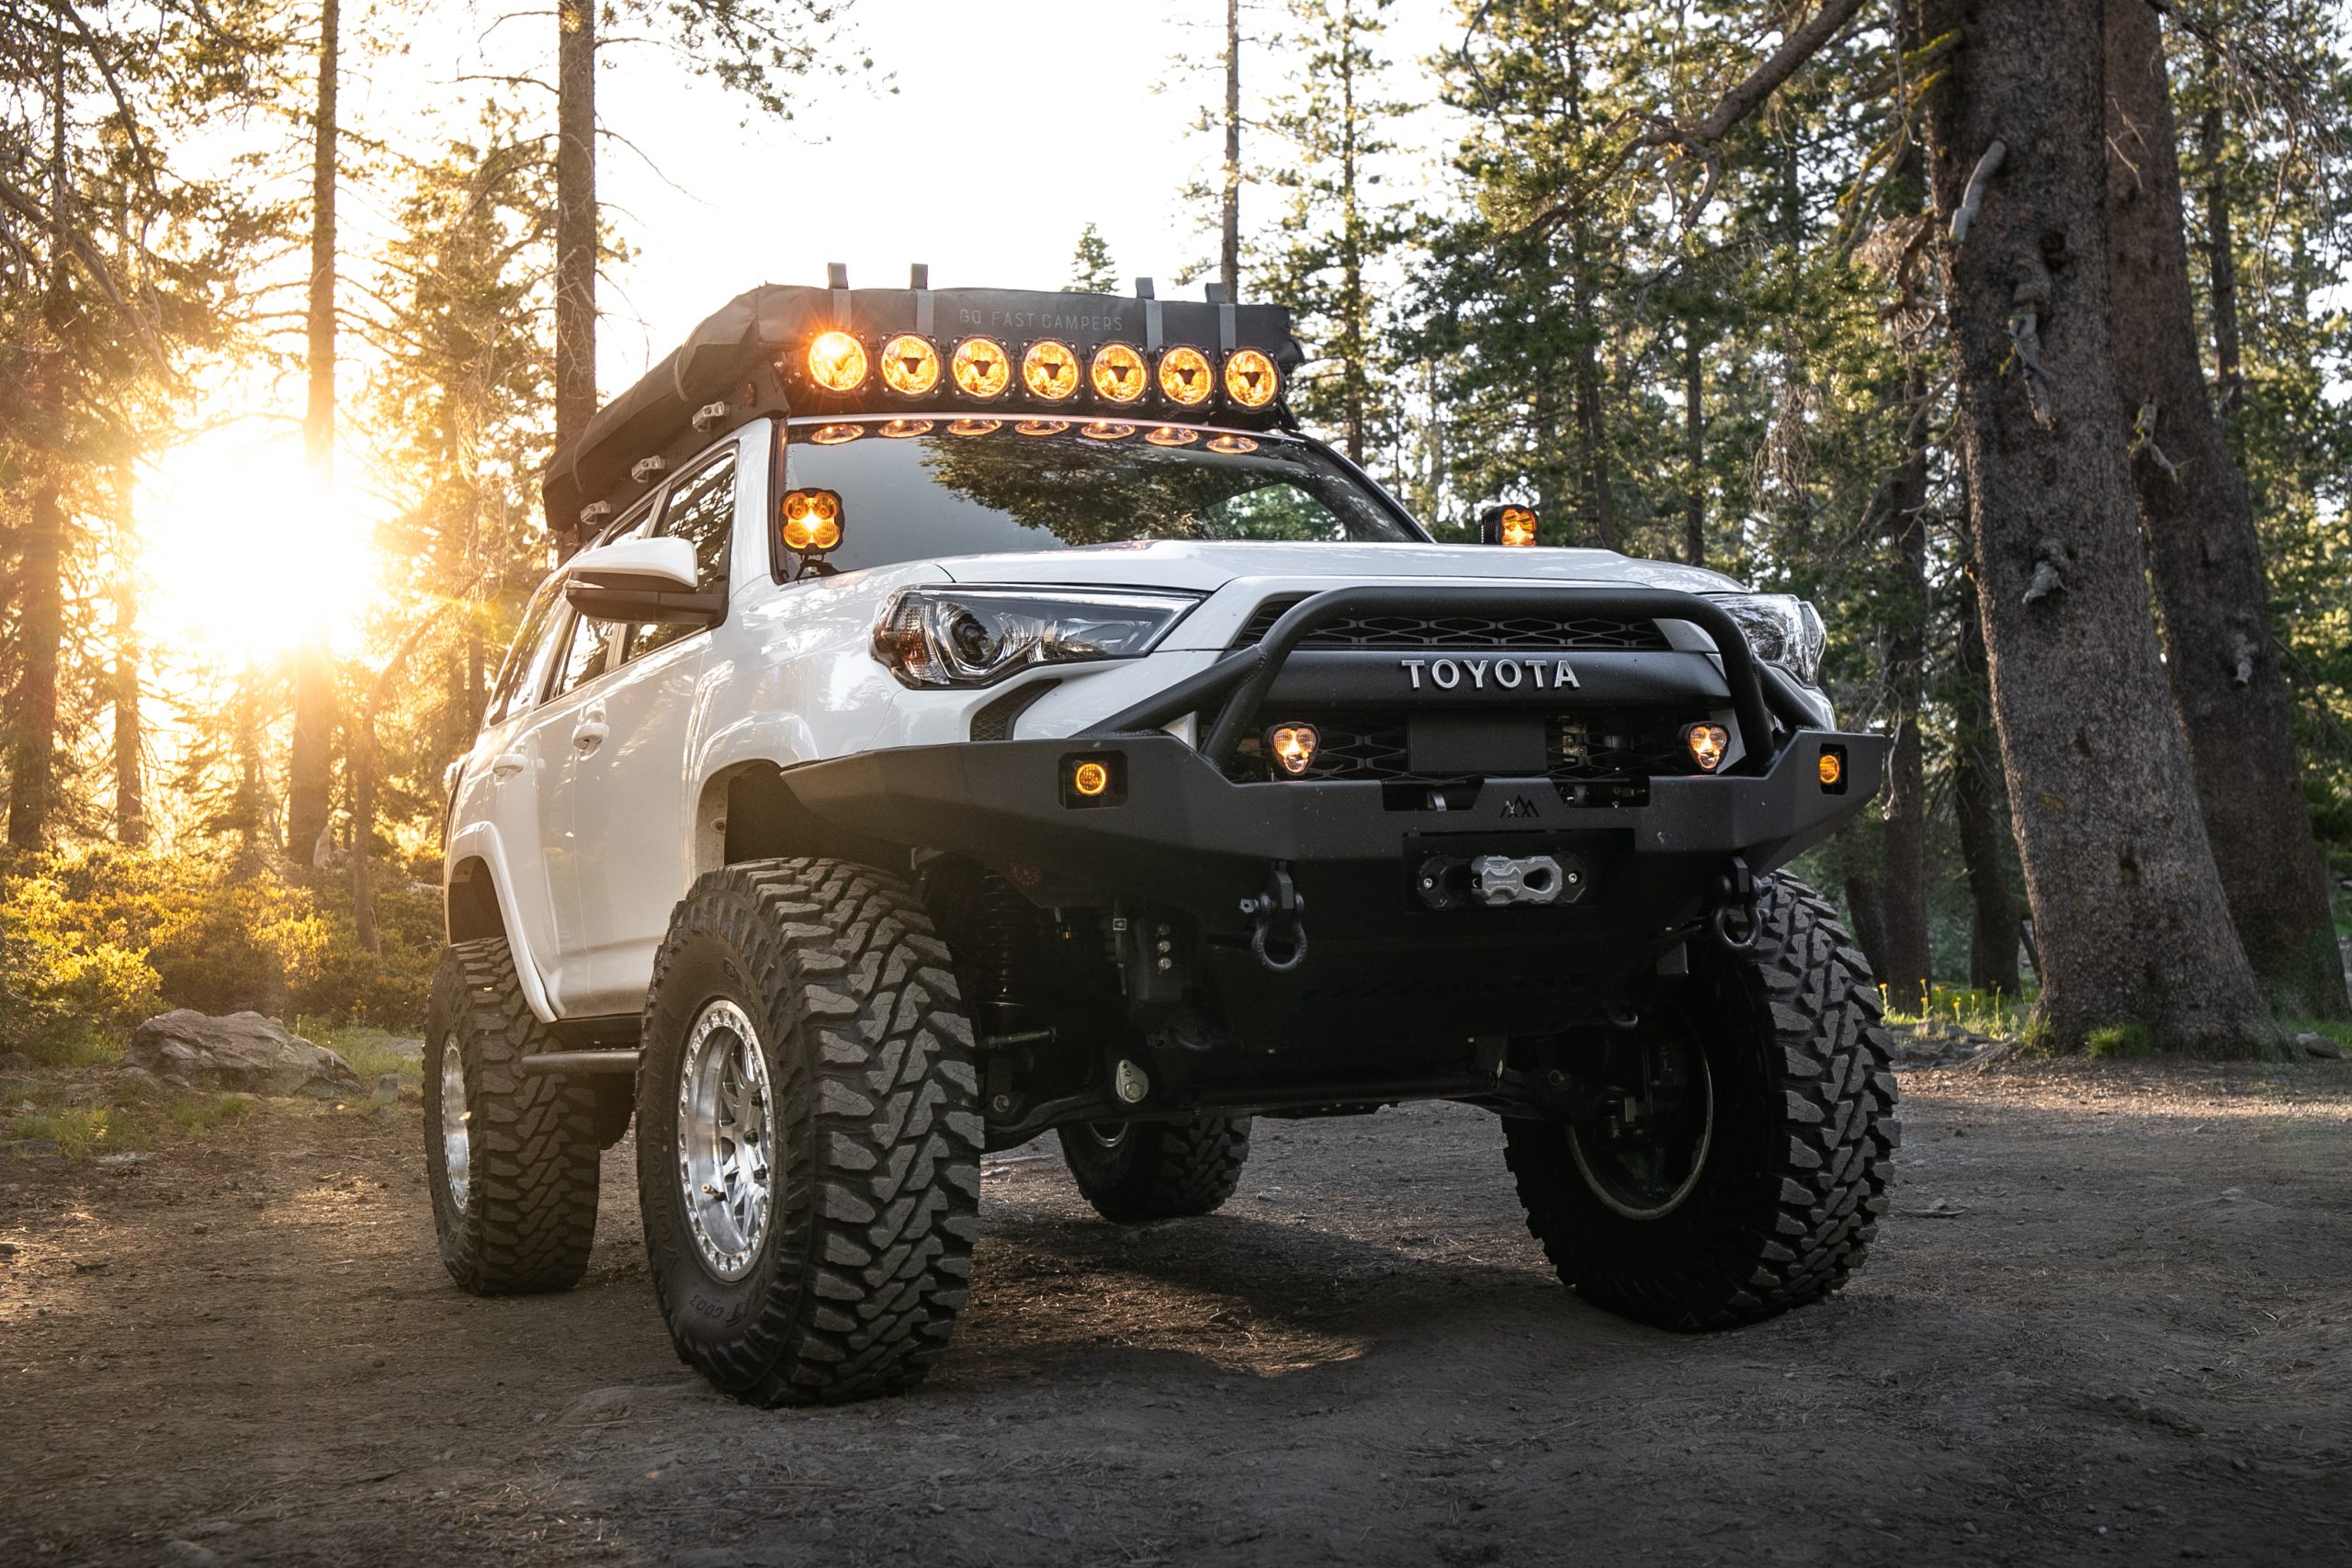
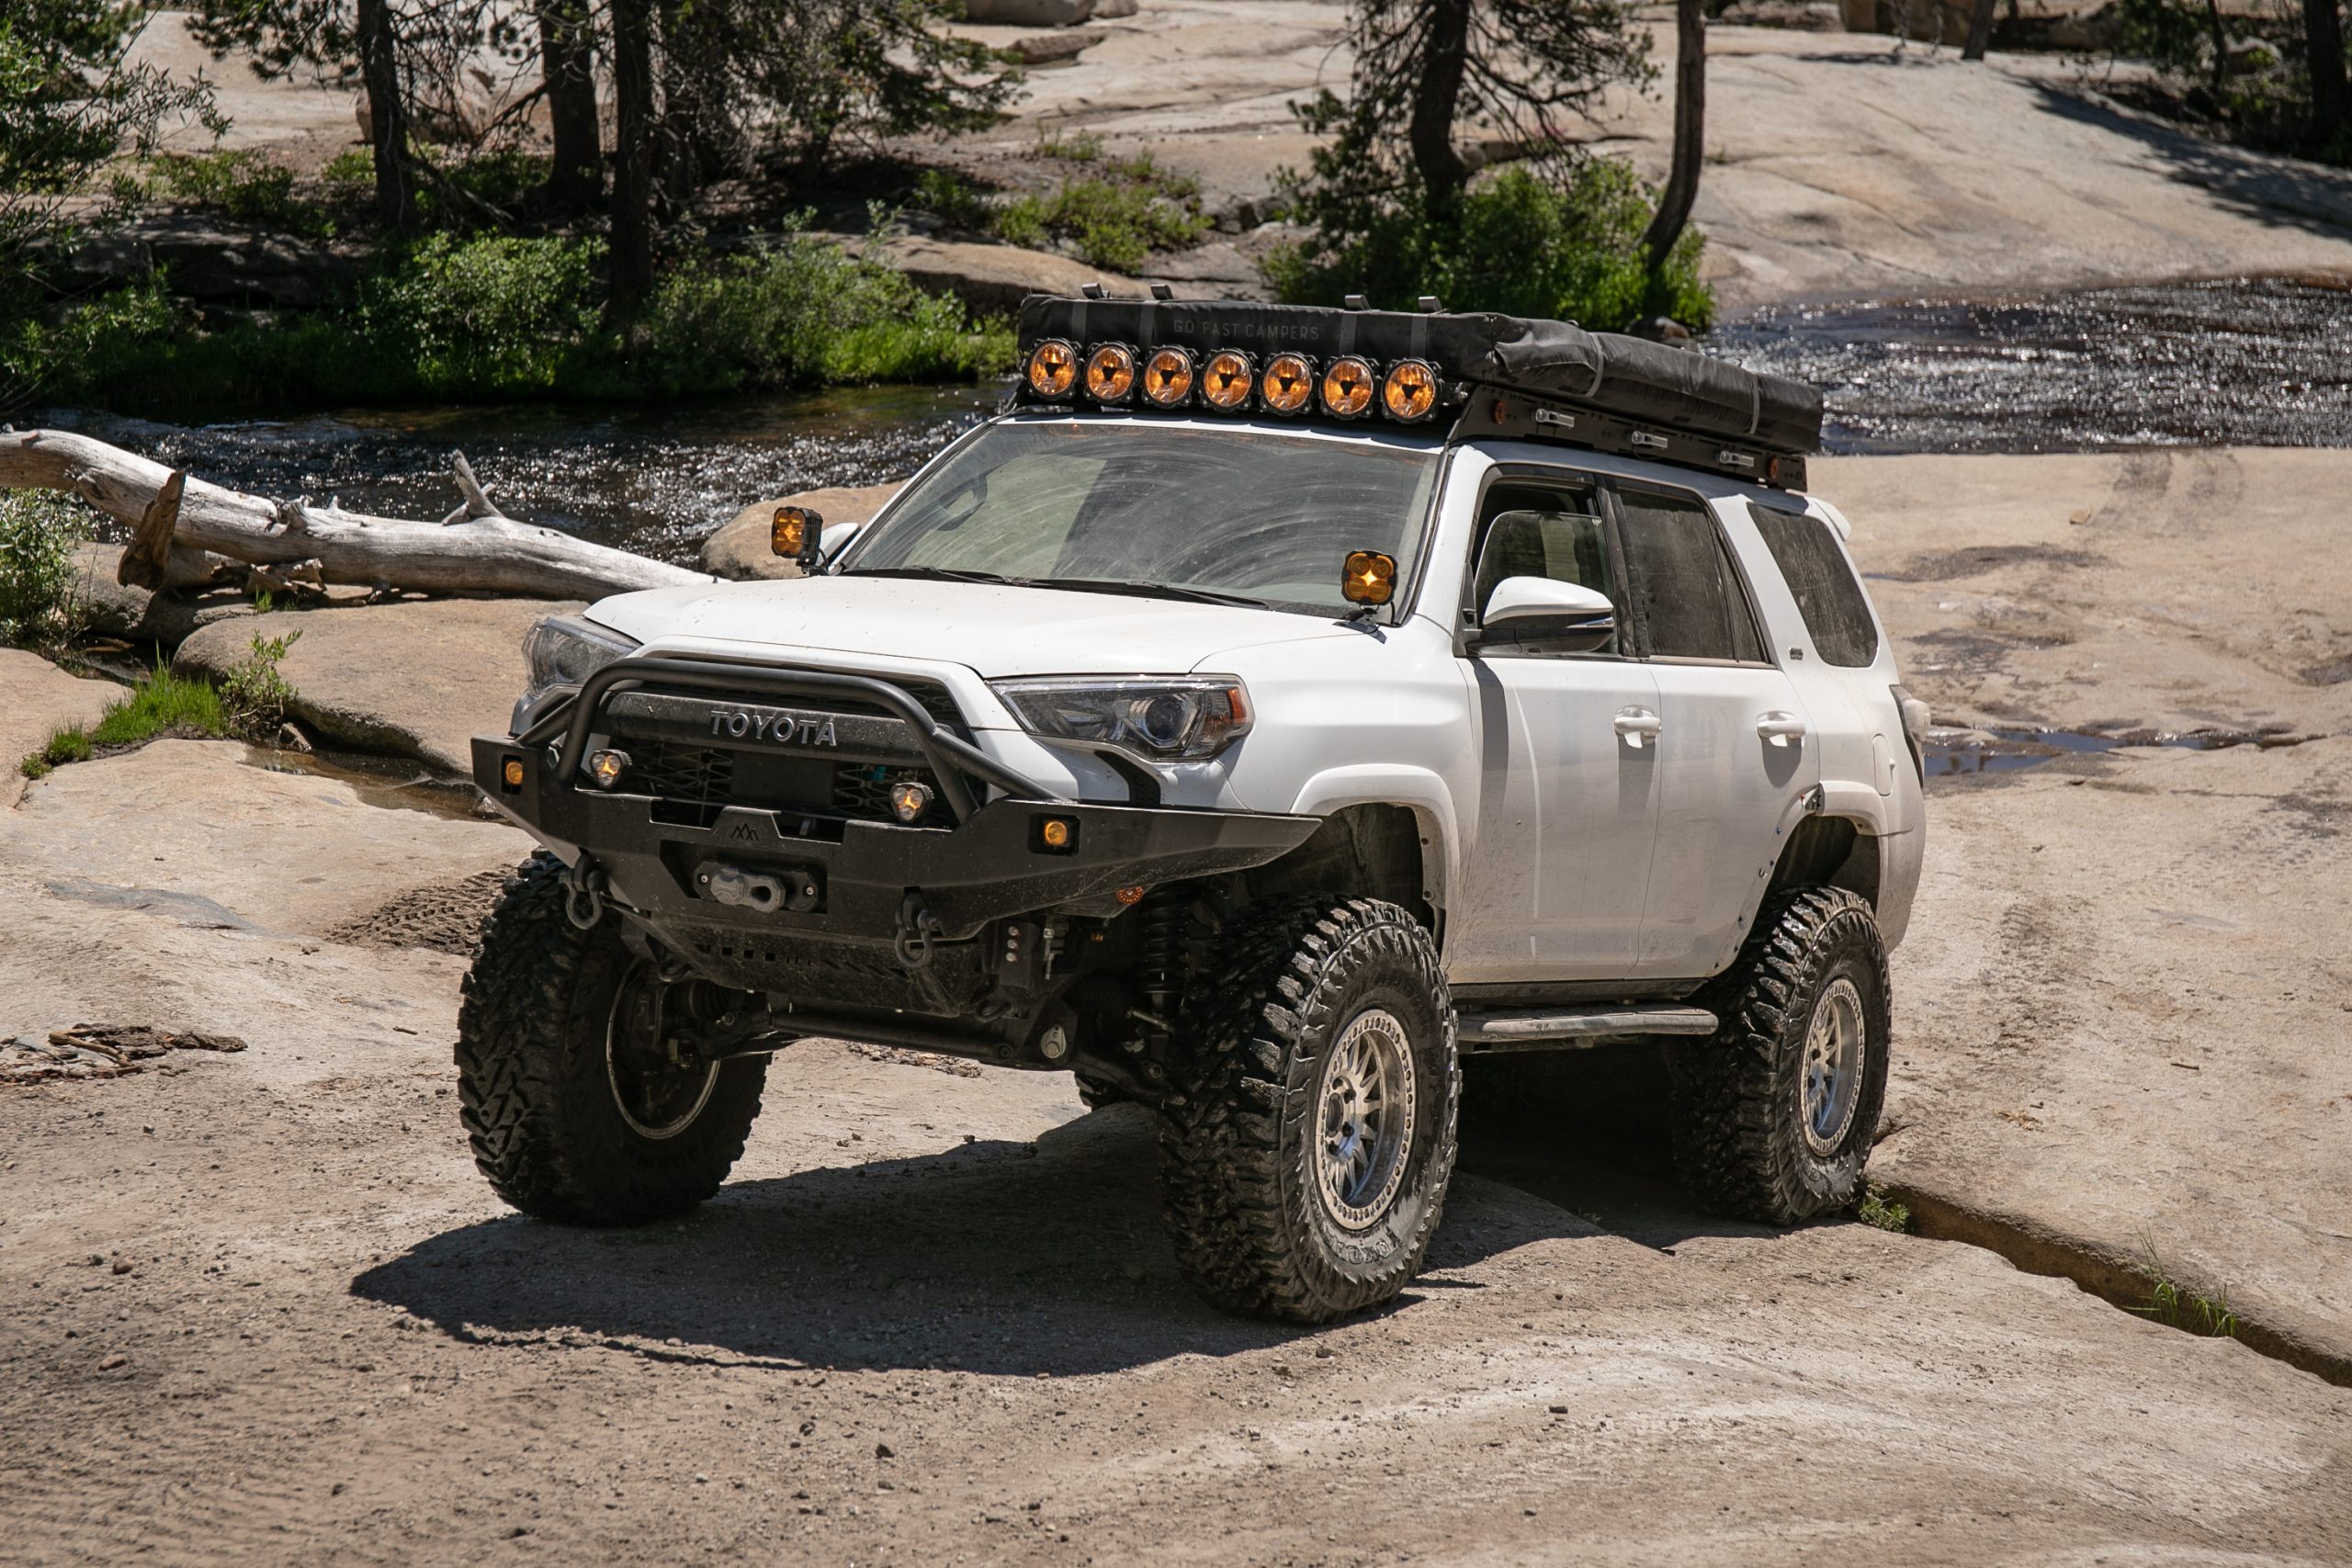
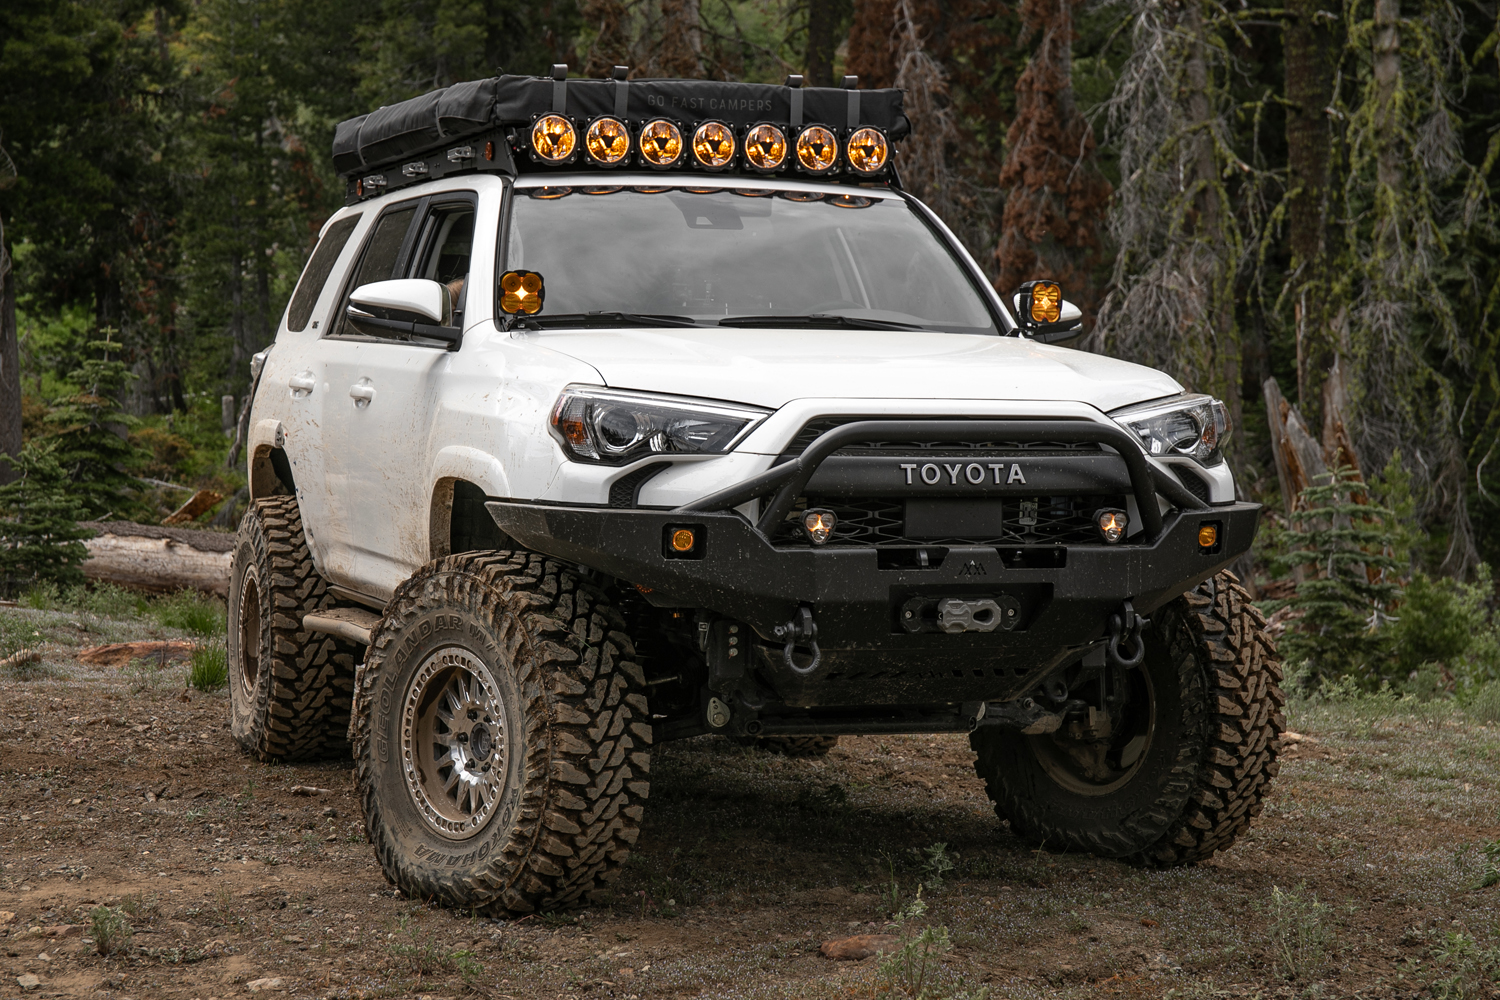
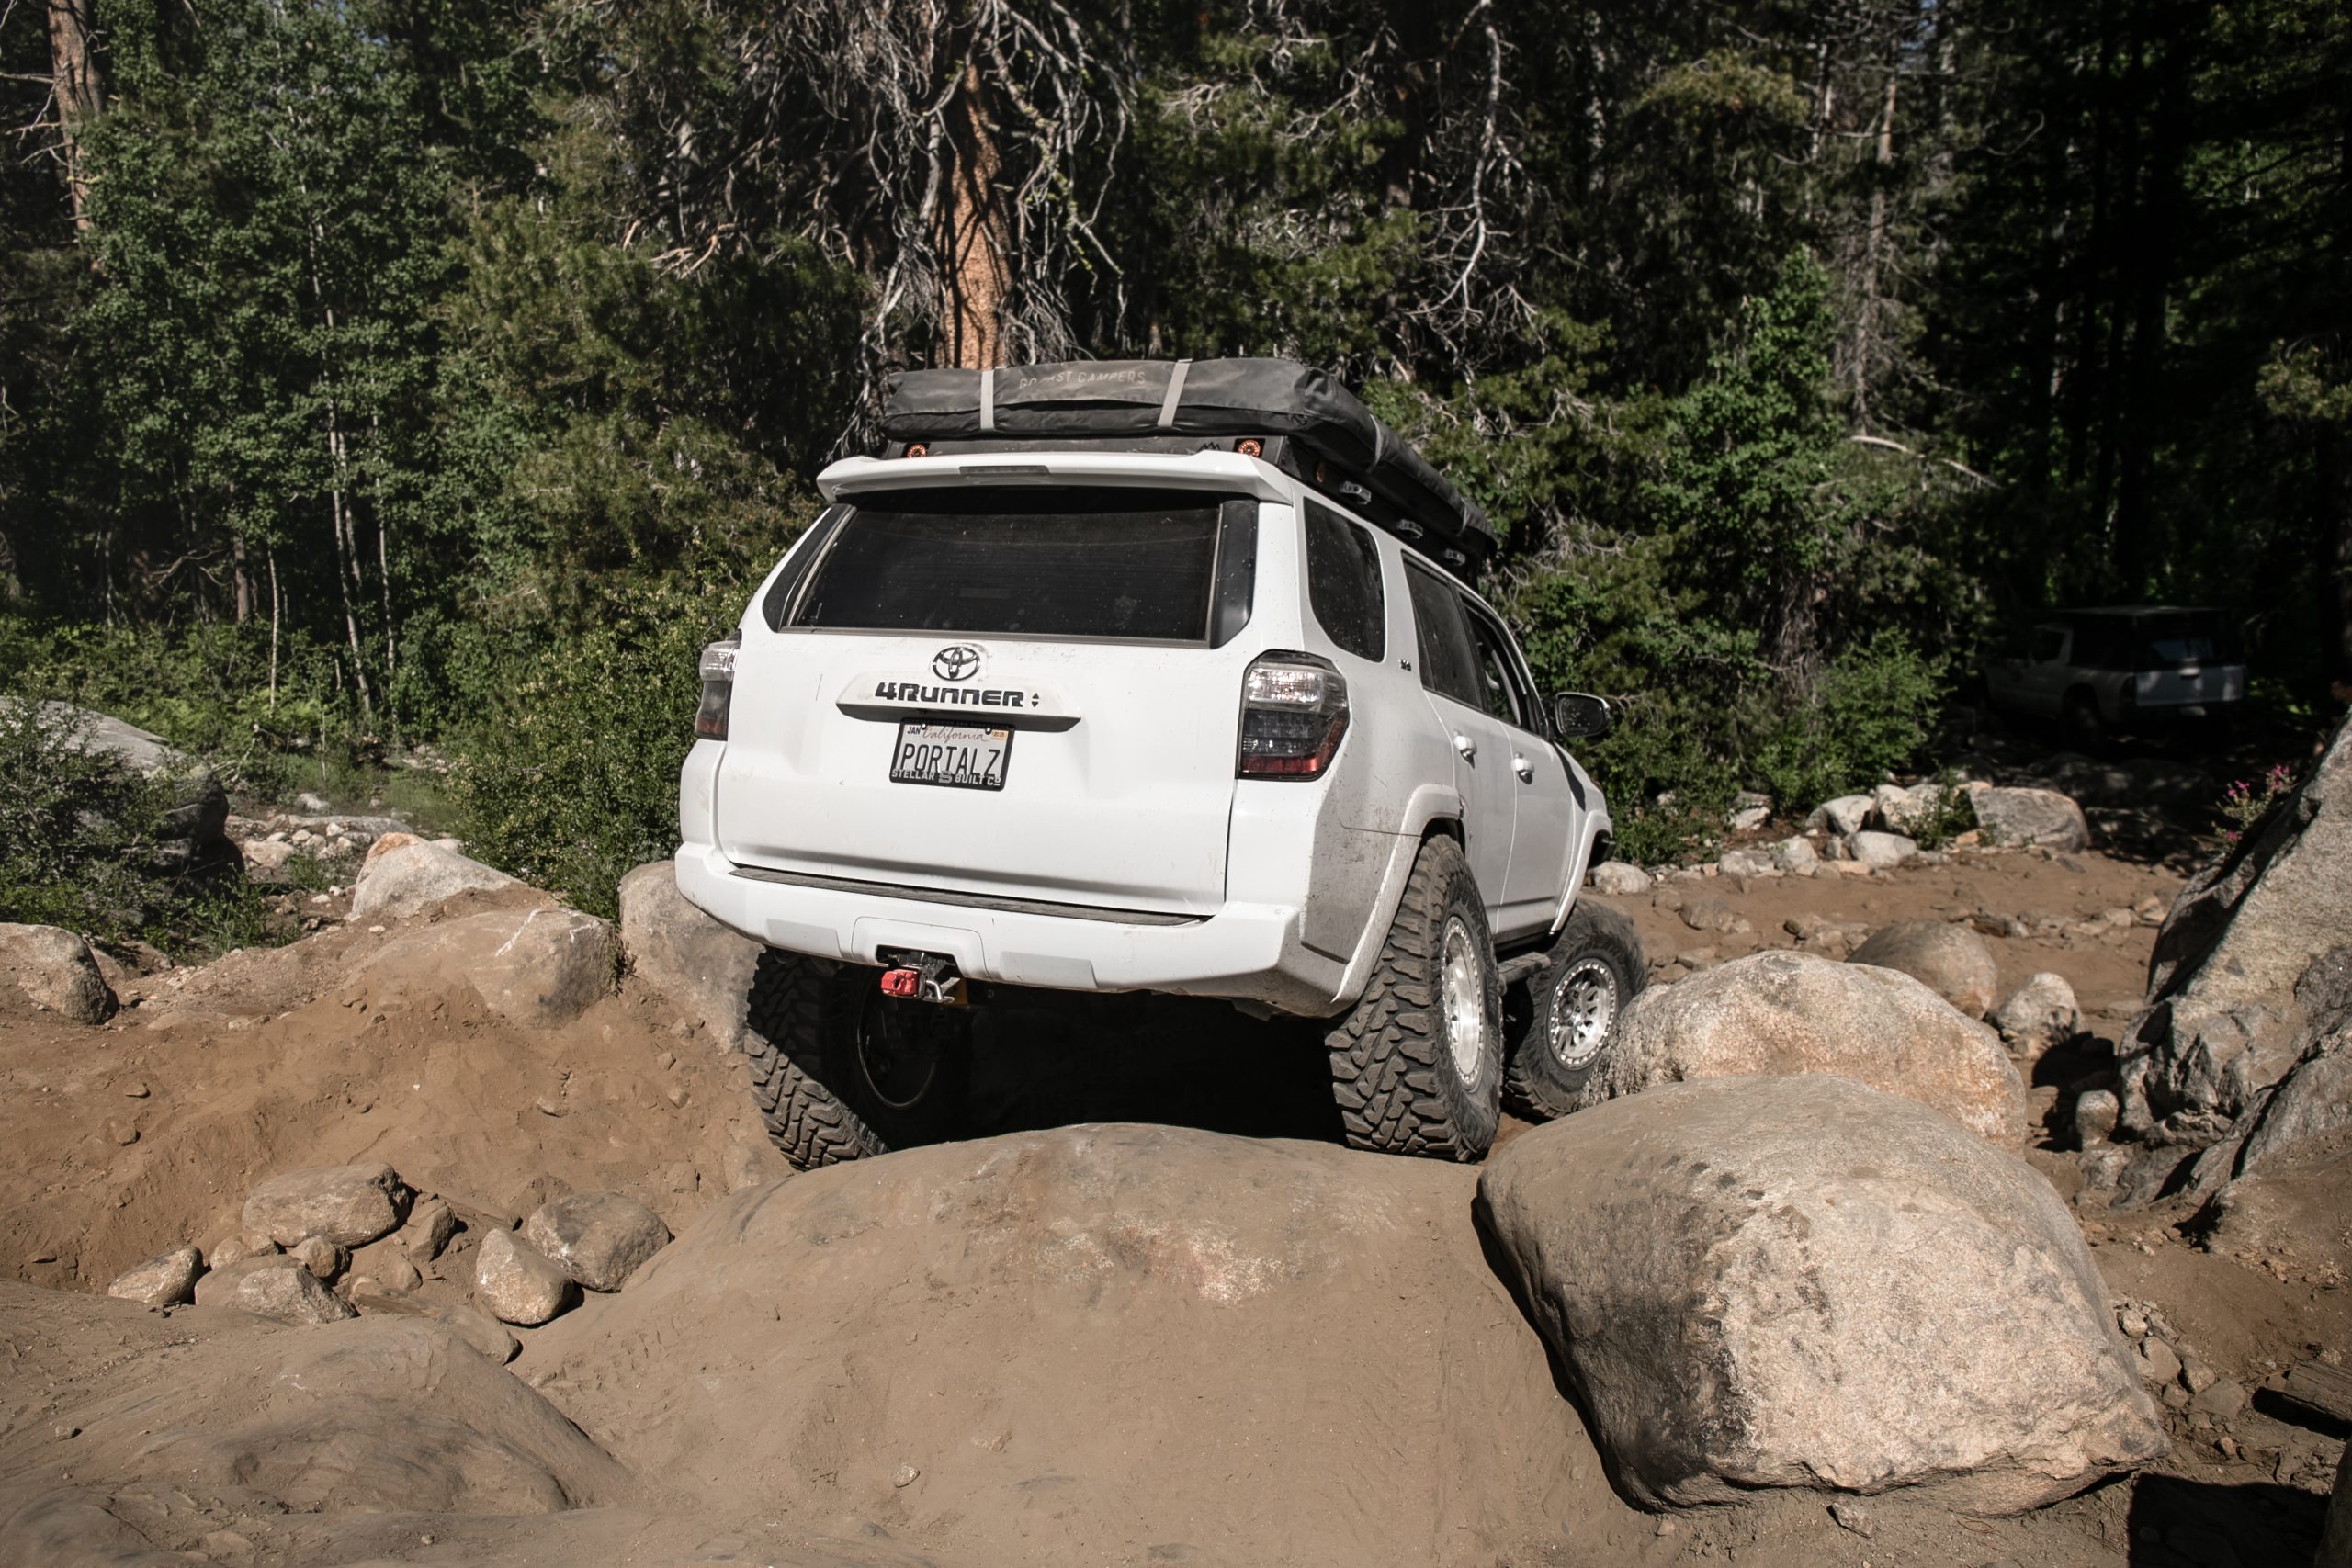
We’ve put the rack through multiple overland and off-road adventures. From week-long overland trips to short weekend rock-crawling trips, DRIFTR continues to deliver. With seven 1X3 triple-slotted crossbars and an eighth on the front fairing, the strength provided is unlike most CNC-style racks. The light knockouts in the rear fairing and the six Agency6 grab handle cutouts add a level of functionality that no other rack offers. We took advantage of the rear fairing for a couple of KC Cyclones, mounted four more cyclones to the side rails, mounted a KC Pro6 Gravity Titan bar up front, and then finished it off with six machined raw billet grab handles from A6.
Find It Online
- DRIFTR Roof Rack: Check Price
Table Of Contents
Specs & Feature Highlights
Features & Specifications:
- 1/4″ thick aluminum side panels
- Six sets of 1/4″ thick mounting brackets & mounting feet + included sealant!
- Seven (8) 1X3 triple-slotted aluminum extrusions
- Pre-drilled slots to mount extrusions anywhere
- The eighth crossbar is mounted to the front fairing
- Adjustable front fairing
- Made in USA
- No drilling required
- Modular design
- Moonroof compatible
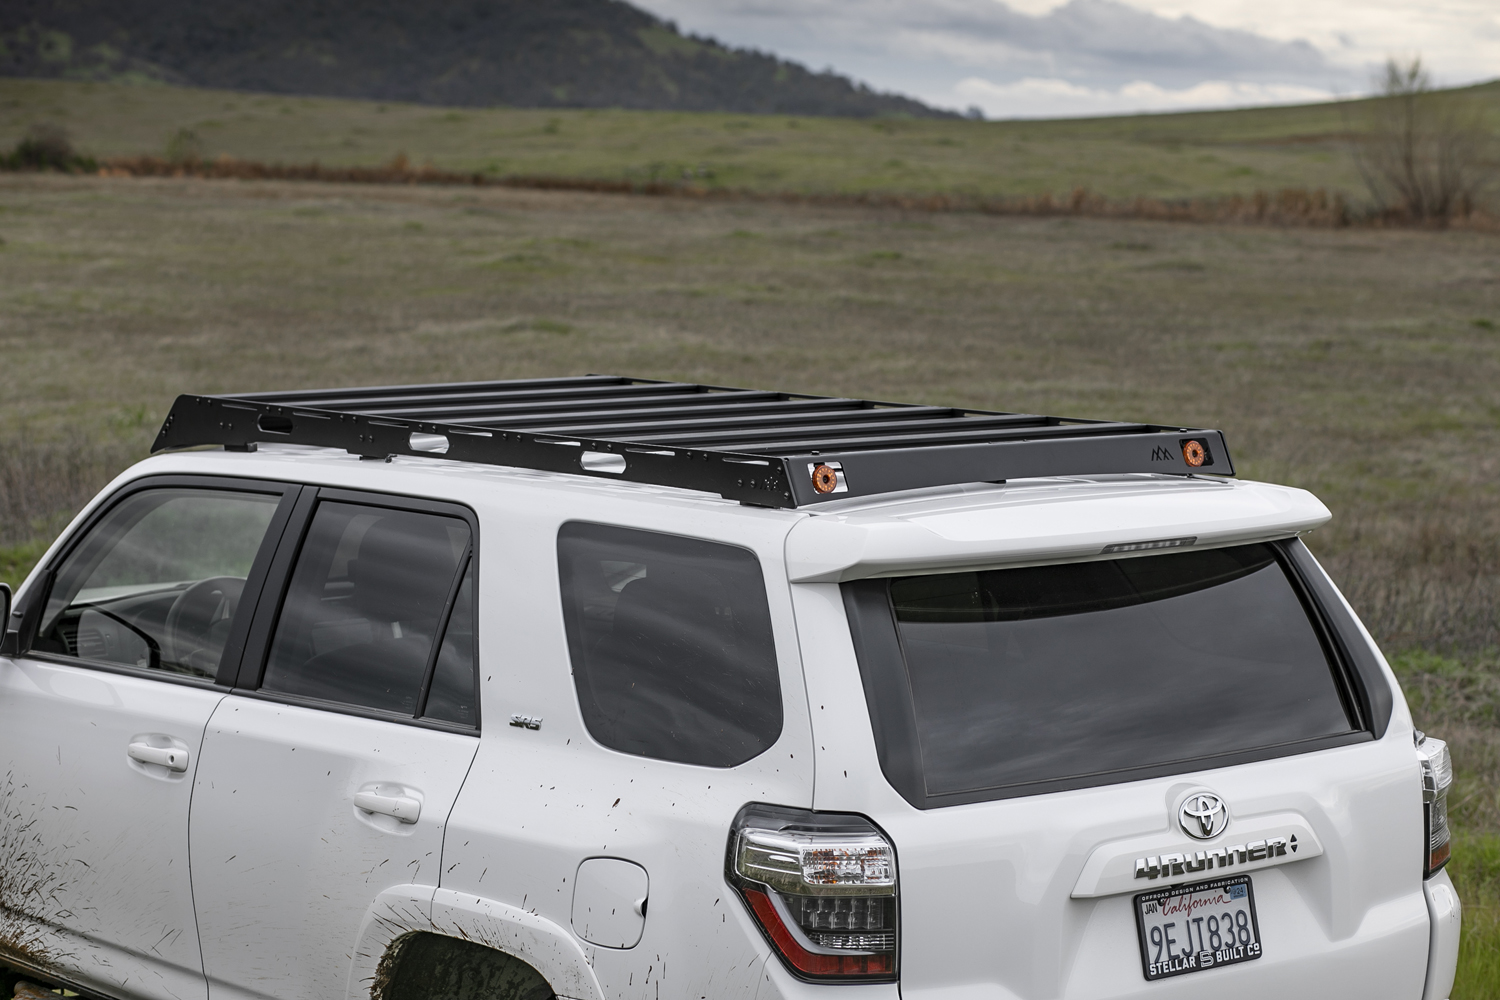
- Rear fairing features Baja S2 or KC Cyclone knockouts
- Side rail cutouts for A6 grab handles
- T-nuts for accessory mounting included
- Powder coated in semi-textured black.
What makes this rack stand out is the use of 1/4″ thick aluminum side panels, 1/4″ mounting brackets, and 7 1×3 aluminum extrusions, including a unique eighth crossbar mounted to the front fairing. The most distinct features include a rear fairing with knockouts for Baja S2 or KC Cyclone lights and side rail cutouts for A6 grab handles.
Ease of Installation
The installation was very easy. I installed the rack by myself in about 1 hour.
Backwoods provided 6 mounting feet; four for the rear and two for the front. They even provide the sealant for sealing the mounting feet around the factory mounting points to prevent leaks.
This is a non-drill rack. Instead of drilling, they provide adjustable brackets with rubber feet. This design lets you tension the rack and rubber feet against the roof of the 4Runner. To tension the feet correctly, you may need the help of a friend. Overall the installation was very smooth as they provided a detailed step-by-step video for you to follow.
Build Quality & Strength
DRIFTR was clearly designed with strength in mind. There are very few racks on the market that provide massive 1X3 crossbars. You will find eight (8) total on DRIFTR. There are 7 primary crossbars along the top of the rack and one additional 1X3 crossbar mounted to the front fairing. The front fairing is mounted to the crossbar and then the crossbar gets mounted to adjustable slots on the side rails.
You can position the front fairing at full height for no light bar, or drop it down to fit a 40″ bar. While most CNC-style racks leave the side rails unconnected in the rear, DRIFTR is different. They designed a special rear fairing that connects the rear side rails with an additional four bolts. As if all those features weren’t enough, DRIFTR adds adjustable tensioning feet to the front for more support and to prevent front sag from lightbars and/or tents.
Once the front fairing, rear fairing, 6 mounting feet, and all 7 primary crossbars were bolted in place, I was shocked at how strong this rack was.
If you’re looking for impressive load capacity and proper weight distribution, I would highly consider DRIFTR for superior build quality and strength.
Versatile Mounting Options
With seven total 1X3 triple-slotted crossbars, you have endless options for mounting gear. With the traditional 1X2 crossbars, you only get 2 slots for mounting gear with t-nuts. When you jump up to a 1X3, you get three slots. One additional slot might not sound like a big deal but when mounting storage boxes, solar panels, Hi-Lift jacks, awnings, and other gear – you would be surprised at how often NOTHING lines up. Having the additional slot in the crossbar makes all the difference for mounting gear.
The pre-drilled side slots down the rack offer a versatile mounting solution for either crossbar placement or secondary accessory mounts. This helps for positioning rooftop tents, or side-mounted gear like shovels, Hi-Lifts, recovery boards, and more.
Adjustable Front Fairing
The front fairing can be positioned at the top, level with the 7 crossbars if you’re not running a light bar, or at the bottom hugging the roofline of the 4Runner. The lowest fairing position allows you to mount up to a 40″ light bar and pre-drilled mounting holes are provided in the fairing. With multiple mounting holes on top of the fairing, your mounting options are endless. You can run a series of pod-style lights on top of the fairing or a single light bar – whichever you prefer. For my setup, I removed the front fairing and installed a KC Pro6 bar.
We purchased a set of Pro6 mounting brackets from Sherpa. These brackets mount directly to the extrusion with two bolts on each side. They allow for two different mounting positions, high and low. We also removed the center KC support bump stop and built our own bracket for connecting the center of the bar to the extrusion for more support and to remove the bump stop for a cleaner look.
Whichever light bar you decide to run, the DRIFTR can support it.
Rear Fairing Light Knock Outs
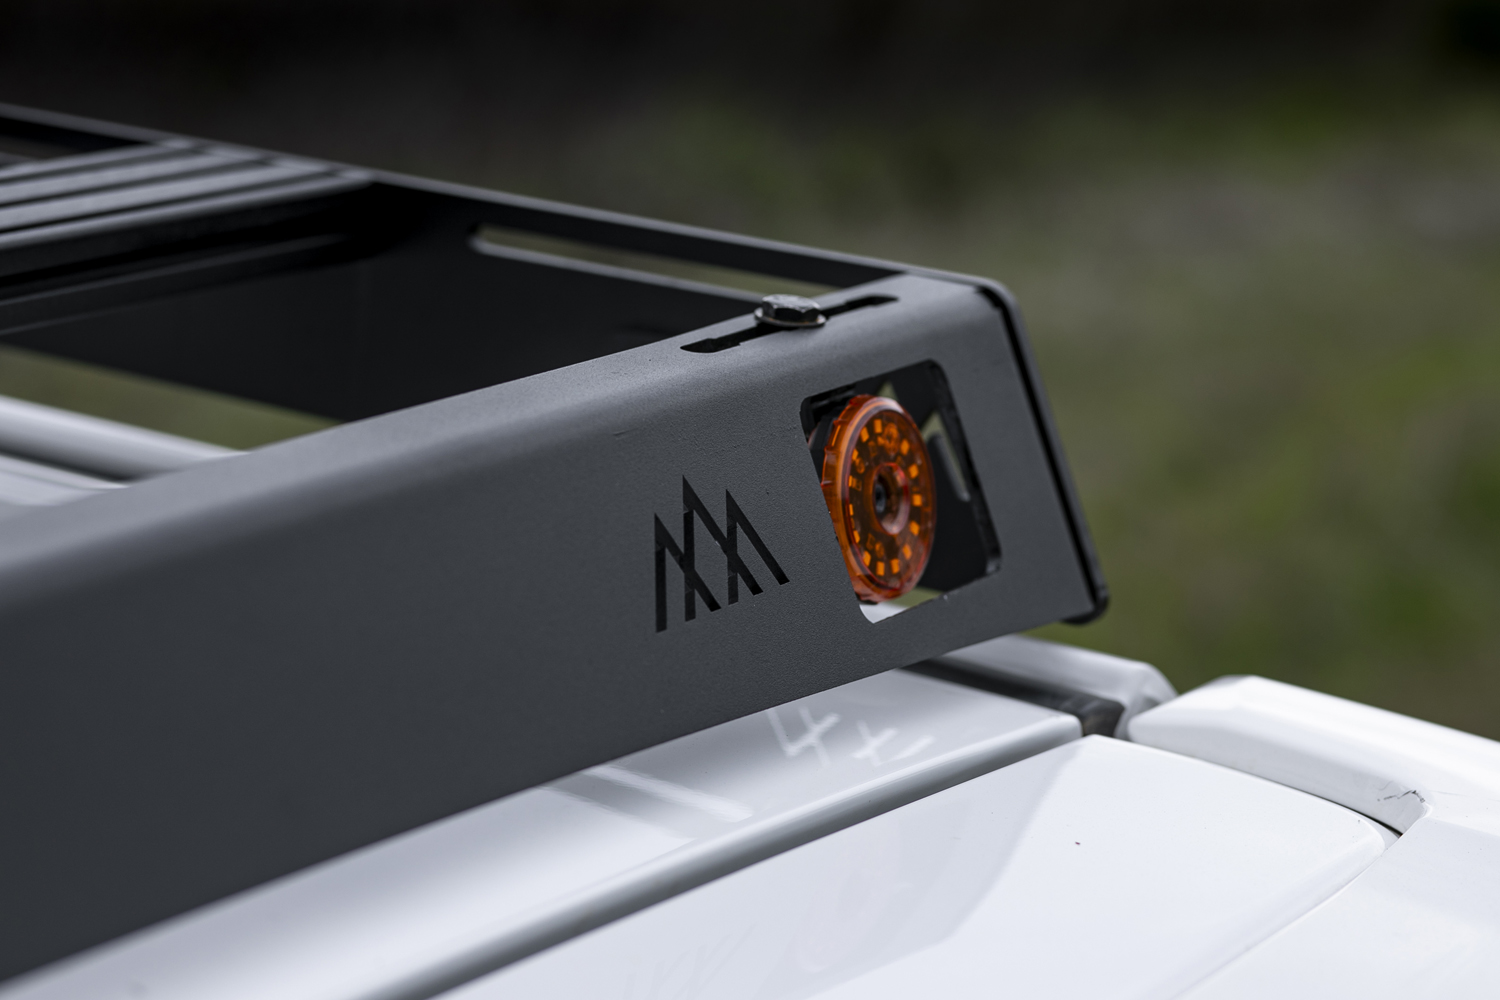
This might be one of the most unique features of DRIFTR.
No other rack on the market features a rear fairing with built-in chase light knockouts for a Baja S2 or in my case, the KC Cyclones. The rack ships with the knockouts in place. You can cut them out using a grinder or a Sawzall/Hackzall. I found the Milwaukee Hackzall gave a quicker, straighter cut. Once the knockouts were removed, we used a simple L bracket to mount up the cyclones. Finding chase light mounting points on other racks is usually a frustrating process – but not with DRIFTR.
Rooftop Tent Mounting
Mounting our rooftop tent was super easy with this rack.
Because DRIFTER uses pre-drilled side holes/slots to mount extrusions anywhere along the rack, it makes mounting a tent incredibly simple. We started by removing three crossbars, mounted them to our Go Fast Superlite, re-positioned the tent, and then tightened the crossbars down to new locations on the side rails. I’ve mounted over 7 tents to racks over the years and this was by far the easiest rack to install a tent on.
Grab Handle Cutouts
Having three Agency6 grab handles on both sides of the rack is incredibly useful. It might sound like overkill but it’s not.
I’ve been running grab handles on all my rack setups for years. We ran two A6 grab handles on each side of Jade, our 2016 TEP, and two A6 handles on our Tacom’s GFC camper. They’re very convenient when stepping on a slider or tire to access gear, RTT, etc. The fact that DRIFTR has the holes pre-drilled and the handle cut out makes this rack not only super user-friendly but very easy to mod.
Rattle-Free
Last but not least, DRIFTR has been 100% rattle-free. This might be one of the most annoying parts about racks in general. Most of them rattle, especially when you start loading them with heavy light bars and rooftop tents.
Some brands might be sound out of the gates but after the weight goes on and a few rock-crawling trips – bolts get loose and side rails begin to sway.
After 6 months of wheeling places like Slick Rock, Gold Lake to Snake Lake loop, Barney Riley, Strawberry Pass, and countless trips to the OHV park with all the weight mounted to the rack – I still have zero rattles. Knock on wood. : )
Final Thoughts
DRIFTR does it all. They designed this rack to be user-friendly, easy to modify, and the price is incredibly competitive with the bigger brand names on the market.
The only downside of this rack is the accessory offering from Backwoods in-house. Backwoods only offers the accessory deck panels at this time. You can always buy other brands’ accessory mounts so it’s not a deal breaker, just something to consider. If you’re looking for a suite of rack accessory brackets, head over to Prinsu or Sherpa. Both of those companies offer a ton of stuff to choose from.
At the end of the day if you want one of the strongest racks on the market with a ton of features – DRIFTR might be for you.

I’m considering this rack along with Sherpa. How do they stack against each other?
Most of the premium racks are comparable in one way or another. Some of it just comes down to price and personal preference. They both serve the same function and have strong designs. But the Backwoods is cheaper than both options. I think their more expensive version is more comparable side by side. And that’s a pretty decent price difference.
This rack has really grown on me. I saw that Backwoods released a new 3G Tundra rack and they offer these floor system panels now. I wonder if they’re compatible…
Yeah, I am sure they would work. You would just need to space out the crossbars to fit them.
do you know the dimensions?
mainly just the height?
The front height at the A-pillar measured 5.25” from the roof to the top of the rack. The center portion and the rear measure out to 3.75″ give or take an eighth.
thank you sir!