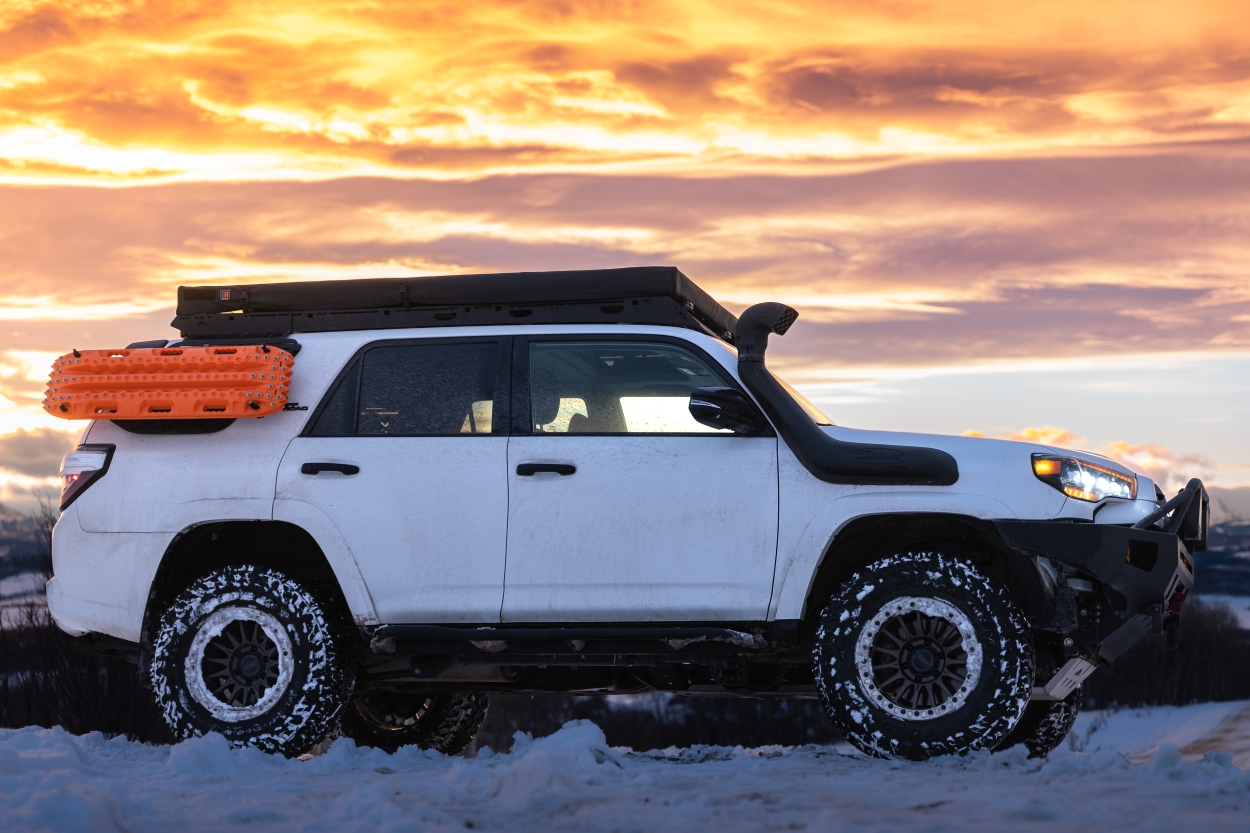
When it comes to camping and overlanding, gear organization is crucial. Sherpa Equipment Co.’s exterior side accessory panels provide an excellent solution for optimizing storage space.
These side panels allow you to use otherwise unutilized exterior space on your vehicle. They’re great for large items like recovery boards, RotopaX, chainsaws, water ports, etc. Essentially, anything that gets dirty and doesn’t need to be in your vehicle. Moreover, it ensures quick and easy access to crucial equipment.
I’ll be covering the installation of these side accessory panels on the Crestone rack along with the Maxtrax mounts.
Note: This side panel is not compatible with the new Sport series.
Table Of Contents
Overview
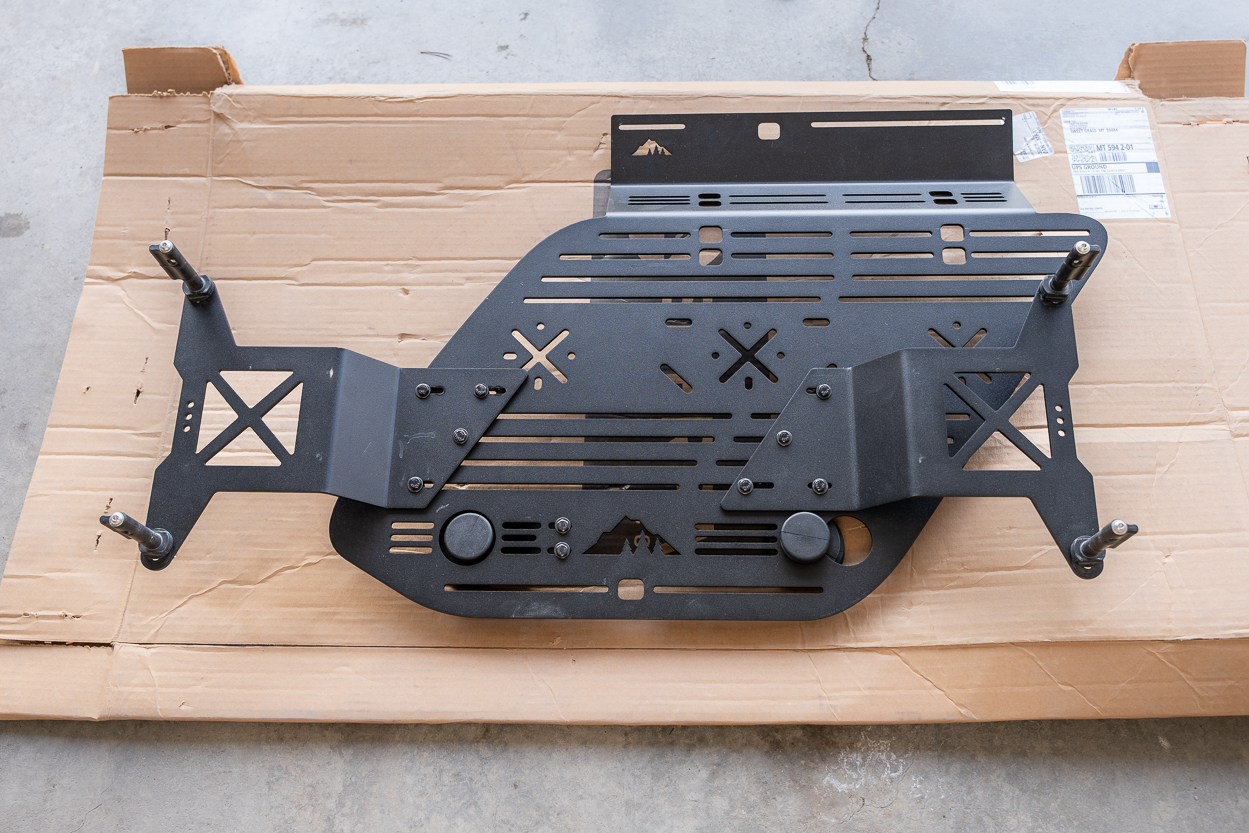
- Made out of 3/16″ aluminum
- Black powder coat or raw finish
- Compatible with Crestone & Needle
- Load rated for 30 lbs.
- Weighs 9 lbs.
These panels offer a great balance between strength and weight. They also don’t unnecessary bulk to your vehicle. If you have a compatible roof rack, these can be installed with just a few simple tools.
Available Accessories: Check Price
Installation
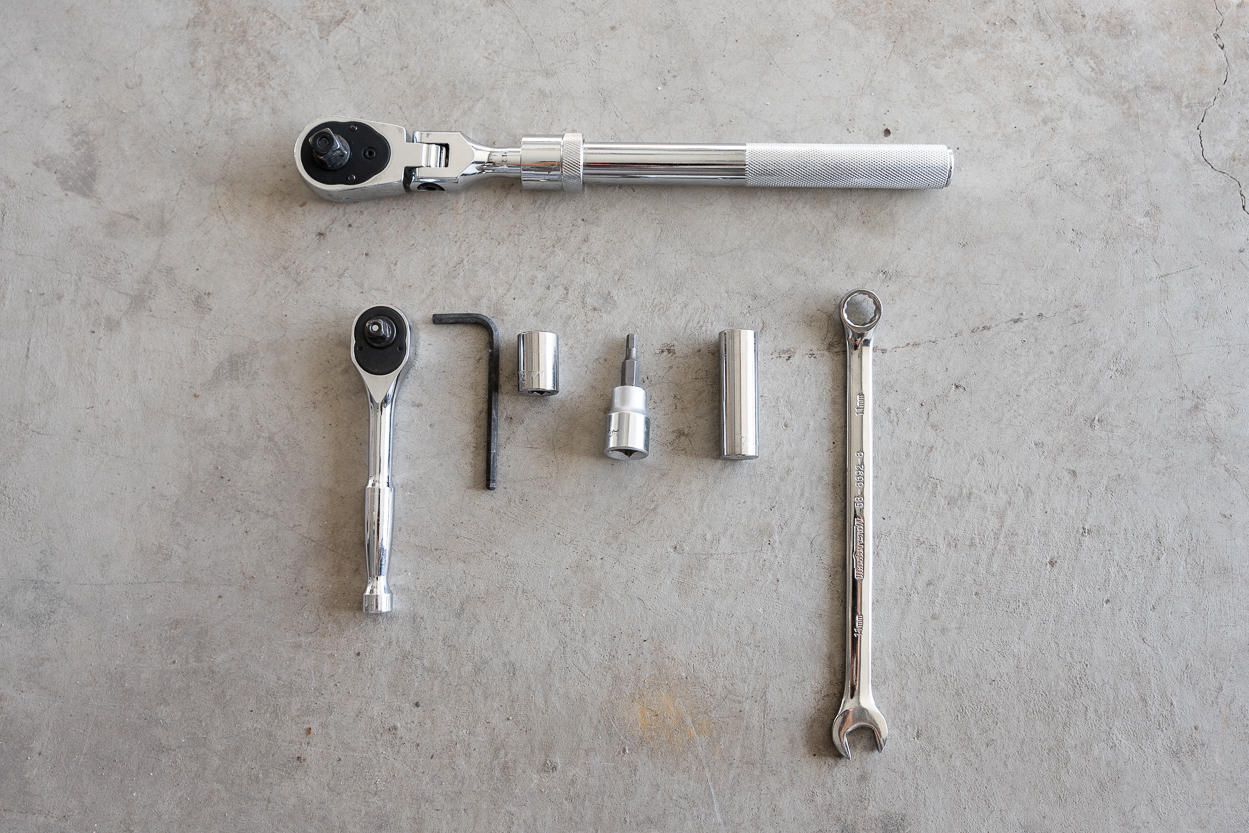
Required Tools
- 3/8″ Ratchet
- 1/4″ Ratchet
- 11 mm Socket & Wrench
- 5/32 or 4 mm Allen Key/Socket
- Rags
- Windex/Soapy Water Spray
Step 1. Prep Hardware
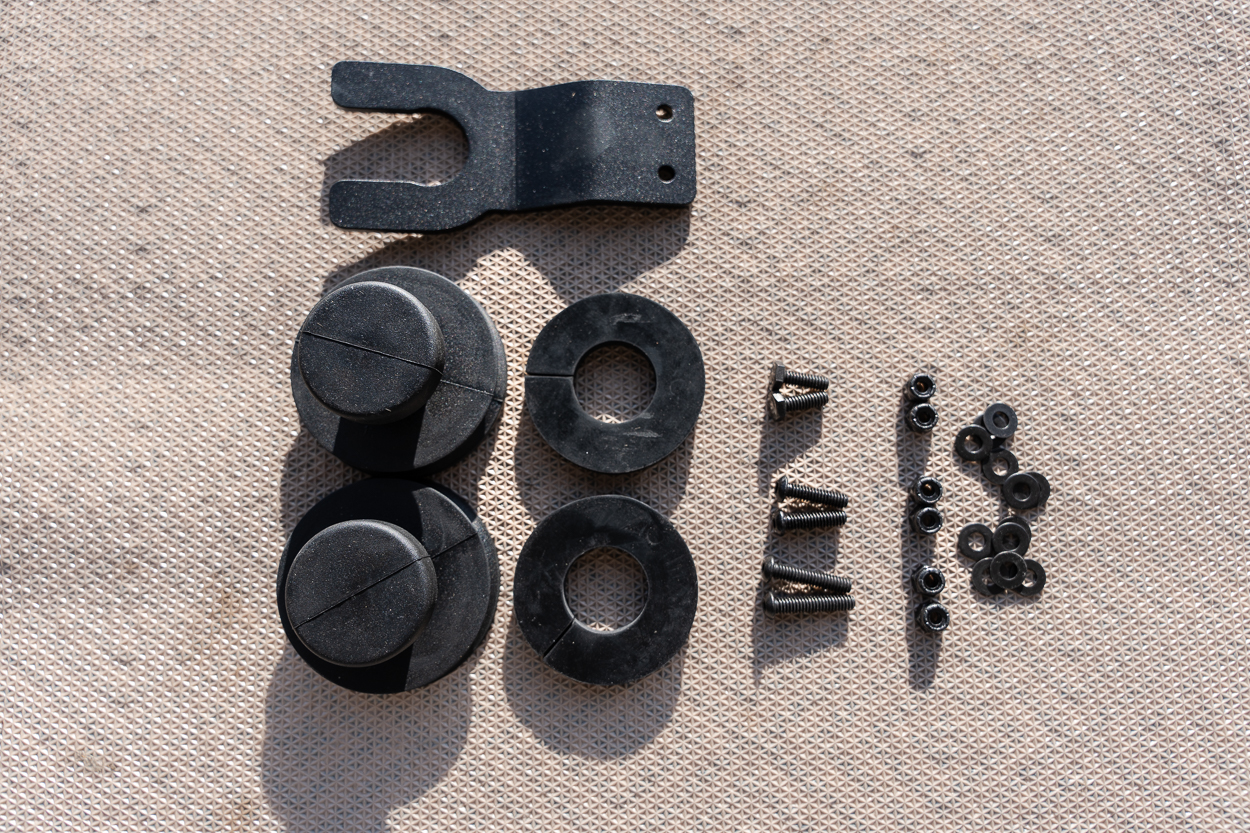
For each side panel, sort out the following hardware as listed below:
- Mounting bolts for Top (Extrusion bar) – (2) 1/4″-20 Socket Button
- Mounting bolts for Top – (2) 1/4”-20 Socket Button
- Mounting bolts for Suction Cup – (2) 1/4”-20 x 3/4” Hex Button
- Nyloc Nut – (6) 1/4″-20
- Washer – (12) 1/4″
- Drop Bracket – (1)
- Suction Cup – (2)
- Rubber Spacers – (2)
If you are installing any accessory mounts such as Maxtrax, Rotopax, etc. to the side panels, install them before bolting the whole assembly to the roof rack. Also, to prevent potential damage or scratches to the glass surface, the bolts should be run through the backside of the panel with the nut and any excess thread facing away from the glass.
Step 2. Assemble Suction Cup
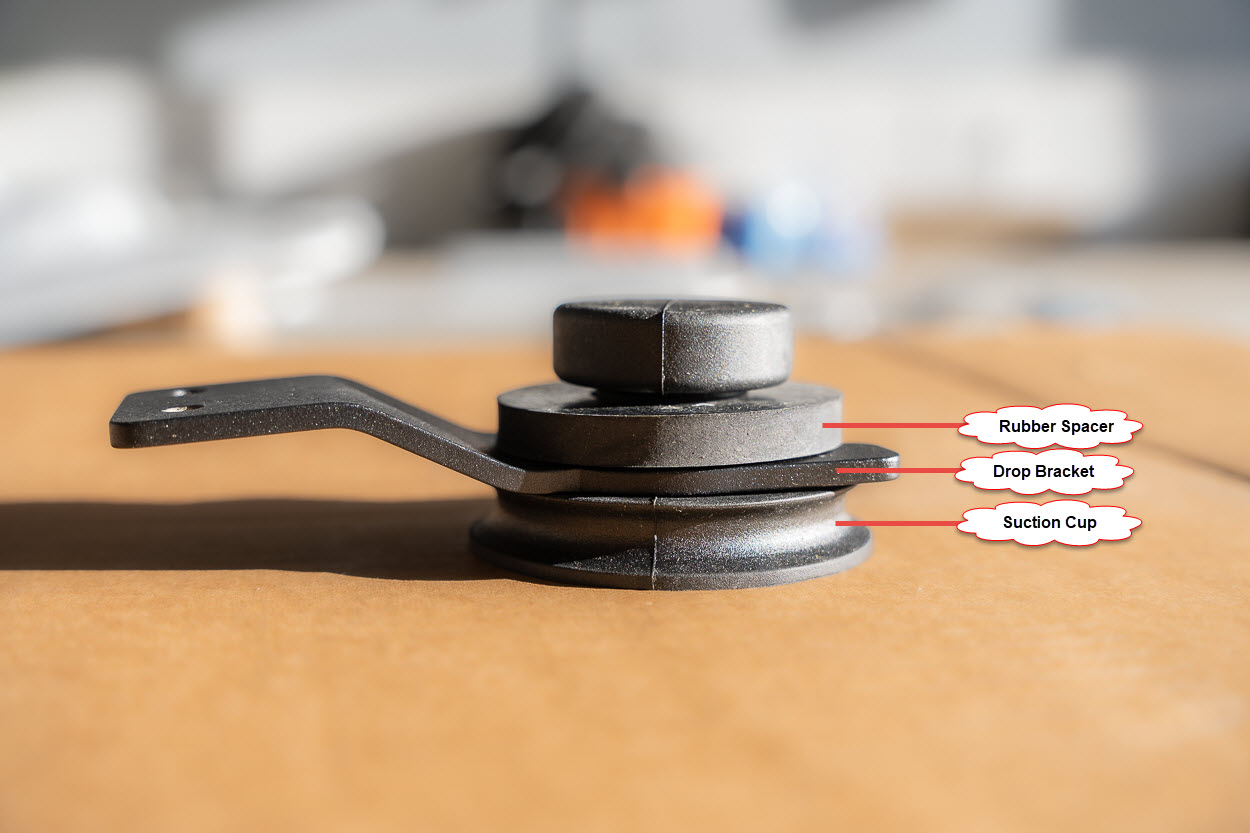
Next, split the ends of the rubber spacer and then wrap it around the neck of the suction cup.
When assembling the components, insert the neck of the suction cup into the slot of the drop bracket as shown above. The drop bracket must be positioned between the suction cup and the rubber spacer. This order is essential for achieving the ideal spacing of the window panel from the glass surface.
Step 3. Mount First Cup To Panel

Utilize the two short slots located to the left of the Sherpa mountain cutout logo to secure the drop bracket and suction cup assembly onto the backside of the panel. The handle of the suction cup should be centrally positioned within the hole in the panel.
Use (2) 1/4”-20 x 3/4” Hex Buttons, (2) 1/4”-20 Nyloc nuts, and (4) 1/4” Flat Washers for this step.
Step 4. Mount Second Cup
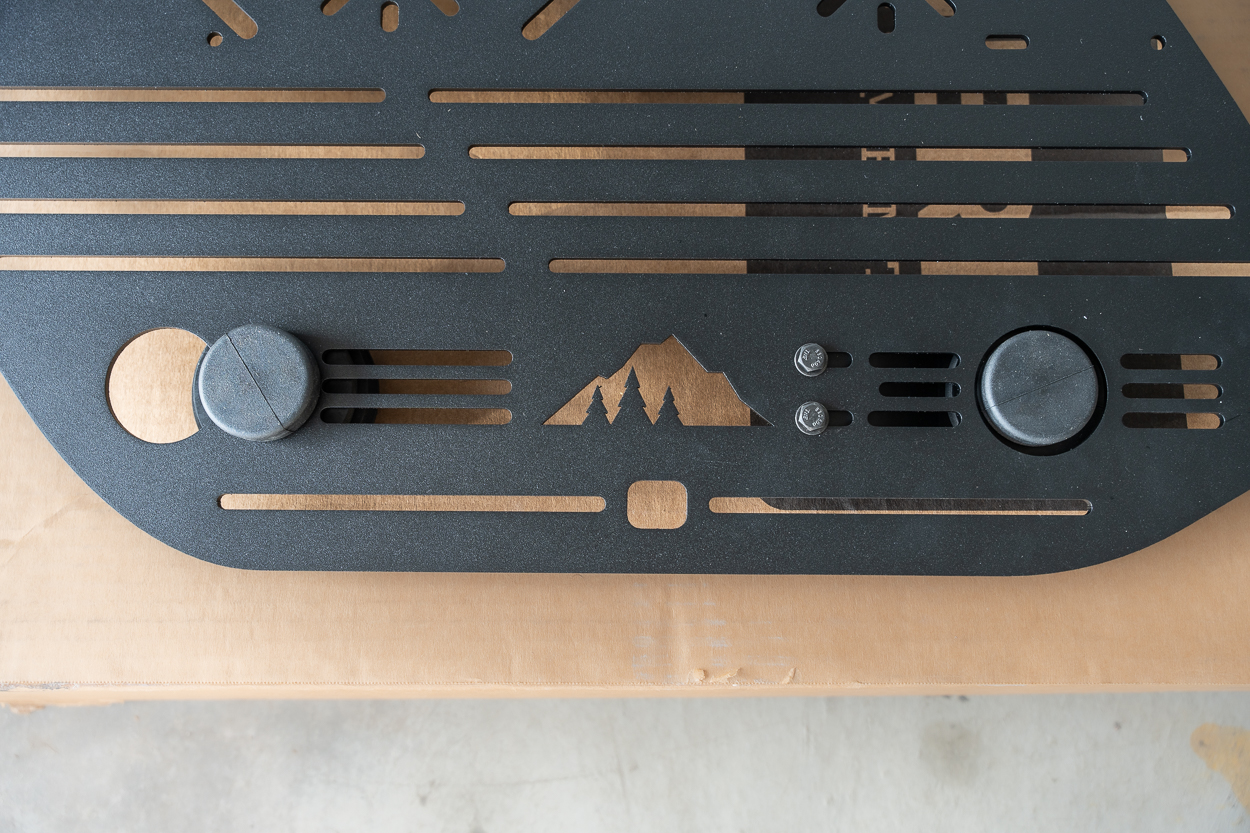
Wrap the second rubber spacer around the neck of the remaining suction cup. Both the rubber spacer and the suction cup should be positioned on the back side.
Insert the suction cup, handle-first, through the back.
Slide the suction cup to the left into the smaller slot. When correctly installed, only the handle of the suction cup should protrude and sit on the front face of the window panel.
You will only need (1) Suction Cup and (1) Rubber Spacer for this step.
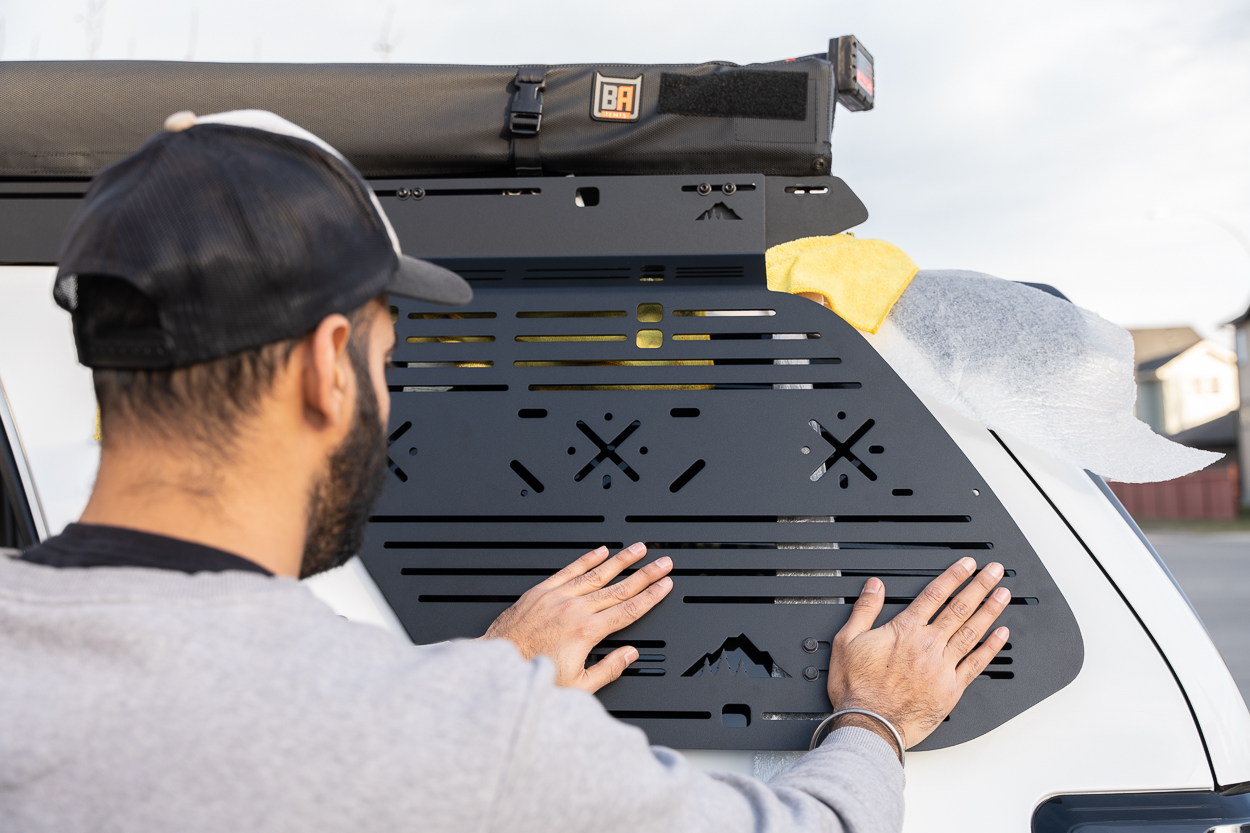
Step 5. Clean Window

Before mounting the side panel assembly onto the roof rack, you should clean any dirt or grime from the side glass windows. This will ensure better adhesion of the suction cups.
Step 6. Remove Rack Hardware
Remove the rear mount hardware on the side where everything will be installed.
To protect the vehicle’s paint, I recommended placing a towel between the rear edge of the side plate and the vehicle as the rack might droop once this hardware is removed.
If there are any crossbars fastened to the side plate along the slot that the window panel will cover, remove the hardware that secures these crossbars as well.
It will help to have another set of hands hold the side plate up while performing these steps.
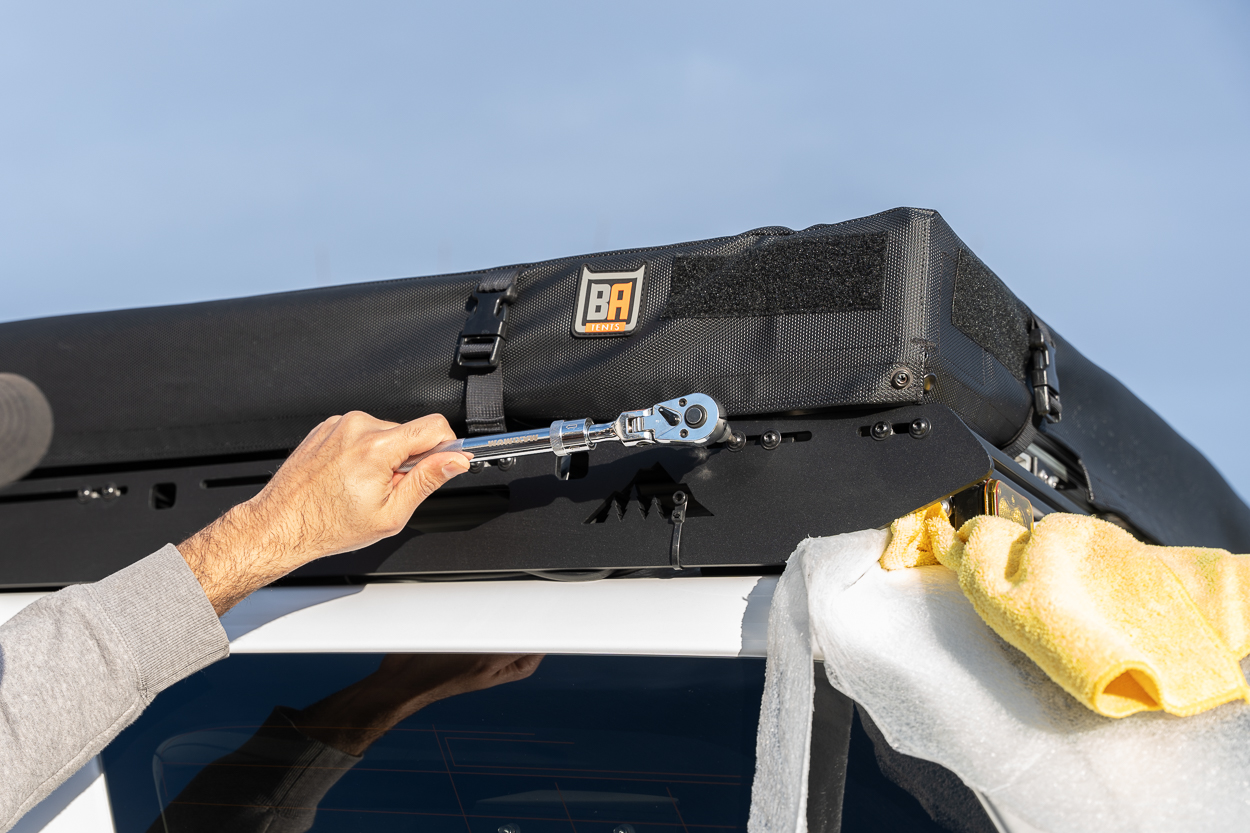
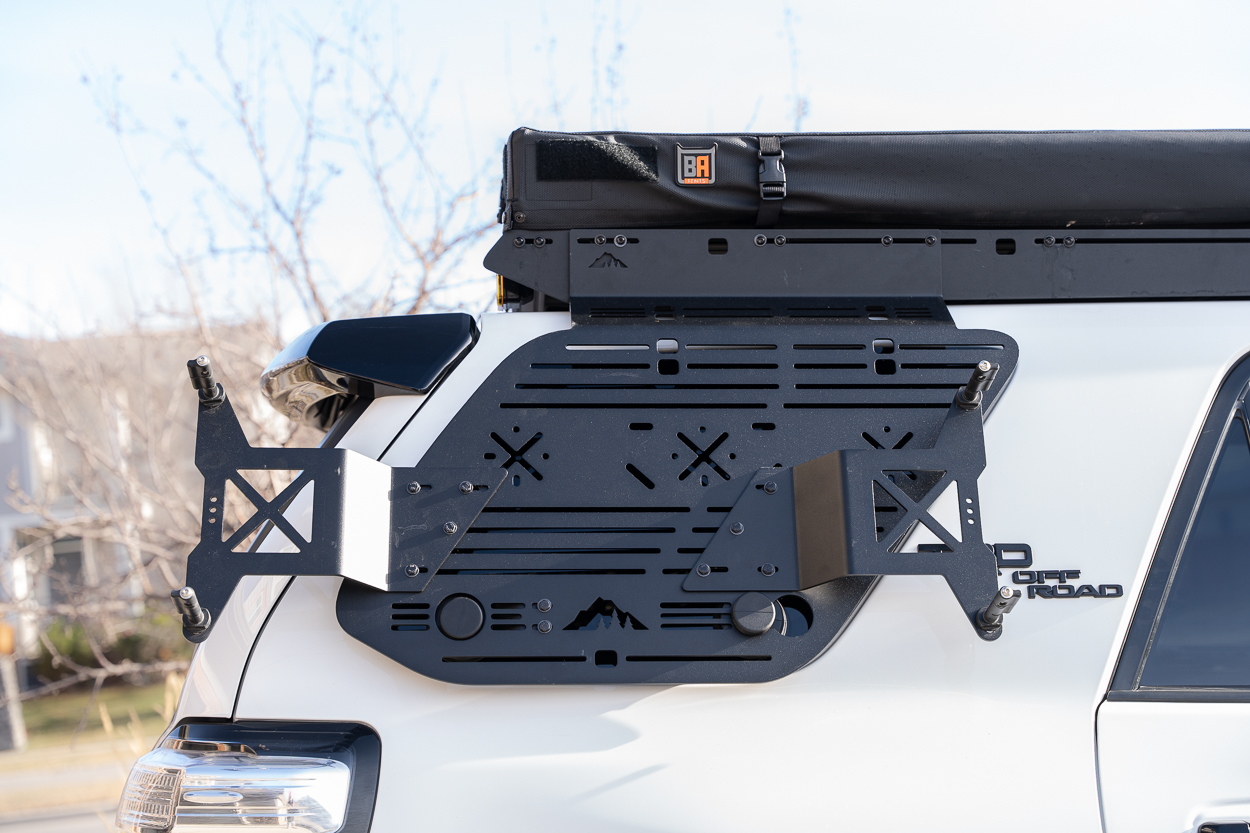
Step 7. Attach Panel To Rack
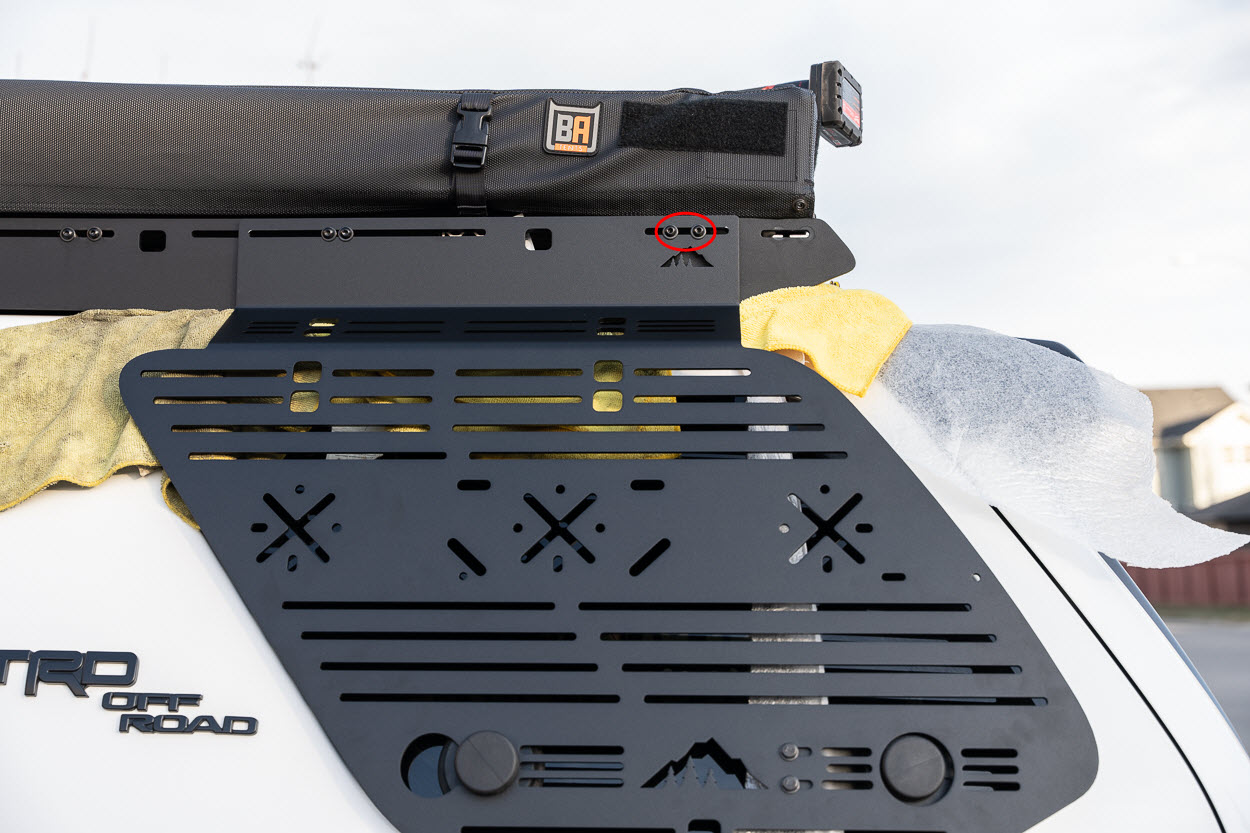
Begin by fastening the bolts located towards the rear of the 4Runner (highlighted in red). After securing these bolts, proceed to fasten the bolts in the subsequent slot(s). It helps to align the edges of the panel and roof rack for proper positioning.
Once the panel is properly positioned, press the suction cups onto the window to provide additional support.
Replace the 1/4”-20 x 1” socket button that was removed from rack’s rear mount with the provided 1/4”-20 x 1.25” socket buttons that come with the panel. Reuse the four washers and two Nyloc nuts that were originally removed.
These longer socket buttons account for the increased thickness of the window panel against the side plate.
Step 8. Fasten All Hardware
Be sure to reinstall any crossbar hardware that was removed during Step 6 through the window panel slot.
For these, use (2) of the provided socket buttons (1/4”-20 x 1”) and Nyloc nuts. Space these components out evenly along the slot for optimal load distribution.
If the suction cups have detached during the installation process, apply pressure on the handles to ensure proper adhesion. They should firmly stick to the surface.
Repeat the same steps for the other side and you’re in business.
Accessory Mounts
Mounting accessories to the side panels is simple. Each accessory mount is shipped with the necessary hardware, and the side panels provide plenty of versatility in terms of spacing and positioning.
Previously, I had my ActionTrax recovery boards mounted on top of my rack. However, once I got my BA RTT, they ended up collecting dust in my garage. Now, they’ve found a new home on the specially designed Maxtrax brackets which they happen to be compatible with.
The setup has ample clearance from the tailgate door, so no need to worry about interference here. You can also mount gear such as an axe, shovel, and similar tools to the side panels using Quick Fist mounts.
Final Thoughts
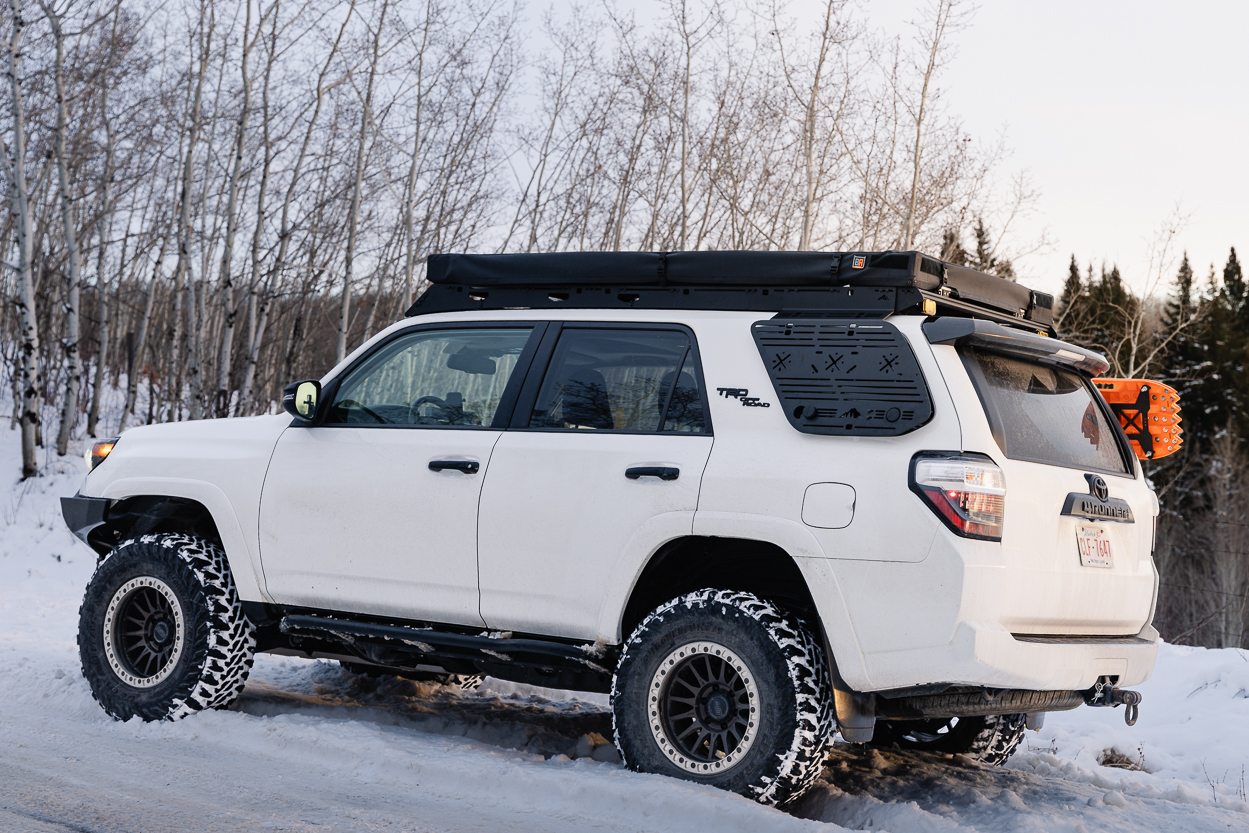
These panels are an excellent solution for reclaiming space after sacrificing the roof rack for an RTT. They are compatible with a range of accessory mounts to suit everyone’s needs and are extremely versatile. Installation is also a breeze and can be done using simple hand tools.
Overall, I would definitely recommend these to anyone seeking to expand their storage space and keep recovery gear readily accessible.