CarTrimHome Rear MOLLE Panels and Shelf: Installation Guide, Review and Oveview For 5th Gen 4Runner
Rear window MOLLE panels have cemented their place as a top upgrade in the 4Runner community. The addition of shelves to these only increases the storage potential for long trips with a lot of gear.
A downside to many of these systems is that they can get a little pricey depending on what fabricator you choose. CarTrimHome has recently introduced a lightweight and affordable MOLLE panel with a shelf kit for the 5th gen 4Runner.
Find it online:
- CarTrimHome MOLLE Panels and Shelf: Check Price
USA Made Options:
- Cali Raised LED Molle: Check Price
- Cali Raised LED Molle Panels and Shelf: Check Price
First Impressions
Right out of the box, the first thing that I noticed was how light these panels really are. CTH opted for aluminum alloy instead of the traditional steel like most manufacturers. This was a great way to cut down on weight for a modification that might not need steel.
There were a few tiny blemishes on the powder coating, but overall they arrived in great shape. Given the cost of this unit, it wasn’t something that I found concerning.
MOLLE Panel Installation
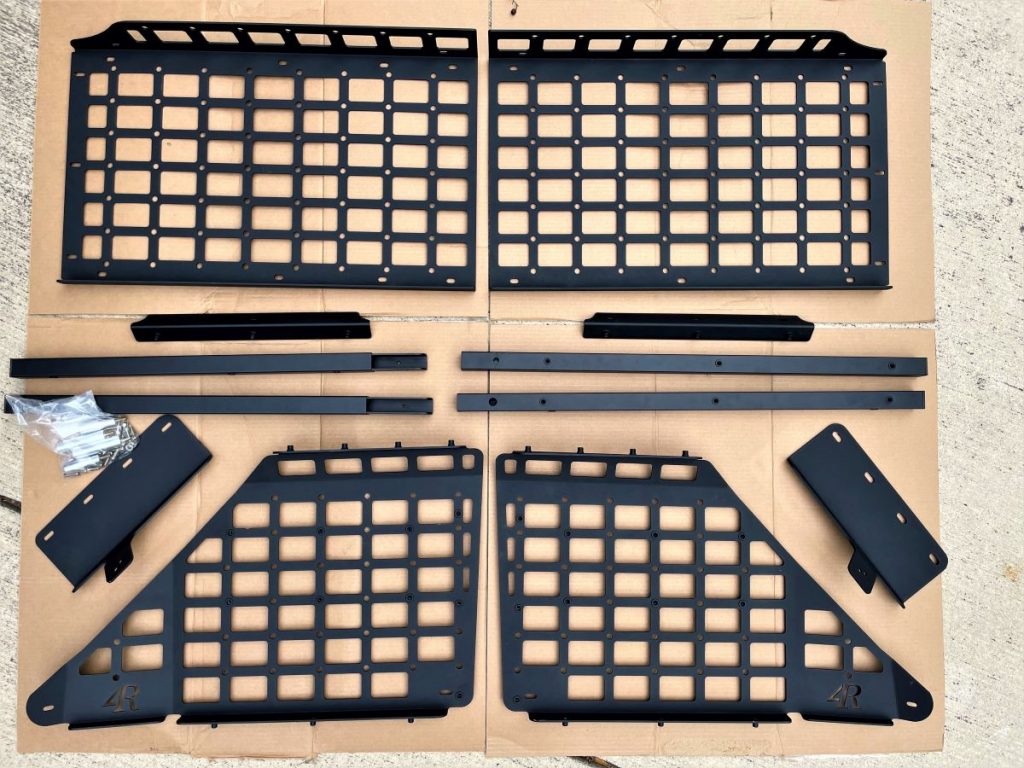
Everything that you need for the install is included with the hardware. The only tool that I used of my own was a Phillips head screwdriver.
I will say that the amount of screws included was a little intimidating. There are three (3) different sizes of Allen head (you will have spares) and two (2) hex head bolts for the coat hook brackets.
The only difference that I found in the screw sizes was when installing the shelf. The smallest screws were ideal for holding the shelf to the bracket since they are not visible after tightening.
Step 1. Remove The Existing Hardware
The side panels utilize existing bolt locations which makes installation a breeze. To start, you will need to remove the coat hook, net hook, and bolt cover in the small indention right behind the seat.
To remove the coat hook, grasp the sides of the bottom half below the line, pinch, and pull downward. This will expose a 10mm bolt that holds it in place.
Remove the bolt and set aside. You will replace the bolt with a longer one that is provided.
To remove the net hook, turn the hook clockwise to loosen and pull out.
Remove the screw and set aside with the hook.
To remove the remaining screw, you will need to use a plastic pry tool or small screwdriver to take the cover off.
Remove the screw and set it aside with cover.
Step 2. Installing The Panels
The brackets are not marked for their intended sides. Each respective side will have the hanging bracket towards the rear. For reference, see the picture of parts above for correct orientation.
To install the upper bracket of the panel, you will need the two hex head bolts in the hardware bag. Insert the bolt through the front of the coat hook, then into the bracket, and tighten.
Note: There will be small gap between the coat hook and the bracket. This is normal, so do not overtighten trying to make it sit flush.
Step 3. Mount Spacers
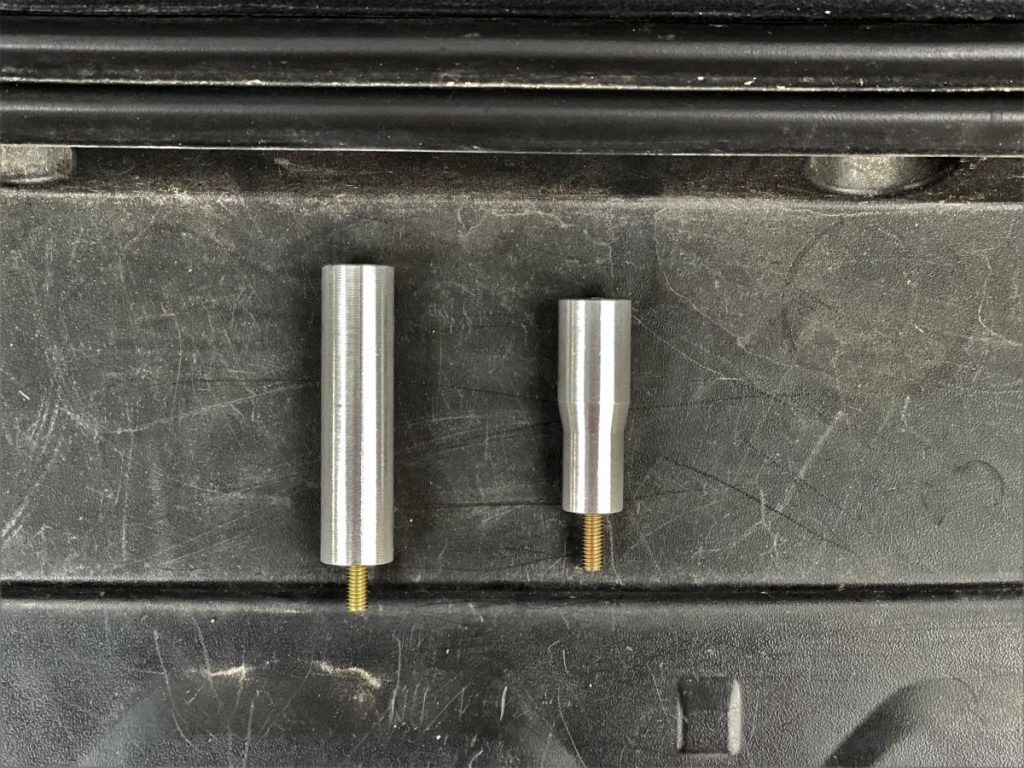
Next, thread in the aluminum spacers in the bottom hole locations.
The longer spacers (left) will thread into the space toward the back seats. The smaller spacer (right) will thread in the location of the net hook.
Step 8. Install MOLLE Panels
Lastly, installing the panels is done by just hanging the top on the inside of the mounting bracket and adding four (4) screws to secure it. I used the medium screws here.
Then, add the final two (2) longer screws to secure the panel to the spacers.
Repeat the process on the other side.
The installation of the shelf was a bit more tedious than the MOLLE panels, but it was still a simple process.
Step 9. Install Shelf Brackets to Desired Height

The first step is to install the shelf brackets to the desired height. There are three (3) heights indicated by the rivet nuts on the MOLLE panels themselves. I used the medium screws here.
Step 10. Assemble Horizontal Support Bars
Now the horizontal support bars will need to be put together.
One set will have two (2) holes (top) and the other will only have one (bottom). Insert the smaller side making sure that the holes align. You do not need to add any screws yet.
Step 11. Set Support Bars
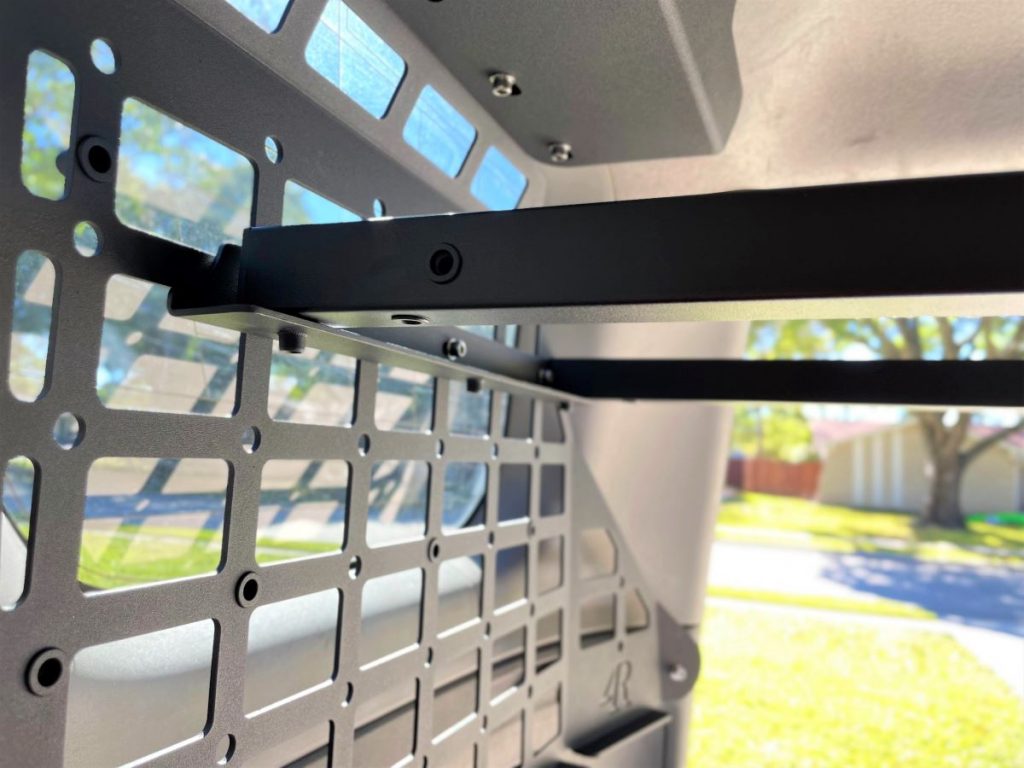
Insert and lay the bars across the installed brackets.
The bar with two (2) holes will be installed closest to the back seats with one (1) set of holes facing the windshield and the other facing downward. The rear bar will have holes facing downward.
The bars are screwed directly to the shelf so they should just be sitting on the brackets freely.
Step 12. Set Shelf
Next, take one half of the shelf and with the higher end facing the windshield, slide it between the support bracket and the bars.
Add a couple of screws to loosely hold the shelf on the bracket and to the support bars. I used the shorter screws to hold the shelf directly to the bracket. Any of the longer ones are visible from underneath.
The second half of the shelf will be a tight fit. Gently wiggle it in place and start placing screws underneath and on the front side of the shelf to hold everything in place.
Use and Review
These MOLLE panels and the shelf both perform exactly as they should. The install process was incredibly easy and it is amazing just how much you can fit on them.
There is an abundance of mounting locations for any gear that you have. I keep a few bungee straps to really secure items to the shelf and prevent them from bouncing around.
The three mounting locations for the shelf provide flexibility for your use. I have three medium-sized dogs that ride with me often and the top location was perfect. The dogs were able to sit and stand without taking any notice of the shelf above their heads.
The shelf can be added and removed without taking it completely apart as long as there is nothing installed underneath on one side of the panels. It takes some finesse, but it is doable if you do not want it installed all the time.
When the shelf is added, the visibility from the rear view mirror is affected significantly. While off-road this is not an issue, but it takes some getting used to on the highways.
I like that this still leaves the coat hook which is just another tie point. In the future, I may replace them with eye bolts, but this kit gives me options, which I like.
The additional mounting locations for the shelf bracket can be utilized using the spare screws and the rivet nuts. I added a few Quickfists this way and they have worked out great.
Final Thoughts
This is perhaps one of the easiest and useful modifications that you can make to your 4Runner. So far, this kit is holding steady and I have not had any issues with strength or blemishes.
Given the price point and everything included, I would recommend this kit to anyone looking for MOLLE panels and a shelf.


Did this add any additional noise in the cab with this set-up?
It looks as if you installed the shelf on the second from top rivet holes, can it be installed higher to help with visibility? Thanks.
How much does this system weigh?
Hey KDS,
Unfortunately I did not think to weigh it prior to the install, but it was super light. If I had to guess I would say the whole system is around the 15lb mark.
what heights can the shelf be attached at? for non-3rd row versions.
Too bad they don’t ship to Canada. Baffling how many US vendors won’t ship to Canada but willing to ship overseas.
Not a US vendor. China.
Nice install post!
Good write up. We have the Rago Molle panels and have thought about the shelf that goes with those. seems like it could have several good practical uses.
My Rago Mollie Panel with the shelf are rock solid and I am so happy with them. They are adjustable to multiple heights, they are saleable with or without the shelf option & they known well throughout the industry.